
When raising baby chicks, the ideal heat lamp distance for chicks is typically 18-24 inches above them. This distance allows for a safe and effective heat gradient, ensuring the chicks can move away from the heat if they get too warm. Getting the heat lamp height just right is crucial for their well-being.
Raising chicks is a rewarding experience, but it comes with responsibilities, especially when it comes to providing the right environment. One of the most critical aspects is controlling their temperature. Baby chicks, fresh from the incubator or hatchery, have not yet developed their own body heat regulation. They rely entirely on an external heat source to stay warm. This is where the trusty heat lamp comes in. But how close should this vital piece of equipment be to your precious flock? It’s a question that can cause anxiety for new poultry keepers. Too close, and you risk overheating and dehydrating your chicks; too far, and they’ll suffer from the cold, becoming sluggish and susceptible to illness.
This guide aims to demystify the process of setting up a heat lamp for chicks, offering clear advice on brooder heat lamp height, chick brooder temperature, and how to ensure your little ones are in their perfect chick comfort zone temperature. We’ll also cover essential chick brooding guidelines, including safe heat lamp placement for chicks, and how to go about checking chick temperature under lamp to guarantee their health and vitality.
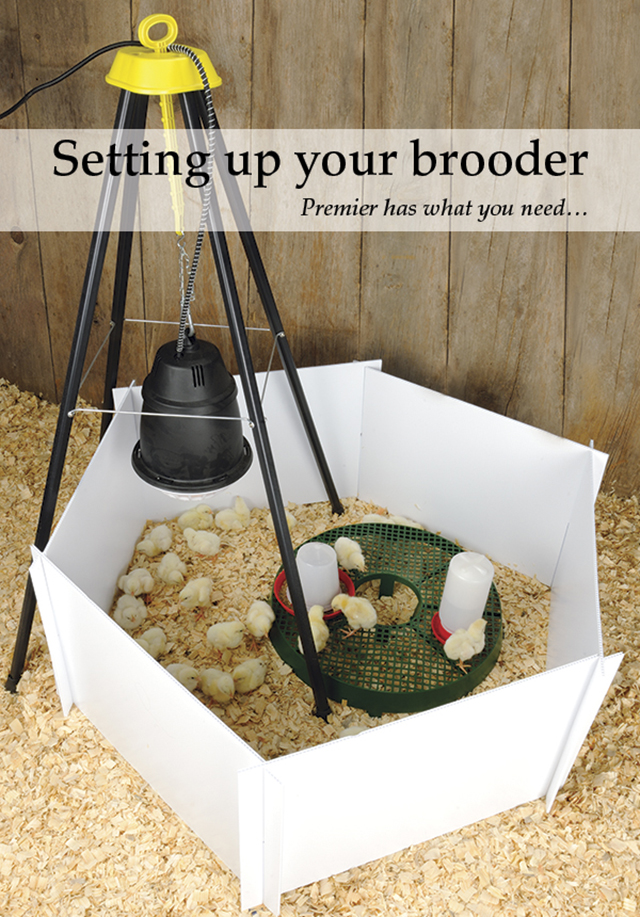
Image Source: www.premier1supplies.com
The Importance of Correct Heat for Newborn Chicks
Newborn chick heat requirements are significant. Unlike adult chickens with their insulating feathers, chicks are born with downy fluff that offers very little protection against the cold. Their bodies are still developing the ability to generate and maintain their own body heat. This makes them incredibly vulnerable to temperature fluctuations.
A properly heated brooder environment is paramount for several reasons:
- Digestion and Nutrient Absorption: Chicks need warmth to properly digest their food and absorb essential nutrients. If they are too cold, their digestive systems slow down, leading to poor growth and potential health issues.
- Immune System Development: A stressed chick, whether from cold or heat, will have a compromised immune system. Adequate warmth supports healthy immune function, making them less prone to diseases.
- Activity Levels: Warm chicks are active chicks. They will be seen pecking at food and water, exploring their surroundings, and generally exhibiting lively behavior. Cold chicks will huddle together, appear lethargic, and be less interested in eating or drinking.
- Preventing Heat Stress in Chicks: While keeping them warm is essential, overheating is equally dangerous. Preventing heat stress in chicks is as important as preventing chilling. Overheated chicks can become dehydrated, pant excessively, and suffer organ damage.
Establishing the Ideal Chick Brooder Temperature
The goal is to create a warm, safe, and controllable environment. The ideal chick brooder temperature is not a single, fixed number but rather a range that changes as the chicks grow.
Here’s a general guideline for chick brooder temperature:
| Chick Age | Ideal Temperature Under Heat Lamp | Target Ambient Temperature |
|---|---|---|
| Day 1-3 | 95-100°F (35-38°C) | 90-95°F (32-35°C) |
| Week 1 | 90-95°F (32-35°C) | 85-90°F (29-32°C) |
| Week 2 | 85-90°F (29-32°C) | 80-85°F (27-29°C) |
| Week 3 | 80-85°F (27-29°C) | 75-80°F (24-27°C) |
| Week 4 | 75-80°F (24-27°C) | 70-75°F (21-24°C) |
Note: These are general guidelines. Ambient room temperature also plays a role.
It’s crucial to remember that these temperatures are measured directly under the heat source. Chicks need to be able to move away from the heat if they feel too warm. This is why a properly sized brooder with a heat source in one area is essential.
How to Set Up a Heat Lamp for Chicks: The Basics
Setting up a heat lamp correctly involves a few key components and considerations.
Brooder Setup
Your brooder can be anything from a large plastic tub or cardboard box to a dedicated chick pen. The key is that it should be:
- Draft-free: Chicks are susceptible to drafts, which can quickly lower their body temperature. Ensure the brooder is enclosed on all sides.
- Spacious enough: Chicks need room to move. A crowded brooder can lead to stress and overheating, as they won’t be able to escape the heat.
- Easy to clean: You’ll be cleaning the brooder regularly as the chicks grow and make messes.
- Secure: Prevent predators from accessing the chicks.
Heat Source Options
The most common heat source for chicks is a heat lamp. There are a few types:
- Infrared Heat Lamps: These are the classic red or clear heat bulbs. They emit infrared radiation, which warms objects directly, including the chicks. They are effective but can be a fire hazard if not installed correctly.
- Brooder Plates (Sweater Plates): These are flat panels that sit just above the chicks, emitting gentle, consistent heat from below. They are considered safer as they don’t get as intensely hot as bulbs and pose less of a fire risk.
- Ceramic Heat Emitters: These bulbs screw into a standard socket but emit heat without light. They can be useful for maintaining consistent temperatures without disturbing the chicks’ natural day/night cycle.
For this discussion, we will focus primarily on the use of traditional heat lamps with bulbs, as they are very common, but the principles of safe heat lamp placement for chicks apply to other methods as well.
Lighting and Heat
A key aspect of how to set up a heat lamp for chicks is understanding that the light itself can also generate heat. This is particularly true for the red or clear incandescent bulbs often used. Be mindful of this when determining your brooder heat lamp height.
Determining the Correct Brooder Heat Lamp Height
The brooder heat lamp height is the most critical factor in regulating the temperature your chicks experience. It’s a dynamic measurement, meaning you’ll need to adjust it based on the chicks’ behavior and temperature readings.
The Starting Point: 18-24 Inches
As mentioned, the general rule of thumb is to hang your heat lamp 18-24 inches above the chicks. This provides a good starting point for achieving the desired temperature gradient.
Why This Distance Works
- Heat Gradient: This height creates a temperature gradient within the brooder. The area directly under the lamp will be warmest, and as the chicks move further away, the temperature will decrease. This allows them to self-regulate their body temperature by choosing a spot that is comfortable for them.
- Preventing Burns: It keeps the hot bulb far enough away to prevent accidental burns on the chicks or bedding material.
- Even Heat Distribution: While it creates a gradient, this distance also allows for a more even distribution of warmth across a significant portion of the brooder, preventing localized hot spots.
Adjusting the Height Based on Chick Behavior
The best way to gauge if your heat lamp distance for chicks is correct is by observing their behavior. This is your primary indicator for checking chick temperature under lamp.
Here’s what to look for:
- Chicks are clustered directly under the lamp, chirping incessantly and seeming agitated: They are too cold. Lower the heat lamp by a few inches (2-3 inches at a time).
- Chicks are huddled together in a large group, far away from the heat lamp, and appear weak or listless: They are likely too cold. Lower the lamp.
- Chicks are all spread out evenly in the brooder, actively pecking and drinking: This is a good sign they are comfortable.
- Chicks are actively trying to get as far away from the heat lamp as possible, panting, or appear lethargic and weak: They are too hot. Raise the heat lamp by a few inches (2-3 inches at a time).
- Chicks are gathered in the coolest part of the brooder, but still appear active and alert: This is normal. They are utilizing the temperature gradient.
Using a Thermometer for Precision
While chick behavior is an excellent guide, a thermometer can provide more objective measurements.
- Infrared (Laser) Thermometer: This is the easiest and safest way to check the temperature. Point it at the floor directly under the heat lamp. This will tell you the surface temperature the chicks are experiencing.
- Thermometer Placed in the Brooder: You can place a standard thermometer in the brooder. However, be sure to place it at chick level and not directly under the lamp. You might want to have one near the heat source and another towards the cooler edge of the brooder to monitor the gradient.
Target surface temperatures under the lamp:
- First week: 95-100°F (35-38°C)
- Second week: 90-95°F (32-35°C)
- Third week: 85-90°F (29-32°C)
These are the temperatures the chicks will feel when they are directly beneath the lamp.
Safe Heat Lamp Placement for Chicks: Fire Prevention and Security
Safe heat lamp placement for chicks is absolutely non-negotiable. Heat lamps, especially those with bulbs, get very hot and can be a significant fire hazard if they malfunction or are placed improperly.
Secure Mounting
- Never rest a heat lamp directly on the bedding or chicks. Always use a secure fixture designed for holding heat lamps.
- Mount the lamp to the side of the brooder or from the ceiling above. If mounting from the ceiling, ensure it is firmly attached and cannot fall. Many fixtures come with clamps or adjustable arms.
- Use a bulb guard or cage. Many heat lamps come with a wire guard that surrounds the bulb. This is an essential safety feature to prevent the bulb from coming into direct contact with bedding or chicks, and also to prevent chicks from pecking at the hot bulb.
Avoiding Flammable Materials
- Keep the heat lamp and cord away from any flammable materials. This includes dry bedding like straw or pine shavings, paper, or plastic.
- Ensure the bulb is not too close to the walls of a plastic brooder, as the plastic can melt or ignite.
Cord Management
- Secure the cord. Prevent the cord from dangling where chicks could peck at it or get tangled. Use zip ties or clips to keep the cord neat and out of the way.
- Check the cord regularly. Ensure there are no frays or damage to the cord or plug.
Red vs. Clear Bulbs
- Red bulbs are often preferred because they emit a red light that doesn’t disrupt the chicks’ sleep cycle as much as clear bulbs do. They also allow you to more easily see the chicks.
- Clear bulbs generate heat but also a brighter light, which can keep chicks more active and potentially disrupt their rest.
Bulb Wattage
- Use the correct wattage bulb. Typically, a 250-watt heat lamp bulb is sufficient for most brooders. Avoid using bulbs with higher wattages unless you have a very large brooder and can maintain adequate distance.
Adjusting Heat as Chicks Grow
As chicks age, their ability to regulate their own body temperature improves. This means you’ll need to gradually reduce the heat provided. This is a critical part of successful chick brooding guidelines.
Gradual Reduction
- Lower the temperature by approximately 5°F (3°C) each week. Refer back to the temperature table provided earlier.
- Continue to observe chick behavior closely during this process. If chicks seem cold, you may need to slow down the temperature reduction or temporarily increase the heat slightly.
- Remove the heat lamp entirely once the chicks are about 3-4 weeks old, or when the ambient room temperature is consistently above 70°F (21°C). They should be fully feathered by this point and able to withstand normal room temperatures.
Signs of Overheating or Chilling
It bears repeating the importance of recognizing these signs:
- Too Cold: Chicks are huddled together in a tight ball, chirping loudly and constantly. They may appear lethargic.
- Too Hot: Chicks are spread out as far as possible from the heat source, panting with their beaks open, wings held away from their bodies, and appear listless or weak.
Troubleshooting Common Heat Lamp Issues
Even with the best intentions, you might encounter some challenges.
Uneven Heating
If you notice that chicks are only congregating in one small area, it might indicate uneven heating or insufficient space.
- Solution: Ensure your brooder is large enough. Adjust the heat lamp height or position slightly to create a more dispersed warmth zone. If using a heat plate, ensure it’s the correct size for the number of chicks.
Lamp Failure
Heat lamps can burn out, and electrical issues can occur.
- Solution: Always have a backup bulb or a backup heating method available. It’s best to test your backup before you need it. If the lamp fails at night, you’ll need to be prepared to provide alternative warmth immediately.
Drafts
Even with a closed brooder, drafts can enter.
- Solution: Place the brooder in a location away from windows, doors, or vents that create drafts. You can also add extra insulation to the sides of the brooder if necessary, but ensure there is still adequate ventilation.
Factors Affecting Heat Lamp Distance
The ideal heat lamp distance for chicks isn’t solely about inches. Several other factors can influence how much heat your chicks are receiving.
Ambient Room Temperature
If the room where you have the brooder is already quite warm (e.g., a heated house in winter), you might need to hang the heat lamp slightly higher than usual. Conversely, if the room is cooler, you might need to lower it slightly.
Brooder Size and Shape
A larger brooder will naturally have more variation in temperature across its area. This is a good thing, as it allows for a more robust gradient. A very small brooder might make it harder for chicks to escape the heat.
Number of Chicks
More chicks in a brooder will generate some collective body heat. However, the heat lamp remains the primary source. Be careful not to overcrowd the brooder, as this can lead to overheating and disease transmission.
Type of Heat Lamp Bulb
Different wattage bulbs will emit different amounts of heat. Stick to the recommended wattage for your setup.
FAQs: Your Chick Heating Questions Answered
Q1: Can I use a regular light bulb instead of a heat lamp bulb?
A1: No, it’s not recommended. While regular incandescent bulbs do produce some heat, they are not designed for continuous operation at high temperatures and can be a fire hazard. Dedicated heat lamp bulbs are made to withstand the heat and provide the appropriate type of warmth.
Q2: How many chicks can one heat lamp safely heat?
A2: A standard 250-watt heat lamp bulb can typically heat a brooder containing up to 20-25 chicks, provided the brooder is adequately sized and the lamp is positioned correctly to create a good temperature gradient.
Q3: My chicks are all huddled under the lamp, what does that mean?
A3: This is a clear sign that they are too cold. Lower the heat lamp by 2-3 inches. Ensure the lamp is not too high and that there are no drafts.
Q4: My chicks are spreading out and some are staying on the far side of the brooder, is this okay?
A4: Yes, this is a good sign! It indicates they are comfortable and utilizing the temperature gradient. They can move closer to the heat if they feel cool and retreat to the cooler side if they feel too warm.
Q5: How do I know when to remove the heat lamp?
A5: You can typically remove the heat lamp when the chicks are 3-4 weeks old and are fully feathered. At this point, they should be able to maintain their own body temperature. The ambient room temperature should also be consistently above 70°F (21°C). Always observe the chicks; if they seem to be chilling, you may need to provide heat for a little longer.
Q6: What are the risks of overheating chicks?
A6: Overheating can lead to dehydration, heatstroke, stunted growth, and even death. Chicks that are too hot will pant, have their wings spread, and appear lethargic. It’s crucial to provide a gradient so they can escape the heat.
Q7: I’m using a chick brooder plate. How close should it be?
A7: Brooder plates are designed to be set at chick level. The height is typically adjustable. Refer to the manufacturer’s instructions for your specific brooder plate. The principle is the same: chicks should be able to walk under it comfortably but not have too much space above them. They should be able to easily move out from under it if they get too warm.
Q8: What is the safest way to hang a heat lamp?
A8: The safest way is to use a proper clamp-on fixture designed for heat lamps that securely attaches to the side of the brooder or a stand above the brooder. Always use a bulb guard to protect the bulb and prevent contact with chicks or bedding. Ensure the cord is managed safely and not a tripping or pecking hazard.
Conclusion
Providing the right amount of warmth is fundamental to raising healthy, thriving baby chicks. By carefully considering the heat lamp distance for chicks, monitoring the chick brooder temperature, and observing your flock’s behavior, you can ensure they remain in their ideal chick comfort zone temperature. Adhering to chick brooding guidelines, practicing safe heat lamp placement for chicks, and knowing how to accurately check chick temperature under lamp will set you on the path to successful chick rearing. Remember, consistency and observation are your greatest tools in ensuring your newborn chick heat requirements are met, and in preventing heat stress in chicks. Happy chick keeping!