
Can you make a pleated lampshade at home? Yes, absolutely! Creating a DIY pleated lampshade is a rewarding project that can transform your home decor. This guide will walk you through the process, from choosing your materials to the final reveal of your beautiful, custom lampshade making creation. We’ll explore various fabric pleating techniques suitable for beginners and even touch upon creating an upholstered lampshade with a pleated finish. Let’s dive into the wonderful world of craft pleated lampshade projects!
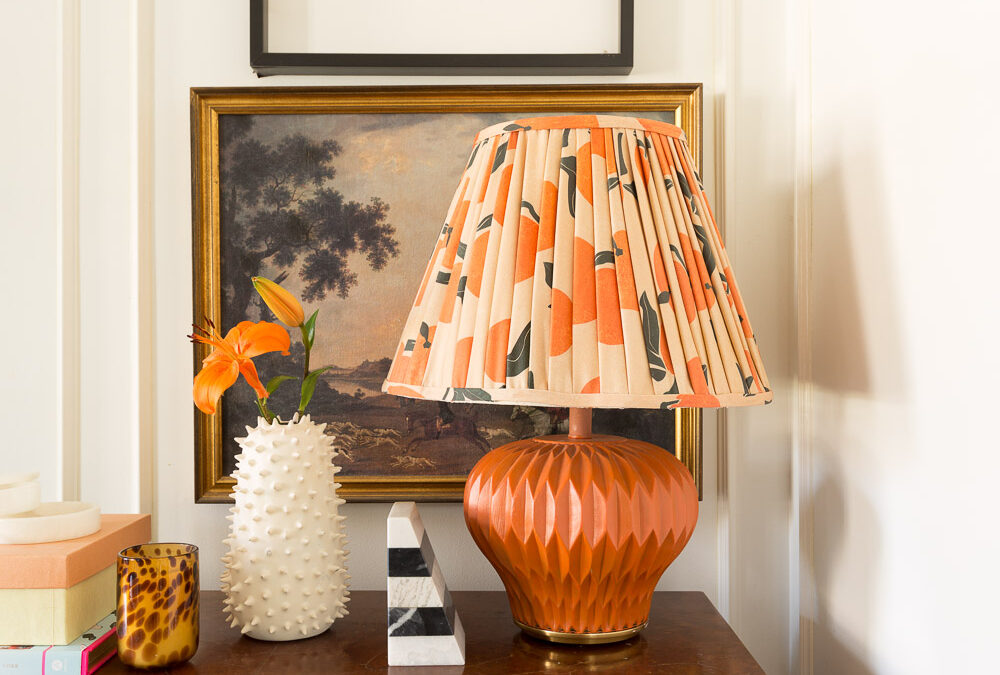
Image Source: jeweledinteriors.com
Why Make a Pleated Lampshade?
Pleated lampshades add a touch of elegance and texture that manufactured shades often lack. They offer a unique way to inject personality into your living space. Whether you’re looking for a classic, sophisticated look or a more modern, statement piece, pleating allows for incredible versatility.
- Unique Aesthetics: Pleats create depth and visual interest, catching light in beautiful ways.
- Personalization: You can choose any fabric, color, or pleating style to match your existing decor.
- Cost-Effective: Making your own can be significantly cheaper than buying a high-quality pleated shade.
- Rewarding Craft: The satisfaction of creating something beautiful with your own hands is immense.
- Customization: Tailor the size and shape to perfectly fit your lamp base.
What You’ll Need: Your Pleating Toolkit
Gathering the right supplies is the first step to success. Here’s a comprehensive list for your fabric lampshade pleating adventure:
Essential Materials:
- Lampshade Frame: You can buy new wire frames online or at craft stores, or repurpose an old lampshade. Choose a shape you like – drum, empire, or bell.
- Fabric: The star of the show! Cotton, linen, silk blends, or even textured synthetics work well. Consider the opacity and how light will filter through. You’ll need enough to cover the shade and for your pleats.
- Lining Fabric (Optional): For a more professional finish and to soften the light, a thin lining fabric can be used.
- Pleating Material (Optional, depending on technique): This could be bias tape, trim, or simply the fabric itself.
- Adhesive: Fabric glue, spray adhesive, or double-sided fabric tape are common choices. Fabric glue is often preferred for a strong, permanent hold.
- Thread: Matching your fabric color for any sewing involved.
Essential Tools:
- Measuring Tape: For accurate fabric measurements.
- Fabric Scissors: Sharp scissors specifically for cutting fabric.
- Craft Knife or Rotary Cutter and Mat: For precise fabric cuts.
- Ruler or Straight Edge: For marking and ensuring straight lines.
- Pencil or Fabric Marker: For marking fabric.
- Iron and Ironing Board: Crucial for pressing seams and pleats.
- Pinking Shears (Optional): To prevent fraying on certain fabrics.
- Clips or Pins: To hold fabric in place while gluing or sewing.
- Damp Cloth: For wiping away excess glue.
Preparing Your Lampshade Frame
Before you start pleating, your frame needs to be ready.
Cleaning and Inspecting:
- If you’re repurposing an old shade, remove the old fabric. This can usually be carefully cut away or pulled off.
- Inspect the wire frame for any damage or rust. Clean it with a damp cloth. If there’s rust, you might want to lightly sand it and apply a rust-inhibiting primer, then a coat of paint.
Covering the Frame (Optional but Recommended):
Some crafters prefer to cover the bare wire frame with a thin layer of fabric or batting first. This provides a smoother surface for your pleats to adhere to and can create a softer diffusion of light.
- Measure: Wrap a measuring tape around the circumference of the lampshade frame at its widest point. Measure the height of the shade.
- Cut: Cut a piece of thin fabric (like muslin or lightweight batting) that is the height of the shade and the circumference plus about an inch for overlap.
- Attach: Use spray adhesive or fabric glue to attach this base fabric to the frame, ensuring it’s smooth and taut. Trim any excess.
Mastering Fabric Pleating Techniques
This is where the magic happens! There are several ways to achieve a pleated look.
Technique 1: The Basic Box Pleat
The box pleat is a classic and relatively easy-to-execute pleat that creates a clean, structured look. It’s a great starting point for your DIY pleated lampshade.
Designing Your Pleating Pattern:
What are pleating patterns for lampshades? For a box pleat, you’ll need to calculate the fabric width. A box pleat involves three panels of fabric folded in the same direction.
- Formula: To calculate the fabric width needed for one box pleat, you’ll use:
(Desired Finished Width x 4) + Seam Allowance (if needed).- For example, if you want your finished pleat to be 1 inch wide, you’ll need 4 inches of fabric per pleat.
- Calculating Total Fabric: Measure the circumference of your lampshade at its widest point. Divide this circumference by the desired finished width of your pleats. Multiply that number by the fabric width required for one pleat.
- Example: Lampshade circumference = 24 inches. Desired finished pleat width = 1 inch.
- Number of pleats = 24 inches / 1 inch = 24 pleats.
- Fabric width per pleat = (1 inch x 4) + 0.5 inch (for overlap) = 4.5 inches.
- Total fabric width needed = 24 pleats x 4.5 inches = 108 inches.
- Example: Lampshade circumference = 24 inches. Desired finished pleat width = 1 inch.
- Fabric Height: The fabric height should be the height of your lampshade plus about 1 inch at the top and 1 inch at the bottom for finishing.
Step-by-Step Box Pleating:
- Cut Your Fabric: Cut long strips of fabric according to your calculations for width and height.
- Mark Your Pleats: On the wrong side of your fabric, mark your pleat lines. For a box pleat, you’ll have lines for the two folds and the center.
- If your pleat is 1 inch wide, you’ll mark lines every 1 inch. The center fold will be on the 2-inch mark.
- Create the Pleats:
- Fold the fabric along the marked lines to create the box pleat. The center of the pleat should be 1 inch, with 1 inch on either side that folds underneath.
- Press the pleats firmly with your iron.
- Attach to Frame:
- Start at the top edge of the shade frame. Apply fabric glue or double-sided tape along the top wire.
- Carefully align the top edge of your pleated fabric strip with the top wire and press firmly.
- Gently work your way down the side of the frame, ensuring the pleats remain neat and evenly spaced. Apply adhesive as you go.
- When you reach the seam where the fabric meets itself, overlap it slightly and secure with glue or tape. Trim any excess fabric neatly.
- Repeat this process for the bottom edge, securing the fabric to the bottom wire.
Technique 2: The Knife Pleat
Knife pleats are narrower and lie flat against each other, creating a sleek, streamlined look. This is a popular choice for a more modern decorative lampshade design.
Designing Your Pleating Pattern:
For knife pleats, you’ll need to decide how wide you want each pleat to be. A common width is 1/2 inch or 3/4 inch.
- Formula: To calculate the fabric width needed for one knife pleat, you’ll use:
(Desired Finished Width x 2) + Seam Allowance (if needed).- For example, if you want your finished pleat to be 1/2 inch wide, you’ll need 1 inch of fabric per pleat.
- Calculating Total Fabric: Similar to the box pleat, measure your shade’s circumference and divide by your desired finished pleat width. Then, multiply that by the fabric width required for one pleat.
- Example: Lampshade circumference = 24 inches. Desired finished pleat width = 1/2 inch.
- Number of pleats = 24 inches / 0.5 inch = 48 pleats.
- Fabric width per pleat = (0.5 inch x 2) + 0.25 inch (for overlap) = 1.25 inches.
- Total fabric width needed = 48 pleats x 1.25 inches = 60 inches.
- Example: Lampshade circumference = 24 inches. Desired finished pleat width = 1/2 inch.
- Fabric Height: Same as for box pleats – shade height plus allowances.
Step-by-Step Knife Pleating:
- Cut Your Fabric: Cut long strips of fabric according to your calculations.
- Mark Your Pleats: On the wrong side of the fabric, mark lines for every pleat. For a 1/2 inch finished pleat, you’ll mark lines every 1/2 inch.
- Create the Pleats:
- Fold the fabric along the marked lines, with each fold overlapping the previous section by the desired finished width.
- Press the pleats very firmly with your iron.
- Attach to Frame:
- Begin at the top wire, applying adhesive.
- Carefully attach the pleated fabric strip, working your way around the frame. Ensure the pleats are consistent and lie flat.
- Secure the top and bottom edges to the frame wires using adhesive. Trim excess fabric neatly.
Technique 3: Using Bias Tape for Pleating
This is a fantastic method for creating neat, evenly spaced pleats, especially if you’re new to sewing pleated lampshade projects. Bias tape adds a finished edge to each pleat.
Designing Your Pleating Pattern:
The calculation here is a bit different as the bias tape will dictate the pleat size. You’ll need to determine the width of the bias tape and how much fabric it will cover per pleat.
- Bias Tape Width: Choose a bias tape width that suits your design.
- Fabric Calculation: You’ll need enough fabric to be covered by the bias tape, plus a small allowance for the fold.
Step-by-Step Bias Tape Pleating:
- Cut Fabric Strips: Cut fabric strips to the height of your lampshade, plus allowances for the top and bottom. The width of these strips will depend on your desired pleat density. For a gathered look, cut wider strips. For more defined pleats, cut narrower strips.
- Prepare Fabric: Fold and press the fabric strips to create the pleats. You can fold them as knife pleats or box pleats.
- Apply Bias Tape:
- Starting at the top of the shade frame, place the edge of the bias tape along the top wire.
- Carefully place a pleated section of fabric underneath the bias tape, ensuring the pleats are neat.
- Using fabric glue or double-sided tape, adhere the bias tape over the pleated fabric and to the frame. Work in small sections.
- Continue around the shade, ensuring the bias tape covers the raw edges of the pleats and is attached securely to the frame.
- Finish by attaching the bottom edge of the bias tape to the bottom frame wire.
Attaching the Fabric to the Frame: The Final Hold
Once your pleats are formed and pressed, it’s time to secure them to the lampshade frame.
Gluing Method:
This is the most common and accessible method for a craft pleated lampshade.
- Apply Adhesive: Apply a thin, even bead of fabric glue along the top wire of the lampshade frame.
- Align and Press: Carefully align the top edge of your pleated fabric with the glued wire. Press firmly, working in sections. Use clips to hold the fabric in place while the glue dries if needed.
- Work Down: Gently pull the fabric taut as you move around the frame, ensuring the pleats maintain their shape. Apply adhesive to the frame as you go.
- Secure Bottom Edge: Once the top is secure, apply adhesive to the bottom wire and carefully press the bottom edge of the fabric onto it. Ensure the pleats are neat at the bottom.
- Trim Excess: Once dry, trim any excess fabric at the seams or edges with sharp scissors or a craft knife for a clean finish.
Double-Sided Fabric Tape Method:
This is a quicker alternative to glue, but might not be as permanent for heavier fabrics.
- Apply Tape: Apply double-sided fabric tape along the top wire of the frame.
- Align and Press: Remove the backing paper from the tape and carefully align the top edge of your pleated fabric, pressing it down firmly.
- Continue Around: Repeat the process for the entire circumference of the shade, applying tape to the frame and pressing the fabric onto it.
- Secure Bottom: Apply tape to the bottom wire and adhere the bottom edge of the fabric.
- Trim: Trim any excess fabric neatly.
Sewing Method (for more advanced crafters):
If you want a truly professional finish, especially for a sewing pleated lampshade, you can sew the fabric to the frame.
- Prepare Fabric Edges: Fold over and press the top and bottom edges of your pleated fabric. You can create a double-folded hem.
- Attach Fabric: Carefully wrap the fabric around the frame.
- Hand Stitching: Using a strong upholstery thread and a curved needle, hand-stitch the hemmed edges of the fabric to the top and bottom wires of the frame. This requires patience and neat stitches.
- Securing Pleats: You may also need to add small stitches at the sides of the pleats to keep them in place along the frame, especially at the top and bottom.
Adding Finishing Touches: Elevate Your Design
Once the main fabric is attached, you can add decorative elements to enhance your decorative lampshade design.
Trims and Borders:
- Bias Tape Trim: A contrasting or coordinating bias tape can be glued or sewn along the top and bottom edges of the lampshade for a polished look.
- Braided Trim: Add a braided or tasseled trim for a more ornate or vintage feel.
- Ric-Rac or Gimp: These can be applied along the edges or even between pleats for added texture.
Piping:
- Self-Piped Pleats: You can create your own piping using fabric strips and cord to insert between pleats or along the edges for a very professional, upholstered lampshade effect.
Embellishments:
- Buttons: Small decorative buttons can be sewn onto the center of box pleats.
- Appliqués: Fabric shapes can be cut and applied to the shade.
Working with Different Fabric Types
The type of fabric you choose significantly impacts the final look and the ease of the process.
Cotton and Linen:
- Pros: Easy to work with, hold pleats well, good for beginners. Natural fibers offer a classic look.
- Cons: Can fray easily if not handled carefully.
Silk and Silk Blends:
- Pros: Luxurious drape, beautiful sheen, excellent for sophisticated designs.
- Cons: More delicate, can be slippery to handle, requires careful pressing to avoid scorching. May need a lining to diffuse light.
Textured Fabrics (e.g., Velvet, Chenille):
- Pros: Add rich texture and depth.
- Cons: Can be challenging to get sharp pleats, may require specialized adhesives or sewing techniques. The pile of the fabric needs to be consistent in direction.
Synthetic Fabrics:
- Pros: Often more durable, less prone to wrinkling, can be more affordable.
- Cons: Some synthetics can melt under high heat from irons, so always test your iron settings.
Troubleshooting Common Issues
Even with careful planning, you might encounter a few hiccups.
Uneven Pleats:
- Cause: Inconsistent marking or pressing.
- Solution: Use a ruler and fabric marker diligently. Press each pleat firmly before moving to the next. If it’s really bad, you might need to unpick and re-pleat that section.
Fabric Slipping:
- Cause: Insufficient adhesive or tape, or the wrong type of adhesive for the fabric.
- Solution: Ensure the frame is clean and dry. Use a good quality fabric glue or strong double-sided fabric tape. Consider using clips to hold the fabric in place while the adhesive dries.
Fraying Edges:
- Cause: Cutting fabrics that fray easily without proper preparation.
- Solution: Use pinking shears on the raw edges before pleating, or apply a thin bead of fabric glue along the cut edges to seal them.
Bubbling or Puckering:
- Cause: Fabric not being pulled taut enough, or too much adhesive applied unevenly.
- Solution: Ensure the fabric is smooth and taut against the frame as you apply it. Use a thin, even layer of adhesive.
Popular Pleating Styles for Inspiration
Exploring different pleating patterns for lampshades can spark your creativity.
Gathered Pleats:
- Achieved by using wider fabric strips and creating very fine, close pleats. This gives a soft, gathered effect.
Accordion Pleats:
- Alternating folds in opposite directions, creating a zig-zag effect. These are usually sewn onto a base fabric or frame.
Sunburst Pleats:
- Pleats radiating outwards from a central point, often used on circular or conical shades.
Pleated Skirts:
- Creating a skirt-like effect at the bottom of the lampshade with deep, soft pleats.
Maintaining Your Pleated Lampshade
To keep your beautiful creation looking its best:
- Dusting: Gently dust with a soft brush or a lint roller. Avoid harsh vacuuming.
- Cleaning: For spot cleaning, use a slightly damp cloth and blot gently. Avoid saturating the fabric.
- Sunlight: Position your lampshade away from direct, prolonged sunlight, as this can fade the fabric over time.
Frequently Asked Questions (FAQ)
Q1: What is the best fabric for a DIY pleated lampshade?
A1: Cotton and linen blends are excellent choices for beginners as they are easy to handle and hold pleats well. For a more luxurious look, silk or silk blends can be used, but they require more delicate handling.
Q2: Can I pleat without sewing?
A2: Yes, you can achieve a beautiful pleated lampshade using fabric glue or strong double-sided fabric tape. This is a great option for those who prefer not to sew.
Q3: How do I calculate how much fabric I need for pleats?
A3: The amount of fabric depends on the type of pleat (box, knife, etc.) and the desired finished width of each pleat. You’ll generally need about 2 to 4 times the finished circumference of the shade, depending on how full you want the pleats. Use the formulas provided in the “Mastering Fabric Pleating Techniques” section.
Q4: Who can benefit from making a pleated lampshade?
A4: Anyone interested in home decor, DIY crafts, sewing, and interior design can benefit from making a pleated lampshade. It’s a project that adds a personal touch to any room.
Q5: How do I ensure my pleats are even?
A5: Precision is key. Use a ruler and fabric marker to mark your pleat lines accurately on the wrong side of the fabric. Press each pleat firmly with an iron before moving to the next section. Consistency in your folding and pressing will result in even pleats.
Q6: Can I use this technique for any lampshade shape?
A6: This technique works best on conical or drum-shaped lampshades where the fabric can be applied smoothly around the frame. More complex shapes might require custom pattern adjustments.
Q7: What are some good fabric pleating techniques for beginners?
A7: The basic box pleat and knife pleat, especially when using a pre-folded fabric strip, are excellent starting points. Using bias tape to finish the pleats also simplifies the process.
Q8: How do I make an upholstered lampshade with pleats?
A8: To create an upholstered look with pleats, you’ll first cover the frame with a base fabric, then apply your pleated fabric over it. This creates a layered, textured effect, similar to a sophisticated upholstered lampshade but with the added detail of pleats.
Q9: Where can I find pleating patterns for lampshades?
A9: While specific “patterns” in the traditional sense aren’t always used, you can find inspiration and guidance on calculating fabric requirements and pleat spacing from craft blogs, sewing websites, and books on lampshade making. The techniques described in this guide provide the framework for creating your own pleating patterns for lampshades.
Q10: What makes this a good home decor lampshade project?
A10: This project allows for complete customization of color, fabric, and style, enabling you to create a truly unique piece that perfectly complements your home decor lampshade projects, elevating the overall aesthetic of your living space.
Making a pleated lampshade is a fantastic way to bring a touch of handcrafted elegance into your home. With a little patience and the right materials, you can create a custom lampshade making masterpiece that you’ll be proud of. Enjoy the process of transforming your lamp with beautiful fabric pleating techniques!