
So, you’ve got your hands on a UV LED nail lamp and you’re ready to achieve that salon-perfect gel manicure at home. But how exactly do you use this magical device? You use a UV LED nail lamp by placing your gel-polished nails inside the lamp and activating it for a specific duration to cure (harden) the polish. This process is key to achieving a durable, chip-resistant gel manicure.
Gel manicures have taken the nail world by storm, offering a longer-lasting and glossier finish than traditional nail polish. At the heart of this transformation lies the UV LED nail lamp, often referred to as an LED nail dryer. This device is specifically designed to cure gel polish, turning a liquid formula into a hard, durable coating. If you’re new to the world of gel nails, or just looking to refine your technique, this comprehensive guide will walk you through everything you need to know about using a UV lamp for nails effectively and safely.
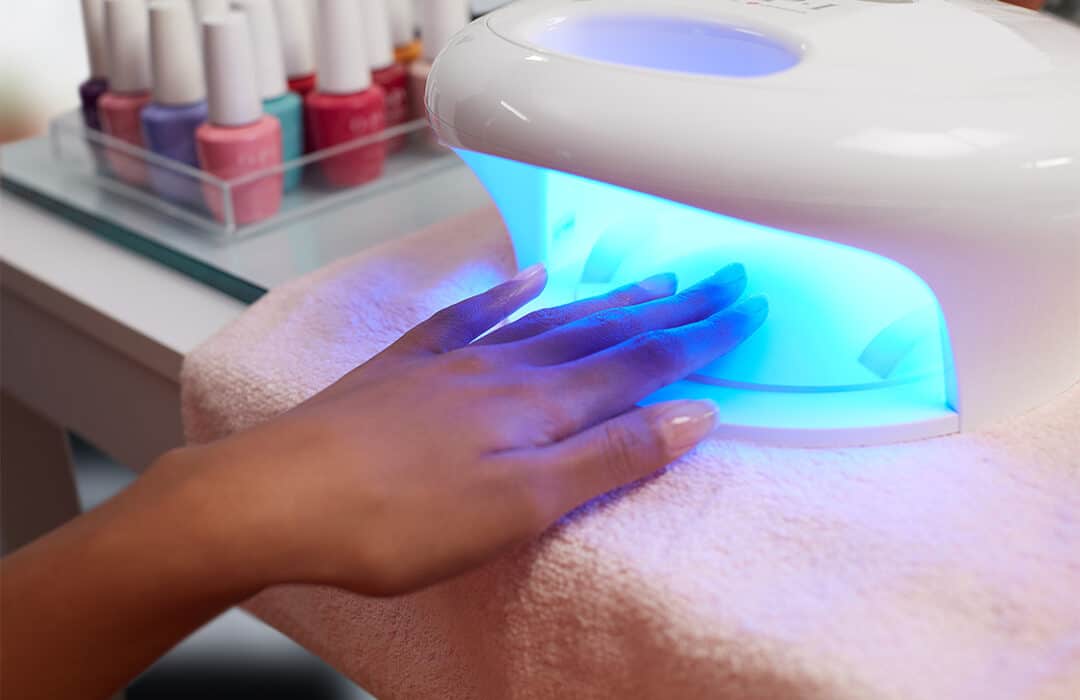
Image Source: glitterbels.com
Getting Started: What You Need for Your Gel Manicure
Before we dive into the lamp itself, let’s ensure you have all the necessary tools for a successful gel manicure.
- UV LED Nail Lamp: The star of the show!
- Gel Nail Polish: Choose your favorite colors.
- Gel Polish Base Coat: Essential for adhesion and protecting your natural nails.
- Gel Polish Top Coat: Seals the color and adds shine.
- Nail Cleanser/Rubbing Alcohol: To remove the tacky inhibition layer after curing.
- Lint-Free Wipes: For cleaning and removing the tacky layer.
- Nail Files and Buffers: To prepare your nails.
- Cuticle Pusher/Orange Stick: For cuticle care.
- Cuticle Oil: To rehydrate after the manicure.
The Anatomy of a UV LED Nail Lamp
Understanding the basic components of your UV lamp for nails will help you use it more effectively.
- Light Sources: These are the LEDs that emit the specific wavelengths of UV light needed for gel nail curing. Modern lamps primarily use UV LEDs, which are more energy-efficient and have a longer lifespan than traditional UV bulbs.
- Timer Settings: Most lamps come with pre-set timers (e.g., 10, 30, 60, 90 seconds). This allows you to control the curing time for each layer of polish.
- On/Off Switch or Sensor: Some lamps have a manual switch, while others automatically turn on when you place your hand inside (motion sensor).
- Power Cord: To connect the lamp to an electricity source.
- Curing Chamber: The enclosed space where you place your hands or feet.
Deciphering Lamp Wattage and Its Importance
When choosing a gel polish light, you’ll often see wattage mentioned. But what does it mean, and why is it important?
What is Wattage?
In simple terms, wattage (W) is a measure of power. For a UV LED nail lamp, a higher wattage generally indicates a more powerful light output.
How Wattage Affects Curing
- Faster Curing: Higher wattage lamps can cure gel polish more quickly. This means less waiting time between coats.
- More Thorough Curing: A powerful lamp ensures that the gel polish is fully cured, which is crucial for durability and preventing lifting or peeling.
- Compatibility: Some gel polish brands might recommend a specific wattage for optimal curing. Always check the product instructions.
Table: Typical Wattage and Curing Times
| Wattage Range | Typical Curing Time (per coat) | Common Features |
|---|---|---|
| 6W – 15W | 60-120 seconds | Small, portable, good for beginners |
| 24W – 48W | 30-60 seconds | Popular for home use, faster curing |
| 60W – 120W+ | 10-60 seconds | Professional grade, very fast curing |
It’s important to note that while wattage is a factor, the quality and type of LEDs also play a significant role in curing efficiency.
Step-by-Step: How to Use Your UV LED Nail Lamp
Now that you’re prepped and have a basic grasp of the lamp, let’s get to the actual process of gel nail curing. Proper usage is key to a flawless finish.
Step 1: Prepare Your Nails
This is a critical step that ensures your gel polish adheres properly and lasts longer.
- Clean Your Nails: Wash your hands thoroughly and dry them.
- Shape Your Nails: File your nails to your desired shape.
- Push Back Cuticles: Gently push back your cuticles with a cuticle pusher or orange stick. Avoid cutting them unless you are experienced, as this can lead to infection.
- Buff the Nail Surface: Lightly buff the surface of your natural nails with a fine-grit buffer. This removes any natural oils and creates a smooth surface for the polish to adhere to. Wipe away any dust with a lint-free wipe and nail cleanser.
Step 2: Apply the Base Coat
The base coat is the foundation of your gel manicure.
- Apply a Thin Layer: Apply a thin, even coat of gel base coat to each nail. Ensure you cap the free edge of your nail by running the brush along the tip.
- Avoid the Cuticle: Try to avoid getting the base coat on your cuticles or the surrounding skin, as this can cause lifting.
- Cure Under the Lamp: Place your hand into the UV lamp for nails. Select your desired curing time (usually 30-60 seconds for base coat, but check your polish instructions). Most lamps have a timer, or you can simply press the button once for a standard cure.
Step 3: Apply Your Gel Color
This is where the magic happens!
- First Coat: Apply a thin, even coat of your chosen gel nail polish. Again, cap the free edge.
- Cure: Place your hand back under the LED nail dryer. Cure for the recommended time (often 30-60 seconds).
- Second Coat: Apply a second thin, even coat of gel color. Ensure full coverage.
- Cure Again: Cure your nails under the lamp for the recommended time. For deeper colors or opaque finishes, a third coat might be necessary, followed by curing.
Key Tip: Always apply thin coats. Thick coats can lead to uneven curing, wrinkling, or a sticky surface.
Step 4: Apply the Top Coat
The top coat seals your manicure and provides shine and protection.
- Apply a Thin Layer: Apply a thin, even coat of gel top coat. Make sure to cap the free edge.
- Cure: Place your hand under the UV lamp for nails. Cure for the recommended time (often 60-120 seconds for top coat, as it typically requires a longer cure than color coats).
- Remove the Tacky Layer: After curing, your nails will have a slightly tacky or “sticky” surface. This is called the inhibition layer. Soak a lint-free wipe with nail cleanser or rubbing alcohol and gently wipe each nail to remove this tackiness.
Step 5: Hydrate and Finish
Your gel manicure is almost complete!
- Apply Cuticle Oil: Apply a drop of cuticle oil to each nail and gently massage it into the cuticle area. This rehydrates the skin after the curing process and adds a final touch of shine.
Navigating Lamp Settings and Curing Time
Understanding lamp settings and how they relate to curing time is crucial for a successful gel manicure.
Common Lamp Settings
- Timer Buttons: Most lamps have buttons for specific time intervals (e.g., 10s, 30s, 60s, 90s).
- Low Heat Mode: Some advanced lamps offer a “low heat” or “gentle” mode. This is useful for gel polishes that tend to generate more heat during curing, reducing the “heat spike” sensation on the nail. This mode often involves a slower ramp-up in power.
- Sensor Activation: Many lamps automatically turn on when you insert your hand, and turn off when you remove it.
Determining the Right Curing Time
The curing time isn’t a one-size-fits-all answer. It depends on several factors:
- Gel Polish Brand: Different brands have different formulas, and some may require longer or shorter curing times. Always check the specific product instructions.
- Lamp Wattage: As discussed, higher wattage lamps generally cure faster.
- Number of Coats: Each layer needs its own cure.
- Color Opacity: Darker and highly pigmented colors may require slightly longer curing times to ensure full opacity is hardened.
- Lamp Age: Over time, LEDs can degrade, potentially requiring slightly longer curing times.
General Guidelines for Curing Time:
- Base Coat: 30-60 seconds
- Gel Color: 30-60 seconds per coat
- Top Coat: 60-120 seconds (often the longest cure)
Experimentation is Key: If you find your polish is wrinkling, peeling, or remains sticky after wiping, your curing time might be too short, or your coats might be too thick. If you feel excessive heat, you might need to use a lower heat setting or a shorter initial cure followed by a longer one.
Nail Lamp Safety: Protecting Yourself and Your Skin
While UV LED nail lamps are generally safe for home use, it’s important to be aware of nail lamp safety guidelines to protect your skin and eyes.
Protecting Your Skin
- UV Exposure: The LEDs in these lamps emit UV-A radiation, which can contribute to skin aging and, in rare cases, increase the risk of skin cancer with prolonged and excessive exposure.
- Preventive Measures:
- Wear Gloves: Consider wearing fingerless UV-protective gloves designed for nail technicians. These gloves block UV rays while allowing your fingertips to be exposed for manicuring.
- Apply Sunscreen: Apply a broad-spectrum SPF 30 or higher sunscreen to your hands 15-20 minutes before using the lamp.
- Limit Exposure: Avoid staring directly into the lamp and limit the frequency of use if you have concerns.
- Don’t Overlap Curing: Only cure for the recommended time.
Protecting Your Eyes
- Direct Exposure: While not as common a concern as with older UV bulb lamps, it’s still wise to avoid looking directly into the light sources. The intense light can be uncomfortable and may cause temporary visual disturbances.
- Preventive Measures:
- Use the Lid: If your lamp has a lid or enclosure, keep it closed during use.
- Avoid Direct Staring: Train yourself to look away from the lamp during the curing process.
Electrical Safety
- Inspect the Cord: Ensure the power cord is not frayed or damaged.
- Use the Correct Power Source: Plug the lamp into an outlet that matches its voltage requirements.
- Keep Away from Water: Like any electrical device, keep your UV lamp for nails away from water and moisture.
Common Issues and How to Fix Them
Even with proper usage, you might encounter a few common problems.
Problem: Polish is still sticky after wiping.
- Possible Causes:
- Insufficient curing time.
- Gel polish applied too thickly.
- The gel polish light is not powerful enough or the LEDs are aging.
- You didn’t use a UV-curable top coat.
- Solutions:
- Increase the curing time by 10-30 seconds.
- Apply thinner coats of polish.
- Ensure your lamp is functioning correctly and consider if it’s time for a replacement if it’s very old.
- Double-check that you are using a gel top coat that requires UV curing.
Problem: Gel polish is wrinkling or bubbling.
- Possible Causes:
- Curing time is too short for the thickness of the layer.
- The gel polish is too thick.
- The UV lamp for nails is too powerful for the specific polish, causing the surface to cure too quickly while the bottom remains unset.
- Solutions:
- Apply thinner coats of gel polish.
- Reduce the curing time slightly if you suspect the lamp is too powerful, or use a “low heat” mode if available.
- Ensure your lamp’s LEDs are evenly distributed.
Problem: Gel polish is lifting or peeling prematurely.
- Possible Causes:
- Improper nail preparation (oils left on the nail).
- Base coat or top coat not properly cured.
- Gel polish applied too close to the cuticle.
- Gel polish not capped at the free edge.
- Solutions:
- Thoroughly clean and buff nails before applying polish.
- Ensure adequate curing time for all layers, especially the base and top coats.
- Be precise when applying polish, keeping it slightly away from the cuticle.
- Always cap the free edge of your nails with each coat.
Frequently Asked Questions (FAQ)
Can I use a regular UV lamp for gel nails?
Yes, you can use a regular UV lamp for gel nails, but UV LED lamps are generally preferred. UV LED lamps cure gel polish faster and are more energy-efficient. Older UV bulbs can degrade over time and may need replacement.
How often should I replace the bulbs in my UV lamp?
Traditional UV bulb lamps typically require bulb replacement every 6-12 months, depending on usage. UV LED lamps do not have bulbs that need replacing; the LEDs have a much longer lifespan, often lasting for thousands of hours of use.
Does the wattage of the UV LED nail lamp matter?
Yes, the wattage of the UV LED nail lamp matters as it indicates the power output. Higher wattage generally means faster and more efficient curing. For home use, lamps between 24W and 48W are usually sufficient.
What is the “tacky layer” on my nails after curing?
The tacky layer, also known as the inhibition layer, is a byproduct of the curing process. It’s a thin, sticky film that remains on the surface of the gel polish after it has hardened. This layer is removed by wiping the nails with a cleanser or rubbing alcohol on a lint-free wipe.
How do I cure my toenails?
You can cure your toenails the same way you cure your fingernails. Ensure your toenails are clean and prepped. Apply base coat, color coats, and top coat, curing each layer under the UV lamp for nails. Most lamps are large enough to accommodate a full hand or foot.
Can I use my UV LED nail lamp for curing press-on nails with gel glue?
No, UV LED nail lamps are designed to cure gel nail polish, which contains photoinitiators that react to UV light. Gel glue designed for press-on nails typically cures through air drying or by using a different type of adhesive that doesn’t require UV light. Always check the product instructions for the specific glue you are using.
Is it safe to cure my nails multiple times?
While it’s generally safe to cure each layer as directed, curing your nails repeatedly for excessively long periods without cause is not recommended. This can lead to over-curing, which can make the gel brittle and more prone to chipping, and may also increase your exposure to UV radiation. Stick to the recommended curing time for each product.
Conclusion: Mastering Your UV LED Nail Lamp
Using a UV LED nail lamp to achieve a professional-looking gel manicure at home is entirely achievable with a little practice and attention to detail. By following these steps, paying close attention to curing time, understanding your lamp settings, and prioritizing nail lamp safety, you can enjoy beautiful, long-lasting gel nails. Remember that quality products and diligent preparation are just as important as the lamp itself. So, go forth, experiment with colors, and embrace your inner nail artist!