
Yes, you can paint a brass lamp! It’s a fantastic way to update its look and give it a new life. This guide will walk you through everything you need to know to achieve a beautiful, lasting finish on your brass lamp.
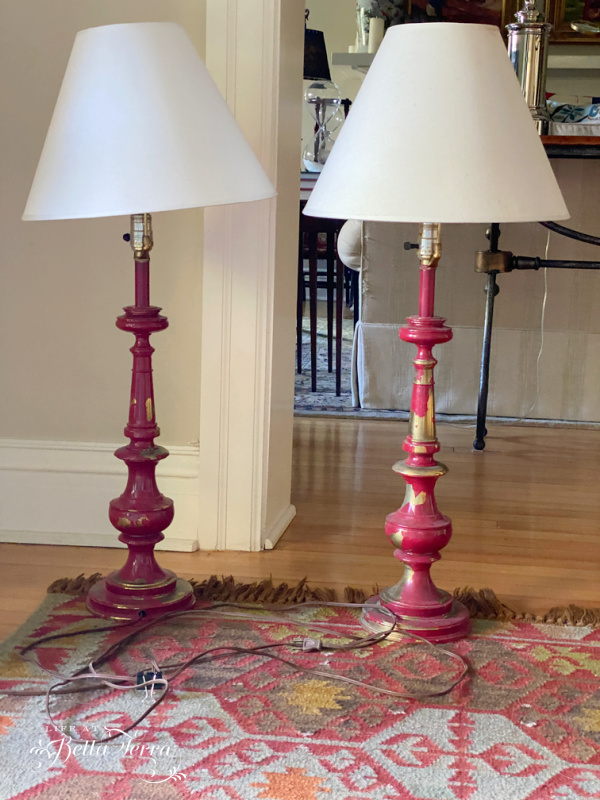
Image Source: lifeatbellaterra.com
Breathing New Life into Old Brass: A Comprehensive Guide to Painting Your Lamp
Brass lamps, with their timeless appeal, often become cherished heirlooms or stylish finds from thrift stores. However, their warm, golden hue might not always fit with a changing decor. Fortunately, painting a brass lamp is a surprisingly straightforward and rewarding DIY project that can completely transform its aesthetic. Whether you’re aiming for a modern matte finish, a vibrant pop of color, or an antique brass finish, this in-depth guide will equip you with the knowledge and steps to achieve professional-looking results. We’ll cover preparing the surface, choosing the right paint, the painting process itself, and finishing touches that ensure durability.
Why Paint a Brass Lamp?
Brass, while beautiful, can sometimes feel dated or clash with a room’s color scheme. Painting offers an accessible and affordable solution to:
- Update a Classic: Give an old lamp a modern makeover to match current trends.
- Coordinate with Decor: Easily match the lamp’s finish to your existing color palette.
- Cover Tarnished Areas: Hide imperfections or tarnishing that can be difficult to remove completely.
- Personalize Your Space: Express your style with a unique color or finish.
Essential Supplies for Your Brass Lamp Painting Project
Gathering the right tools and materials before you begin is crucial for a smooth and successful painting experience. Here’s what you’ll need:
- Protective Gear: Gloves, mask (especially for spray paint), safety glasses.
- Cleaning Supplies: Mild dish soap, water, soft cloths or sponges, degreaser (optional, but recommended for stubborn grime).
- Sanding Tools: Fine-grit sandpaper (220-grit or higher) or a sanding sponge.
- Primer: A good quality primer specifically designed for metal or suitable for brass.
- Paint: Your chosen paint (spray paint, chalk paint, metallic paint, etc.).
- Brushes/Rollers: If not using spray paint, you’ll need high-quality brushes or small foam rollers.
- Drop Cloth or Newspaper: To protect your work surface.
- Painter’s Tape: For masking off any areas you don’t want to paint.
- Clear Topcoat/Sealer: To protect your painted finish.
Step 1: The Crucial First Step – Cleaning Your Brass Lamp
Before any paint can adhere properly, you must thoroughly clean brass. This is arguably the most important step for a durable finish. Any dirt, grease, wax, or tarnish left on the surface will prevent the primer and paint from sticking, leading to peeling and chipping down the line.
Removing Dust and Grime
- Dust it off: Start by wiping down the entire lamp with a dry, soft cloth to remove any loose dust.
- Wash it clean: Mix a small amount of mild dish soap with warm water. Dip a soft cloth or sponge into the soapy water and wring it out well so it’s damp, not dripping.
- Gentle scrub: Gently wipe down all surfaces of the brass lamp. Pay attention to crevices and details where dust and grime can accumulate.
- Rinse thoroughly: Use a clean, damp cloth (rinsed in plain water) to wipe away any soap residue.
- Dry completely: Immediately dry the lamp with a clean, dry, lint-free cloth. Ensure no water is left sitting on the surface, especially in any etched areas.
Dealing with Stubborn Grime and Old Finishes
If your lamp has a lot of built-up grime, grease, or an old lacquer that needs removing, you might need a bit more power.
- Degreaser: For greasy residues, a good degreaser can be very effective. Apply it according to the product instructions and wipe clean.
- Lacquer Removal: Many older brass items have a clear lacquer coat to prevent tarnishing. If this is peeling or you want to paint over it, you’ll need to remove it.
- Mineral Spirits: Often, mineral spirits can dissolve old lacquer. Apply with a cloth and rub until the lacquer comes off. You may need to repeat this process.
- Lacquer Thinner: For tougher finishes, lacquer thinner might be necessary. Use this in a well-ventilated area, wear gloves and a mask, and test in an inconspicuous spot first.
- Brass Cleaner: Some brass cleaners are designed to remove tarnish and old finishes. Always follow the product’s instructions carefully and test on a small area.
Important Note: If your brass lamp has an exceptionally valuable patina or intricate detailing that you don’t want to disturb, consider if painting is the best option. However, for most decorative lamps, a good cleaning will reveal the true beauty of the brass underneath.
Step 2: Preparing Brass for Paint – The Foundation for Success
After a thorough cleaning, the next critical step in how to paint a brass lamp is to prepare brass for the primer and paint. This involves creating a surface that the new coatings can adhere to.
Light Sanding for Adhesion
Even after cleaning, the surface of brass can be quite smooth, which can make it difficult for paint to grip. Light sanding creates a microscopic “tooth” for the paint to cling to.
- Choose your grit: Use fine-grit sandpaper, typically 220-grit or higher. You want to scuff the surface, not remove the brass material. A sanding sponge is also a great option as it conforms to curves and shapes.
- Gentle abrasion: Lightly sand the entire surface of the lamp. You don’t need to see deep scratches; you just want to dull the sheen.
- Wipe away dust: After sanding, thoroughly wipe the lamp with a clean, dry cloth or a tack cloth to remove all sanding dust. Any dust left behind will be trapped under the paint.
Masking Off Unwanted Areas
If your lamp has areas you don’t want to paint, such as electrical components, light sockets, or fabric shades, use painter’s tape to mask them off carefully. Ensure the tape is pressed down firmly to prevent paint from seeping underneath.
Step 3: Priming Your Brass Lamp – The Key to Durability
Priming is essential when you want to paint a brass lamp. A good primer acts as a bridge between the brass surface and your topcoat of paint, ensuring better adhesion, a more even color, and enhanced durability.
Selecting the Right Primer for Brass
The type of primer you choose is vital. You need a primer that is specifically formulated for metal or has excellent adhesion properties.
- Adhesion Primer: Look for primers labeled as “multi-surface,” “metal primer,” or “bonding primer.” These are designed to stick to challenging surfaces.
- Rust Inhibitor: Some metal primers also contain rust inhibitors, which can be beneficial even if your brass isn’t rusty, as it adds an extra layer of protection.
Applying the Primer
- Shake well: If using spray primer, shake the can vigorously for at least one minute after the ball starts rattling.
- Thin, even coats: Apply the primer in thin, even coats. Avoid applying it too thickly, as this can lead to drips and an uneven finish.
- Spray painting:
- Hold the can about 10-12 inches away from the surface.
- Use a steady back-and-forth motion, slightly overlapping each pass.
- Work in sections, allowing for slight drying time between passes if needed.
- Brush or roller application: If using a brush or roller, apply the primer smoothly and evenly.
- Drying time: Allow the primer to dry completely according to the manufacturer’s instructions. This usually takes at least 30 minutes to an hour, but can be longer depending on humidity and temperature.
- Second coat (optional): For darker paint colors or if the primer coverage seems uneven, a second thin coat of primer can improve the final result. Lightly sand again with very fine-grit sandpaper (320-grit or higher) after the first coat dries, then wipe away dust before applying the second.
Step 4: Choosing and Applying Your Paint
Now for the fun part – selecting and applying the paint! There are several excellent paint options for giving your brass lamp a fresh look.
Popular Paint Choices for Brass Lamps
- Spray Paint for Brass: This is often the easiest and quickest method. Many spray paints are formulated for metal and offer excellent adhesion and a smooth finish.
- Benefits: Fast application, even coverage, wide variety of colors and finishes (matte, satin, gloss, metallic).
- Tips: Choose a spray paint specifically designed for metal. Multiple thin coats are always better than one thick coat.
- Chalk Paint for Brass: Chalk paint is known for its matte, velvety finish and its ability to adhere to almost any surface with minimal prep.
- Benefits: No sanding or priming often required (though recommended for best adhesion on brass), creates a vintage or rustic look, easy to distress.
- Tips: While it claims no prep is needed, a good cleaning and light sanding will ensure the best results. Chalk paint often requires a wax or sealant topcoat.
- Metallic Paint for Brass: If you want to enhance the metallic look or achieve a different metal finish (like an antique brass finish, or even a copper or silver look), metallic paints are ideal.
- Benefits: Can mimic the look of other metals, adds a decorative flair.
- Tips: Apply in thin coats for a smooth finish. Some metallic paints have a sheen that can show imperfections, so good surface prep is key.
- Enamel or Acrylic Paints: High-quality enamel or acrylic paints applied with a brush or roller can also work well, especially for intricate details or if you prefer a hand-painted look.
- Benefits: More control over application, good for detailed work.
- Tips: Use good quality brushes for smooth application and avoid visible brush strokes.
The Painting Process: Achieving a Flawless Finish
The method of application will depend on your chosen paint.
Using Spray Paint
- Ventilation is key: Ensure you are in a well-ventilated area or outdoors.
- Shake the can: Shake the spray paint can thoroughly.
- Test spray: Before spraying the lamp, test the spray on a piece of scrap cardboard to check the flow and color.
- Thin, even coats: Apply the paint in thin, even coats. Aim for a consistent spray pattern.
- Crosshatch technique: Spray in a sweeping motion, moving from side to side, then overlap with a top-to-bottom motion. This ensures complete coverage.
- Allow drying time: Let each coat dry for the time recommended by the manufacturer (usually 10-20 minutes) before applying the next.
- Build coverage: Continue applying thin coats until you achieve the desired opacity and coverage. This might take 2-4 coats or more.
Using Chalk Paint or Brush-On Paints
- Prepare your tools: Ensure your brushes are clean and appropriate for the paint type.
- Apply paint: Apply the paint in thin, even strokes. Work in one direction to minimize brush marks.
- Layering: Allow each coat to dry completely before applying the next. This usually takes about 1-2 hours for chalk paint.
- Second coat: Most chalk paints will require at least two coats for full coverage.
- For brush marks: If using a brush and you want to avoid visible strokes, consider using a high-quality synthetic brush and light, even pressure. You can also gently buff the surface with a very fine-grit sandpaper (400-grit or higher) between coats.
Step 5: Adding Character – Distressing and Embellishments
Once your paint is dry, you might want to add some extra character to your brass lamp restoration project.
How to Distress Brass Lamp Finishes
Distressing can give your painted lamp an aged, antique, or shabby chic look.
- Sanding Method:
- Wait for paint to cure: It’s best to let the paint cure for at least 24 hours (or longer, check paint instructions) before distressing.
- Use fine-grit sandpaper: Take a piece of fine-grit sandpaper (220-grit or higher) or a sanding sponge.
- Lightly rub: Gently rub the sandpaper over edges, corners, and raised details where natural wear and tear would occur.
- Wipe away dust: Wipe away the dust with a clean cloth to reveal the primer or original brass underneath.
- Control your distressing: Start light and add more distressing as needed. You can always remove more paint, but you can’t put it back!
- Using a Dark Wax (with Chalk Paint): After applying chalk paint and letting it dry, you can apply a dark wax over the entire piece. Then, use a clean cloth to wipe off excess wax, leaving some in the crevices and lower areas to create an aged effect.
Creating an Antique Brass Finish
To achieve an antique brass finish, you can layer colors or use specific techniques:
- Base Coat: Paint the lamp with a dark color, such as black or dark brown, using spray paint or chalk paint.
- Dry Brushing Metallic: Once the base coat is dry, lightly dip a dry brush into a metallic paint (gold, bronze, or even a muted brass color). Wipe off most of the paint on a paper towel so the brush is almost dry. Then, lightly sweep the brush across the lamp, focusing on raised areas and edges. This technique highlights the details and creates a vintage feel.
- Aging Glaze: You can also use a glaze. Apply a dark glaze (mixed from craft paints or purchased) over your base color. Then, wipe it back with a cloth, leaving the glaze in the recesses to add depth and an antique look.
Step 6: Sealing Your Painted Brass Lamp – Protecting Your Work
The final crucial step in how to paint a brass lamp is to seal painted brass. A clear topcoat will protect your paint job from scratches, scuffs, and moisture, ensuring its longevity and beauty.
Choosing the Right Sealant
- Spray Sealant: This is often the easiest and most common choice. Look for clear acrylic sealants or spray lacquers. They come in various finishes like matte, satin, and gloss.
- Brush-On Sealant: You can also use a brush-on polycrylic or clear varnish. Ensure it’s compatible with your paint.
Applying the Sealant
- Ensure paint is fully dry: Make sure the paint is completely dry and cured before applying the sealant. Check the paint manufacturer’s recommendations.
- Ventilation: Work in a well-ventilated area.
- Thin coats: Apply the sealant in thin, even coats, just like you did with the primer and paint.
- Spray sealant technique: Hold the can about 10-12 inches away and use a steady, sweeping motion.
- Allow drying time: Let each coat dry thoroughly according to the product instructions.
- Multiple coats: Two to three thin coats of sealant will provide the best protection.
Important Consideration: If you used chalk paint, you’ll typically need to seal it with wax or a polycrylic/varnish to protect the delicate chalky finish.
Frequently Asked Questions (FAQ)
Q1: Do I really need to prime brass before painting?
A1: Yes, it’s highly recommended. Priming helps the paint adhere better, prevents the brass from showing through, and ensures a more durable finish. It’s a critical step in a successful brass lamp restoration.
Q2: Can I use regular house paint on a brass lamp?
A2: While you might be able to, it’s not ideal. Paints specifically designed for metal or multi-surface paints will adhere better and last longer on brass.
Q3: How long does it take for the paint to cure?
A3: Curing time varies greatly depending on the type of paint and sealant used. While the paint may feel dry to the touch within a few hours, it can take several days or even weeks for it to fully harden and cure. Avoid heavy handling or cleaning during this period.
Q4: Can I paint a brass lamp if it’s already lacquered?
A4: Yes, but you must remove the old lacquer first. Lacquer is a barrier that paint will not stick to, and it will peel off. You can typically remove lacquer with mineral spirits or lacquer thinner.
Q5: What’s the best way to get a smooth finish with spray paint?
A5: The key is thin, even coats. Hold the can the correct distance away, use a consistent sweeping motion, and allow proper drying time between coats. Don’t try to cover everything in one go.
Final Thoughts on Your Brass Lamp Painting Journey
Painting a brass lamp is a rewarding project that allows you to customize your decor and give new life to an old item. By following these steps – from thorough cleaning and preparation to careful application of primer, paint, and sealant – you can achieve a professional and long-lasting finish. Whether you’re aiming for a modern look or a charming antique brass finish, your newly painted lamp will be a beautiful testament to your DIY skills. So, gather your supplies, get creative, and enjoy the transformation!