
Thinking about how to build a pendant lamp or how to craft a pendant lamp for your home? You can absolutely build your own pendant lamp! This comprehensive DIY guide will walk you through every step, from choosing your materials to wiring and installing your custom creation.
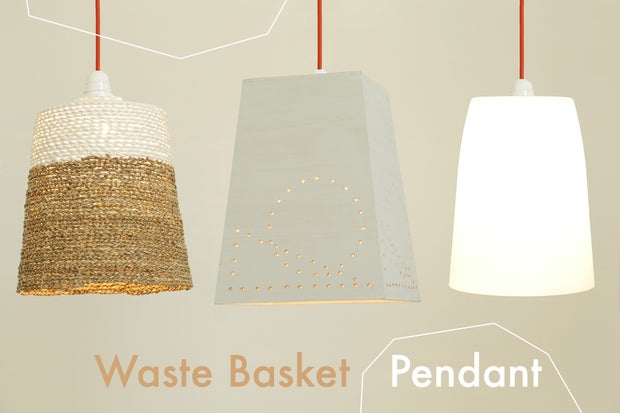
Image Source: content.instructables.com
Your Custom Pendant Light Project: A Step-by-Step Journey
Creating a pendant lamp is a fantastic way to add personality and style to any room. Whether you’re looking to make a simple DIY pendant light or aspire to craft something as intricate as a chandelier, this guide will equip you with the knowledge and confidence to tackle the project. We’ll cover everything from selecting the perfect shade to securely installing your finished hanging lamp tutorial.
Phase 1: Designing Your Pendant Light
The first and perhaps most exciting step in making a pendant light is the design. This is where your creativity truly shines! What kind of ambiance do you want to create? What materials resonate with your style?
Brainstorming Pendant Light Designs
- Style: Modern, rustic, industrial, bohemian, minimalist, vintage? Your chosen style will dictate materials, shape, and color.
- Material: Consider wood, metal, glass, fabric, repurposed items, or even concrete.
- Shape: Cylindrical, spherical, conical, geometric, or something completely unique?
- Size: How large should the pendant be in relation to the space? Consider the ceiling height and the area it will illuminate.
- Light Source: Will it use a single bulb, multiple bulbs, or an LED strip? The type of bulb will affect the overall look and feel.
Material Selection and Considerations
Choosing the right materials is crucial for both the aesthetics and safety of your custom pendant fixture.
- Shade Materials:
- Glass: Offers a clean, often reflective look. Can be clear, frosted, colored, or patterned.
- Metal: Provides an industrial or modern feel. Can be painted, brushed, or left to patina.
- Wood: Adds warmth and natural texture. Can be stained, painted, or left natural.
- Fabric: Softens light and adds a cozy feel. Requires a frame and careful handling.
- Paper/Cardboard: Budget-friendly and versatile, but may require fire-retardant treatment or careful placement away from heat sources.
- Repurposed Items: Jars, baskets, old plumbing parts, colanders – the possibilities are endless!
- Wiring Components:
- Lamp Cord: Choose a cord with a sufficient gauge for the wattage of your bulb. Look for SPT-2 or SPT-3 cord for durability.
- Socket: A standard E26 or E27 socket is common. Ensure it matches your bulb type.
- Canopy Kit: This covers the electrical box on the ceiling and provides a secure mounting point.
- Wire Connectors: Twist-on wire nuts are standard for joining wires.
- Strain Relief Bushing: Protects the cord where it enters the socket.
- Hanging Mechanism:
- Chain: Adds an industrial or decorative touch.
- Rope/Twine: Offers a natural or nautical feel.
- Wire: For a minimalist look.
- Downrod: For a more traditional or structured appearance.
Table 1: Common Pendant Light Materials and Their Characteristics
| Material | Pros | Cons | Best For |
|---|---|---|---|
| Glass | Elegant, diffuses light well | Fragile, can be heavy | Modern, minimalist, sophisticated spaces |
| Metal | Durable, modern/industrial look | Can be heavy, may rust if not treated | Industrial, loft, modern kitchens |
| Wood | Warm, natural aesthetic | Can be flammable, requires finishing | Rustic, Scandinavian, bohemian spaces |
| Fabric | Soft, diffused light, cozy feel | Can be a fire hazard, stains easily | Bedrooms, living rooms, cozy nooks |
| Paper | Lightweight, inexpensive, versatile | Flammable, not durable, can yellow over time | Temporary decor, kids’ rooms (with caution) |
Phase 2: Gathering Your Tools and Supplies
Before you begin the exciting process of making a pendant light, ensure you have all the necessary tools and supplies. This will make the wiring a pendant lamp and pendant light assembly much smoother.
Essential Tools
- Wire Strippers: For safely removing insulation from electrical wires.
- Screwdrivers: Phillips and flathead, in various sizes.
- Pliers: Needle-nose pliers are particularly useful for bending and gripping small wires.
- Adjustable Wrench or Pliers: For tightening nuts and bolts.
- Drill with Drill Bits: For creating holes in your shade material.
- Measuring Tape: For accurate measurements.
- Safety Glasses: Crucial for protecting your eyes.
- Work Gloves: For protecting your hands.
- Utility Knife or Craft Knife: For precise cutting.
- Soldering Iron and Solder (Optional): For more permanent wire connections, though wire nuts are usually sufficient.
- Voltage Tester: To ensure the power is off before working.
Key Supplies
Refer back to your design and material selection to create a comprehensive shopping list.
- Your chosen pendant shade material and any associated structural components (e.g., metal rings, wooden dowels).
- Lamp cord (appropriate length and gauge).
- Lamp socket (matching your bulb type).
- Canopy kit (including mounting screws and bracket).
- Wire connectors (wire nuts).
- Strain relief bushing or cord grip.
- Hook or eye screw for hanging if not using a canopy kit.
- Decorative chain or wire for hanging (if applicable).
- Screws, nuts, bolts, and washers as needed for assembly.
- Light bulb.
- Sandpaper, paint, stain, or sealant (if finishing wood or metal).
Phase 3: Preparing Your Pendant Shade
This is where your pendant light design starts to take physical form. The specific steps will vary greatly depending on your chosen materials.
Cutting and Shaping
- For Fabric Shades: You might be sewing fabric onto a wire frame or stretching it over a base.
- For Glass Shades: If you’re working with glass that needs modification, this often requires specialized tools and skills (e.g., glass cutters, scoring tools). If you’re using a pre-made glass shade, this step is about ensuring it’s clean and ready.
- For Wood Shades: Cut wood to size, sand smooth, and drill holes for wiring and hanging.
- For Repurposed Items: Clean thoroughly. Drill holes as needed for the socket and for hanging.
Drilling Holes
- For the Socket: You’ll need a hole where the socket can be secured. The size will depend on the socket’s base.
- For Hanging: If your design uses a chain or wire, you’ll need holes or loops for attachment.
- For Ventilation (Optional but Recommended): If your shade is enclosed or made of a material that can trap heat, consider adding small ventilation holes to prevent overheating of the bulb and wiring.
Finishing Touches
- Sanding: Smooth any rough edges on wood or metal.
- Painting/Staining: Apply your chosen finish to wood, metal, or even some plastics. Ensure the paint is heat-resistant if it’s close to the bulb.
- Sealing: Protect wood or metal with a sealant.
Phase 4: Wiring a Pendant Lamp
This is a critical step that requires attention to detail and safety. If you’re unsure about any aspect of electrical wiring, consult a qualified electrician.
Assembling the Socket
- Disassemble the Socket: Most lamp sockets have at least two main parts that unscrew, often revealing a threaded base and a cap.
- Prepare the Cord: Cut your lamp cord to the desired length, allowing extra for slack at both the ceiling and the socket.
- Strip the Cord: Use wire strippers to carefully remove about 1 inch of the outer insulation from the end of the cord. Then, strip about 1/2 inch of insulation from the individual wires (usually one is ribbed or marked for the “hot” wire, and the other is smooth for the “neutral” wire).
- Connect Wires to Socket:
- Neutral Wire (Ribbed/Marked): Connect this to the silver-colored screw terminal on the socket.
- Hot Wire (Smooth): Connect this to the brass-colored screw terminal on the socket.
- Loop the stripped end of each wire clockwise around the correct terminal screw and tighten securely. Ensure no stray strands of wire are exposed.
- Attach Strain Relief: Slide a strain relief bushing or cord grip onto the cord before connecting the wires to the socket. Once the wires are connected, thread the cord through the bushing and tighten it. This prevents the cord from being pulled directly on the wire connections.
- Reassemble Socket: Screw the socket cap back onto the socket base, enclosing the wired connections.
Attaching the Shade to the Socket
Your custom pendant fixture might require different methods to attach the shade securely to the socket.
- Threaded Nipple: Many sockets have a threaded nipple that screws into a corresponding threaded hole in the shade. A locknut or set screw often secures it.
- Direct Attachment: Some shades might have a wider opening that the socket can pass through, and then be secured with a screw-on ring or a backing plate.
- Wire Supports: For lighter shades, you might use small screws or clips to attach the shade directly to the socket base or a supporting bracket.
Phase 5: Installing Your Pendant Light
This is the final step to bringing your DIY project to life! Safety is paramount when installing any electrical fixture. Always turn off the power to the circuit at the breaker box before beginning installation.
Mounting the Canopy
- Locate Electrical Box: On your ceiling, you’ll find a circular or octagonal electrical box.
- Attach Mounting Bracket: Your canopy kit should come with a mounting bracket. Secure this bracket to the electrical box using the provided screws. Ensure it’s firmly attached as it will support the weight of your lamp.
- Feed Cord Through Canopy: Thread the lamp cord from your pendant light through the center of the canopy.
- Secure Canopy: Slide the canopy up to the ceiling, covering the electrical box and mounting bracket. Secure it according to the kit’s instructions, often by screwing it onto the mounting bracket.
Wiring to the Ceiling
- Connect Pendant Wires to House Wires:
- Ground Wire: Locate the bare copper or green wire from your pendant light. Connect this to the ground wire in the electrical box (usually green or bare copper).
- Neutral Wire (Ribbed/Marked): Connect this to the white wire from the ceiling.
- Hot Wire (Smooth): Connect this to the black or colored wire from the ceiling.
- Use wire nuts to secure all connections. Ensure the wire nuts are tight and no bare wire is exposed.
- Tuck Wires: Carefully tuck all the wires back into the electrical box.
Final Assembly and Testing
- Attach Shade (if not already done): If your shade was removed for wiring, reattach it securely.
- Install Light Bulb: Screw in your chosen light bulb.
- Turn Power Back On: Go to your breaker box and turn the power back on to the circuit you were working on.
- Test the Light: Flip the light switch to see your beautiful, newly crafted pendant light illuminate the space!
Advanced Techniques: Making a Chandelier
While this guide focuses on a single pendant, the principles can be expanded to making a chandelier. This involves creating a central frame and attaching multiple pendant lights or light sources to it.
- Central Hub: You’ll need a sturdy central point, often a metal ring or a wooden cross, to which the individual pendants will be attached.
- Wiring Multiple Lights: This can become complex. You’ll need to wire each pendant to a main junction box or use a specialized chandelier wiring kit. Consider using a dimmer switch to control the overall brightness.
- Weight Distribution: A chandelier can be heavy. Ensure your ceiling support can handle the load, and consider using a robust chain or downrod system.
Tips for a Stunning Pendant Light Design
- Consider the Scale: A massive pendant in a small room can overwhelm the space, while a tiny one might get lost in a large area.
- Light Diffusion: Think about how the light will be cast. Frosted glass, fabric, or strategically placed holes can create softer, more ambient light. Clear glass or open designs will cast more direct light.
- Color Palette: Coordinate your pendant light with your room’s existing colors or use it as a statement piece.
- Flexibility: Consider using a dimmer switch to adjust the mood and intensity of the light.
Frequently Asked Questions (FAQ)
Q1: Can I use any kind of light bulb in my DIY pendant light?
A1: It’s best to use LED bulbs. They produce less heat than incandescent bulbs, which is safer for DIY shades made from materials like fabric or paper. Always check the maximum wattage recommended for your lamp socket.
Q2: How do I ensure my pendant light is safe?
A2: Always turn off power at the breaker before doing any electrical work. Use proper wire connectors, ensure all connections are secure, and use strain relief to protect the cord. If you’re not comfortable with wiring, hire an electrician.
Q3: What if my shade is made of a flammable material?
A3: If using materials like fabric, paper, or untreated wood, it’s crucial to keep the bulb a safe distance away. Use LED bulbs that run cooler and consider fire-retardant sprays for added safety. Ensure good ventilation.
Q4: How do I adjust the hanging height of my pendant light?
A4: If you’re using a chain, you can adjust the height by shortening the chain links. For cords, you can tie a secure knot above the socket (ensuring it doesn’t interfere with the strain relief) or incorporate a cord management system.
Q5: My pendant light is flickering. What could be wrong?
A5: Flickering can be caused by loose wire connections, a faulty bulb, or an issue with the dimmer switch. Turn off the power and carefully check all connections. Try a different bulb. If the problem persists, it might be time to consult an electrician.
Building your own pendant lamp is a rewarding project that allows for immense personalization. With careful planning, the right tools, and attention to detail, you can create a beautiful and functional custom pendant fixture that perfectly complements your home. Enjoy the process of creating and installing your unique hanging lamp!