
Yes, you can easily make a lava lamp for a science project! This fun and colorful project is a great way to explore scientific concepts like density and chemical reactions. What is a lava lamp? It’s a decorative lamp that contains two immiscible liquids, typically oil and water, with colored wax or solids added. When heated, the wax rises and falls, creating a mesmerizing effect. This guide will show you how to create your own DIY lava lamp and explain the science behind it.
This guide is perfect for anyone looking for a science fair lava lamp or a cool homemade lava lamp. We’ll cover everything from gathering materials to explaining the classic lava lamp experiment. Get ready to create a dazzling display that’s both educational and exciting!
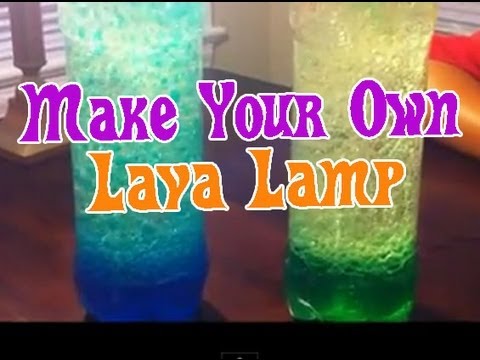
Image Source: i.ytimg.com
Why Make a Lava Lamp for Your Project?
A lava lamp is more than just a pretty decoration; it’s a fantastic visual aid for demonstrating fundamental scientific principles. It’s a perfect fit for a density science project because it vividly illustrates how liquids with different densities behave. You’ll also see a chemical reaction lamp in action when using certain ingredients. This oil and water lamp is a classic science experiment for a reason – it’s engaging, easy to follow, and teaches valuable lessons about the physical world.
Exploring Density
Density is a measure of how much mass is packed into a certain volume. Think of it like this: if you have a box of feathers and a box of rocks of the same size, the box of rocks will be much heavier. That’s because rocks are denser than feathers. In a lava lamp, the different densities of the liquids and the wax are what make the magic happen.
Witnessing Chemical Reactions
When you use certain ingredients, like Alka-Seltzer, you’ll observe a chemical reaction lamp. This reaction produces gas bubbles that are key to the lava lamp’s movement.
Materials You’ll Need for Your DIY Lava Lamp
Gathering your supplies is the first step in creating your homemade lava lamp instructions. You don’t need many specialized items.
Here’s a list of what you’ll need:
- A clear bottle or jar: A clean plastic water bottle (like a 1-liter or 2-liter bottle) or a glass jar with a lid works well. Make sure it’s transparent so you can see the action.
- Water: Tap water is perfectly fine.
- Vegetable oil or baby oil: You’ll need enough to fill most of your bottle. Vegetable oil is a common household item, while baby oil can give a clearer finish.
- Food coloring: Choose your favorite colors! A few drops will be enough to tint the water.
- Alka-Seltzer tablets: These are essential for the “lava” effect. You’ll need a few.
- Optional: Glitter or sequins for extra sparkle.
- Optional: A flashlight or a light source to place under the bottle for a more dramatic effect.
Choosing Your Container
The container is important for visibility. A tall, slender bottle works best for observing the rising and falling “lava” blobs. Make sure it’s clean and dry before you start.
Step-by-Step Homemade Lava Lamp Instructions
Follow these easy steps to build your very own DIY lava lamp:
- Fill the Bottle with Oil: Pour vegetable oil or baby oil into your clear bottle, filling it about two-thirds to three-quarters of the way full.
- Add Water: Fill the rest of the bottle with water, leaving a little space at the top. You should see the water settle at the bottom, beneath the oil. This is because water is denser than oil.
- Add Food Coloring: Add several drops of your chosen food coloring to the bottle. You’ll notice the food coloring drops sink through the oil and mix with the water at the bottom. Gently swirl the bottle if needed to help the color disperse in the water.
- Introduce the Alka-Seltzer: Break an Alka-Seltzer tablet into a few pieces. Drop one piece into the bottle.
- Watch the Magic Happen! You’ll see the Alka-Seltzer react with the water, creating carbon dioxide gas bubbles. These bubbles attach to the colored water, making it less dense than the oil. The colored water-oil mixture then rises to the top. When the bubbles pop at the surface, the colored water becomes dense again and sinks back down. This creates the “lava” effect.
- Add More Alka-Seltzer: As the bubbling slows down, you can add more pieces of Alka-Seltzer to keep the reaction going.
- Enhance the Effect (Optional): For a more dramatic look, place a flashlight or a phone’s flashlight underneath the bottle. This will illuminate the colored blobs as they move. You can also add glitter or sequins to the water before adding the oil for extra visual appeal.
What Happens When You Add Alka-Seltzer?
The Alka-Seltzer tablet contains citric acid and sodium bicarbonate (baking soda). When these ingredients mix with water, a chemical reaction occurs, producing carbon dioxide gas. This gas forms bubbles. These bubbles are lighter than both the water and the oil. They attach to the colored water molecules, making them buoyant enough to rise through the denser oil.
The Science Behind Your Lava Lamp
This classic lava lamp experiment demonstrates several key scientific principles. Let’s break them down:
Density Differences
- Oil and Water: Oil and water don’t mix because of their molecular structures. Water molecules are polar, meaning they have a slight positive and negative charge, which allows them to attract each other and form bonds. Oil molecules are nonpolar, meaning they don’t have these charges. Because of this, oil and water repel each other.
- Layering: When you pour them into the same container, the denser liquid (water) sinks to the bottom, and the less dense liquid (oil) floats on top. In our oil and water lamp, water is denser than oil.
Chemical Reaction and Buoyancy
- Alka-Seltzer Reaction: As mentioned, Alka-Seltzer reacts with water to produce carbon dioxide gas (CO2). This is a classic example of a chemical reaction producing gas.
- Bubble Formation: The CO2 gas forms tiny bubbles within the colored water.
- Buoyancy: These gas bubbles are much lighter than the surrounding water and oil. They attach to the colored water. When enough bubbles attach, the combined colored water and gas become less dense than the oil. This causes the colored water “blobs” to rise.
- Release and Sink: When the gas bubbles reach the surface of the oil and pop, the colored water is no longer buoyed up. It becomes denser than the oil again and sinks back down to the bottom. This cycle repeats as long as there are Alka-Seltzer tablets to produce gas.
What About a Wax Volcano Lamp?
You might also hear about wax volcano lamp designs. These operate on a similar principle of density and heat. In a traditional lava lamp that uses heat, the wax is heated at the bottom of the lamp. As it heats up, the wax expands, becomes less dense than the surrounding liquid, and rises. When it reaches the cooler top, it cools, becomes denser again, and sinks. Our Alka-Seltzer version simulates this rising and falling motion using a chemical reaction instead of heat.
Tips for Your Science Project
To make your science fair lava lamp stand out, consider these tips:
- Label Everything: Clearly label your bottle with the title of your project, your name, and a list of the materials used.
- Explain the Science: Prepare a poster board or display that explains the concepts of density, buoyancy, and chemical reactions. Use diagrams to illustrate how the lava lamp works.
- Demonstrate the Process: Be ready to demonstrate how to add the Alka-Seltzer and explain what is happening at each step.
- Safety First: Although this is a safe project, always supervise younger children. Make sure the bottle is stable and won’t easily tip over.
- Experiment with Colors: Try different color combinations or layered colors.
- Vary the Ingredients: See what happens if you use different types of oil, or if you add more or less food coloring.
Making it Educational
Your lava lamp can be a focal point for explaining:
- Density: How different substances have different weights for the same amount of space.
- Immiscible Liquids: Liquids that don’t mix, like oil and water.
- Chemical Reactions: How substances can change when they mix, creating new things like gas.
- Buoyancy: The ability of an object to float in a liquid or gas.
Troubleshooting Your Lava Lamp
Here are some common issues and how to fix them:
| Problem | Possible Cause | Solution |
|---|---|---|
| Not bubbling enough | Not enough Alka-Seltzer; water too cold | Add more Alka-Seltzer; ensure water is at room temperature. |
| Bubbles too fast, then stop | Too much Alka-Seltzer added at once | Break Alka-Seltzer into smaller pieces; add them one at a time. |
| Oil and water mixing | Unlikely with standard oil and water, but check purity | Ensure you are using pure oil and water. Some contaminants could affect the layering. |
| Color not sinking | Food coloring too concentrated; not enough water | Add a little more water if there’s plenty of space. If the color is very concentrated, it might sink slowly. |
| “Lava” blobs are too small | Not enough gas production | Add larger pieces of Alka-Seltzer or more pieces. |
Long-Term Lava Lamp Fun
While this version is temporary and requires Alka-Seltzer to keep going, it’s a great way to learn the principles. For a more permanent classic lava lamp experiment, you’d typically need a heat source and a wax-based liquid, which is more complex to build safely at home.
Frequently Asked Questions (FAQ)
Can I reuse the lava lamp?
Yes, you can reuse your lava lamp as long as you have more Alka-Seltzer tablets. The oil and water mixture can be kept in the sealed bottle.
Why doesn’t the oil and water mix?
Oil and water don’t mix because water molecules are polar (they have slight positive and negative ends) and attract each other, while oil molecules are nonpolar and don’t attract each other. This is a fundamental concept in chemistry.
Can I use something other than Alka-Seltzer?
While Alka-Seltzer is the easiest and most common ingredient for this DIY project, you could theoretically use other effervescent tablets that produce carbon dioxide. However, the specific formulation of Alka-Seltzer is ideal for this experiment.
Is this a safe science project?
Yes, this project is very safe. The ingredients are common household items, and there are no hazardous chemicals involved. Adult supervision is always recommended, especially when handling bottles and pouring liquids.
What is the difference between this and a store-bought lava lamp?
Store-bought lava lamps typically use heat to melt and move wax. Our DIY lava lamp uses a chemical reaction from Alka-Seltzer to create the movement. This makes it a temporary but very effective demonstration tool for scientific principles.
How do I dispose of the lava lamp mixture?
You can carefully pour the mixture down the drain with plenty of running water. The oil will be diluted, and the water and food coloring are safe for disposal.
Can I make a lava lamp without oil?
This specific oil and water lamp design relies on the density difference between oil and water. You could experiment with other pairs of immiscible liquids, but oil and water are the most accessible and safest for a science project.
What if I want a permanent lava lamp?
Creating a permanent lava lamp similar to commercial ones involves using a specific type of wax, a heat source (like a light bulb), and carefully balanced liquid densities. This is a more advanced project and requires careful attention to safety and material selection, often involving chemicals not readily available for simple DIY projects. The Alka-Seltzer version is excellent for demonstrating the principles in a safe and accessible way.
Why is it called a “lava” lamp?
It’s called a lava lamp because the rising and falling blobs of colored wax resemble molten lava flowing. Our homemade lamp instructions create a similar visual effect using colored water.
This project is a fantastic way to bring science to life! It’s an engaging activity that’s easy to set up and offers a clear visual representation of key scientific concepts. Enjoy creating your own bubbling masterpiece!