
Does your car’s nighttime visibility look dim and cloudy? Those hazy, yellow headlights don’t just look bad; they can actually make driving at night much more dangerous. Sunlight, road grime, and age slowly eat away at your plastic headlight lenses, dimming your beams.
Choosing the right headlight restoration kit can feel like navigating a minefield. You see so many brands promising magic results, but which ones actually work? Will the cheap kit fail in a month, or will the expensive one be overkill? Dealing with cloudy headlights is frustrating, and buying the wrong product wastes your time and money.
This guide cuts through the confusion. We will break down exactly what you need to look for in a kit, explain the simple steps involved, and help you pick the perfect solution for crystal-clear headlights. Get ready to see the road clearly again!
Top Headlight Restoration Kit Recommendations

- KIT CONTENTS - Each headlight restoration kit includes (8) Step 1 Oxidation Removing Wipes, (1) Step 2 Sanding Kit, and (2) Step 3 Ceramic Coating Wipes.
- LASTS AS LONG AS YOU OWN YOUR VEHICLE! - This is a CERAMIC coating for cars that chemically bonds to your headlights and provides UV protection for as long as you'll own your vehicle.
- NO POWER TOOLS REQUIRED - Everything is included in the kit for your car. There are no tools required that could potentially damage your headlights or paint.
- RESTORES AND PROTECTS FROM UV! - Our CERAMIC coating wipes provide a layer of UV protection that will last as long as you own your vehicle. We believe in providing our customers the best products on earth, the first time.
- 3 EASY STEPS! - Cerakote's Headlight Restoration Kit is a simple, 30 minute process. Step 1: Our Oxidation Remover wipes remove stubborn oxidation. Step 2: Using our supplied sanding materials, remove any remaining deep oxidation. Step 3: Cerakote's industry leading ceramic restores the headlight to like-new!

- KIT INCLUDES: 1 - Disc Pad Holder, 3.25 in (8,2 cm) 6 - 3M Gold Sanding Discs 500 Grit, 3 in (7,6 cm) each 4 - 3M White Finishing Discs 800 Grit, 3 in (7,6 cm) each 1 - 3M Trizact Refining Disc 3000 Grit, 3 in (7,6 cm) 2 - 3M Quick Headlight Clear Co
- KITS CONTAIN masking tape, light sanding discs, wax protectant and more
- FOR USE ON plastic lenses – headlights, taillights, fog lights, directional lights and more
- 3M abrasive technology removes yellowing and buildup without damaging plastic lens surface
- Easy to use – choose a kit with no tools required, or for use with a common household drill

- KIT INCLUDES: 1 - 3M Trizact Refining Disc 1000 grit, 3 in/7.6 cm 1 - 3M Trizact Refining Disc 3000 grit, 3 in/7.6 cm 2 - 3M Quick Headlight Clear Coat Wipes 1 - Foam Pad with 3M Hookit Attachment, 3 in/7.6 cm 1- Disposable Glove
- FOR USE ON plastic lenses – headlights, taillights, fog lights, directional lights and more
- 3M abrasive technology removes yellowing and buildup without damaging plastic lens surface
- Easy to use – choose a kit with no tools required, or for use with a common household drill
- Save hundreds vs. replacing headlight lenses
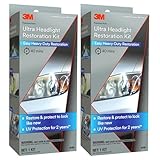
- 2-PACK VALUE: Includes 2 complete Ultra Headlight Restoration Kits (Part 39195) for restoring multiple vehicles or keeping a spare in your garage.
- PRO-GRADE CONTENTS (PER KIT): Disc pad holder + 6 500-grit discs + 4 800-grit discs + 1 3000-grit refining disc + 2 Quick Headlight Clear Coats (3 in discs).
- REMOVES CLOUDY YELLOWED HAZE: Light abrasive system helps remove yellowing, haze, and buildup on plastic lenses for clearer-looking headlights.
- FOR PLASTIC LENSES: Use on headlights, taillights, fog lights, and directional lights—ideal for cars, trucks, SUVs, motorcycles, and trailers (use as directed).
- EASY STEP-BY-STEP: Kits include complete directions plus masking tape, sanding discs, and wax protectant; use with or without a common household drill (not included).
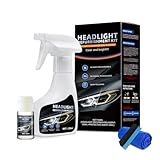
- Make Your Vision Brighter:This New Automotive Headlight Restoration Kits effectively clears up yellowing and cloudiness, shine your car headlamp in just minutes, instantly improving brightness and visibility
- Fast-Acting: This instant headlight oxidation removal spray works in minutes. This headlight cleaning kit quickly and easily resolves cloudy or yellowed headlights, saving you time
- Easy to Use: Simply shake 120ml of headlight restoration fluid, spray on your headlights, and wipe with a microfiber towel. No special tools or complicated steps are required, making this headlight repair kit easy for everyone
- Wide Compatibility: This headlight cleaning kit is suitable for both plastic and glass lenses on a variety of vehicle models, ensuring versatility for daily maintenance. This universal headlight restoration kit, suitable for all vehicle models, is a great addition to any car maintenance routine
- Lnstructions For Use: Step 1-Cleaning: Evenly spray the cleaner onto the headlight surface. Let it sit for 30 seconds, then wipe with a clean towel. Step 2-Rinsing: Thoroughly rinsse the headlight surface with clean water to remove all cleaner, then use a dry cloth to wipe away any water spots. Step3-Restoration: Squeeze an appropriate amount of crystal coating liquid onto the sponge applicator, wipe the headlight surface carefully in one direction to complete restoration.( Tip: when applying the coating liquid, do not scrub back and forth. Complete the wiping in a single pass in the same direction to protect the coating layer.)

- Complete Set: Exquisite toolbox, 800g headlight repair fluid, atomizing cup + 2 lids set(contains 2 lid silicone rings), 6 sandpapers(180# – 280# – 320# – 600# – 800# – 1200#), emery board, funnel, guard tape, power supply set (110V power cord + car power cord), instruction manual. All the tools you need are included in one kit, no additional purchases are required.
- Effective Solution: The headlight repair kit can effectively eliminate scratches/cracks of car headlights and solve the problems of yellowing, blurring, oxidation, stains, aging, etc, makes it easy for you to bring back the crystal-clear shine of your vehicle's headlights, restore headlight clarity, increase visibility and safety. After repair, it can protect your car headlights from yellowing and ultraviolet damage, help delay their aging and extend the service life of car headlights.
- How It Works: The working principle of our kit is By grinding, the damage layer caused by oxidation or scratches on the surface of the headlight can be removed to make the surface smooth and cover them with a new protective film. After the repair, the headlight lamp surface is smooth, bright, uniform, flawless, like new. Please note that polishing is the most important step. After polishing, there are no scratches, trachomes or cracks and all brightening is correct.
- Easy and Convenient: The repair liquid is high transparency, strong adhesion, 800g high-capacity can repair about 48 - 70 headlights. No need to remove headlights, no high temperature baking lights, two power sources can be used at any time whether at home or outside. Easy to use, professional results without prior knowledge. Eliminates the cost of replacing headlights and saves money.
- Wide Application:Our headlight repair set is professionally made, stable performance, has long service life. We focus on the quality and details of our products, and strive to satisfy every customer with our high-quality products. If you have any questions or dissatisfaction with the product, please talk to communication us.

- Easy 3 Steps: Wash lens for free of dust or dirt. Step 1: Wet sanding lights with souring pads, P1000, P3000, P5000 discs. Step 2: Polish it with foam pad and compound. Wash it and wipe dry. Step 3: Seal with UV block coat. Enjoy crystal-clear results
- Restores Headlight: Provide a deep clean to heavy yellowed, cloudy, dull and hazed lenses. Remove haze, oxidation, cloudiness and corrosion. Restore the clarity and shine to see down-road at night. Enhance visibility and safety for night driving
- Save More: POLIWELL headlights restore kit easy to store and enough to restore about 2 lenses. Designed for use on headlights, taillights, fog lights, directional lights and more. Instructions were clear printed on the packaging
- Professional Results: With a common household drill, it is easy to restore the heavy cloudy and scratchs in your headlights. Maintain and protect all types of smooth, shiny plastic and acrylic headlights
- Excellent Diy Set: 2 pcs 3 in 800 grit scrubber pads, 4 pcs each of 1000, 3000 and 5000 grit sanding discs, back-up sanding pad, drill attachment, soft sponge interface pad, 10 meter masking tape, spray bottle, polishing compound and UV coating

- RESTORES FOGGY HEADLIGHTS: Quickly restore and eliminate oxidized and yellowed lenses for a crystal clear, like-new appearance
- BOOST VISIBILITY: Clear and polished headlights shine brighter for maximum visibility, day to night enhancing performance during rain and fog for safer drives
- SAVE ON COSTLY REPLACEMENTS: No need to replace your headlights with expensive parts. Bring back brightness and clarity with this affordable at-home solution that delivers lasting results
- LASTING RESULTS: The included sealing wipe locks in clarity defending against harsh UV rays, yellowing and oxidation, providing protection from future damage
- COMPLETE DIY KIT: Contains everything you need including precision sanding pad and lubricant, headlight clarifying compound, and sealant wipes, for professional results in under 30 minutes
Headlight Restoration Kit Buying Guide: See Clearly Again
Yellow, hazy headlights make your car look old. They also make driving at night dangerous. A headlight restoration kit can fix this problem. This guide helps you choose the best kit.
Key Features to Look For
When buying a kit, look for these important things. They tell you how well the kit will work.
- Completeness: Does the kit include everything you need? You want sandpaper of different grits, a polishing compound, and a UV sealant. A complete kit saves you trips to the store.
- UV Protection: This is very important. The sealant protects the clear plastic from the sun’s rays. Good UV protection keeps your headlights clear for much longer.
- Ease of Use: Some kits require power tools. Others you can finish by hand. Choose one that matches your comfort level and tools.
- Durability of Results: Read reviews. How long do the results last? A good kit should keep the lenses clear for at least a year or more.
Important Materials in the Kit
The materials inside the box matter a lot. They determine how much work you do and how good the final shine is.
The sanding paper must be high quality. Cheap sandpaper tears easily. You need several different levels of grit. You start with a rougher grit to remove the worst damage. Then you move to finer grits for smoothing.
The polishing compound should be strong enough to remove fine scratches left by the final sanding step. Finally, the sealant is crucial. Look for one that clearly states it offers strong UV blocking protection.
Factors That Improve or Reduce Kit Quality
What makes one kit better than another? It often comes down to two things: preparation and the sealant quality.
Improving Quality: Preparation is King
The quality of your prep work decides the outcome. If you do not clean the headlight very well before starting, the product will not stick right. Also, using masking tape correctly around the headlight edges protects your car’s paint. A slow, careful sanding process yields the best results.
Reducing Quality: Weak Sealants
The biggest quality reducer is a poor UV sealant. If the sealant is weak, the sun will quickly turn your newly cleaned lenses yellow again. This happens in just a few months. Always check if the sealant is a dedicated, high-quality liquid or wipe.
User Experience and Use Cases
Headlight restoration kits are generally for DIY (Do It Yourself) car owners. They are a great budget alternative to buying new headlights.
User Experience: Most users find the process takes about one to two hours per headlight. It requires patience, especially during the sanding stage. If you follow the instructions exactly, the results are usually very rewarding. You feel a real sense of accomplishment when you see the clear difference.
Use Cases: These kits are perfect for cars that sit outside a lot. They work best on moderate oxidation—when the headlights look hazy or slightly yellow. If the plastic is cracked or deeply pitted (where you can feel rough holes), a kit might not bring them back to perfect condition. For severe damage, replacement might be necessary.
10 Frequently Asked Questions (FAQ) About Headlight Restoration Kits
Q: How long does a restored headlight last?
A: If you apply a good UV sealant correctly, the results usually last between one and three years. Sunlight is the main enemy.
Q: Do I need power tools for these kits?
A: Many kits let you finish by hand. Kits that use a drill attachment can speed up the polishing process, but they require a gentler touch.
Q: Can I use this kit on plastic taillights too?
A: Yes, most kits work fine on taillights. Taillights often do not face the sun as directly, so the results may last even longer.
Q: What if my headlights are deeply scratched, not just yellow?
A: Kits handle light to moderate hazing well. Deep scratches or pitting might need the roughest sandpaper grit, and you must sand deeper to reach the clear plastic layer underneath.
Q: Is the sanding process dangerous for the headlight lens?
A: No, the sanding process is safe if you use the grits in the correct order. You are actually removing the damaged, oxidized layer.
Q: What is the most important step in the whole process?
A: Applying the final UV protective coating is the most critical step. It locks in your hard work.
Q: Can I restore headlights that have been previously restored?
A: Yes, you can usually restore them again. You must first carefully remove the old, failing sealant before starting the sanding process.
Q: How do I know which sandpaper grit to start with?
A: Start with the roughest grit provided in the kit. If that grit removes the yellowing easily, move to the next finer grit. If it struggles, keep using that grit for longer.
Q: Does this work on glass headlights?
A: No. These kits are specifically designed for modern plastic (polycarbonate) headlight lenses. Glass headlights rarely haze up like plastic ones do.
Q: What should I use to clean the headlight before starting?
A: Use simple soap and water first. Then, wipe the headlight down with rubbing alcohol or a dedicated surface prep cleaner. This removes all wax and oils.