
What is the correct distance for a heat lamp from chicks? The ideal distance for a heat lamp from chicks is typically 12 to 18 inches (30 to 45 cm), but this can vary based on the lamp’s wattage, the number of chicks, and ambient temperature. Crucially, this distance allows for temperature regulation for chicks.
Raising healthy chicks starts with providing them with the right environment. A primary concern for any poultry keeper is ensuring their newly hatched flock is kept warm enough without overheating. This is where the humble heat lamp comes into play, but knowing the correct heat lamp height for chicks is crucial. Too close, and you risk scorching their delicate down; too far, and they could become chilled, leading to illness or even death. This comprehensive guide will delve into everything you need to know about chick care heat lamp placement, safe heat lamp distance for chicks, and how to maintain the perfect brooder temperature.
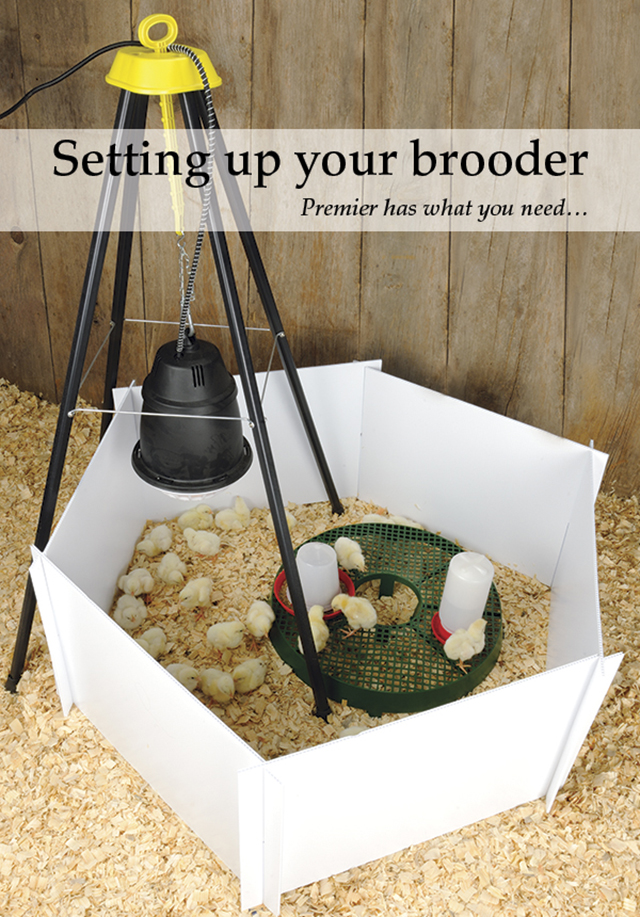
Image Source: www.premier1supplies.com
The Importance of Proper Chick Heating Distance
Chicks, straight from the egg, are unable to regulate their own body temperature. They rely entirely on an external heat source to stay warm. In the wild, this would be the mother hen. In a brooder, this responsibility falls to us and our chosen chick heat source distance. A consistent and appropriate temperature is vital for their growth, immune system development, and overall well-being.
- Metabolism and Growth: Young chicks have high metabolisms and require consistent warmth to convert food into energy for growth.
- Immune System: A properly heated chick is less stressed and has a stronger immune system, making them more resistant to diseases.
- Activity Levels: When too cold, chicks will huddle together, often under the heat source, preventing them from moving around, eating, and drinking. When too hot, they will spread out and pant.
Deciphering Chick Behavior: A Thermometer in Action
Your chicks are the best indicators of whether your heat lamp is at the right height. Observing their behavior is paramount to successful temperature regulation for chicks.
Signs of Proper Warmth:
- Evenly Distributed: Chicks will be spread out comfortably throughout the brooder.
- Active and Alert: They will be pecking at food, drinking water, and exploring their environment.
- Occasional Dust Baths: A sign of contentment and healthy activity.
Signs of Being Too Cold:
- Huddling: Chicks will be piled tightly together, often directly under the heat lamp.
- Chirping: Constant, loud chirping can indicate they are cold and seeking reassurance.
- Lethargy: They will appear sluggish and reluctant to move.
- Shivering: Visible trembling is a clear sign of cold.
Signs of Being Too Hot:
- Panting: Chicks will be opening their beaks and breathing rapidly.
- Spreading Out: They will be spread out as far away from the heat source as possible, often with their wings slightly raised.
- Reduced Activity: They may appear sluggish due to the heat stress.
- Decreased Drinking: Overheating can lead to dehydration.
Establishing the Correct Brooder Temperature
The optimal brooder temperature for chicks isn’t a static number; it changes as they grow. Here’s a general guideline for the first few weeks:
- Week 1: 95°F (35°C)
- Week 2: 90°F (32°C)
- Week 3: 85°F (29°C)
- Week 4 and beyond: Gradually reduce by 5°F (3°C) each week until they can tolerate room temperature, typically around 70-75°F (21-24°C).
It’s essential to have a reliable thermometer in the brooder to monitor the temperature accurately. Place the thermometer at chick level, away from the direct heat source.
Measuring Brooder Temperature Accurately
A simple meat thermometer or a digital thermometer with a probe can be used. Place the probe at the level where the chicks are spending most of their time. For a more accurate reading, check the temperature in different areas of the brooder:
- Directly under the lamp: This will be the warmest spot.
- At the edge of the warm zone: Where chicks can move if they get too hot.
- In the cooler zone: Where chicks can retreat if they find the main area too warm.
This multifaceted approach to temperature monitoring is key for effective brooder lamp guidelines.
Calculating the Right Heat Lamp Height for Chicks
The heat lamp height for chicks is directly related to the wattage of the bulb and the type of fixture you are using. A higher wattage bulb will emit more heat, requiring it to be placed further away.
General Guidelines for Heat Lamp Height:
- 250-watt bulb: Start at 18-24 inches (45-60 cm) above the chicks.
- 125-watt bulb: Start at 12-18 inches (30-45 cm) above the chicks.
Important Note: These are starting points. Always adjust based on your chicks’ behavior and thermometer readings. This is where safe heat lamp distance for chicks truly comes into play, balancing warmth with safety.
Factors Influencing Heat Lamp Distance:
- Wattage of the Bulb: Higher wattage bulbs produce more heat. Always use bulbs specifically designed for brooder lamps or reptile terrariums. Avoid standard household incandescent bulbs as they can be unpredictable.
- Number of Chicks: More chicks generate more body heat. A larger flock might require the lamp to be slightly higher initially, or a wider spread of heat.
- Ambient Room Temperature: If the room where the brooder is located is cooler, you might need to lower the lamp slightly (while still observing chicks) or use a slightly higher wattage bulb. Conversely, in a warmer room, you might need to raise it.
- Brooder Size and Ventilation: A larger brooder with good ventilation will have a more even temperature distribution. Poor ventilation can lead to pockets of heat, making precise placement even more critical.
- Type of Fixture: Some heat lamps are designed with adjustable heights, making it easier to fine-tune the chick heating distance. Clamp-on lamps are popular for their versatility in brooder lamp placement.
Safe Placement of Your Brooder Lamp
Beyond the vertical height, brooder lamp placement also involves positioning it safely within the brooder to prevent accidents.
Safety First: Preventing Fires and Burns
Heat lamps, especially those with exposed bulbs, can be a fire hazard if not installed correctly.
- Secure Fixture: Ensure the clamp-on fixture is securely attached to the side of the brooder. It should not be able to easily fall into the bedding or onto the chicks.
- Avoid Contact with Bedding: Never allow the bulb or any metal parts of the fixture to come into direct contact with the bedding material (like pine shavings or straw). This is a major fire risk.
- Consider a Protective Guard: Some heat lamps come with wire cages to protect the bulb and prevent chicks from touching it. This is highly recommended.
- No Overhead Obstructions: Ensure there are no low-hanging objects directly above the heat lamp that could catch fire.
Brooder Lamp Guidelines for Placement:
- Centralized Heat Source: Position the lamp so it provides a warm zone in one area of the brooder, with cooler areas available for the chicks to retreat to. This allows for self-regulation.
- Avoid Direct Drafts: Do not place the brooder in a drafty area, as this can create uneven temperatures and chill the chicks.
- Check for Wobble: Ensure the lamp fixture is stable and won’t shake or fall, especially if the chicks are active.
Adjusting the Heat Lamp for Optimal Growth
The beauty of using a heat lamp is its adjustability. You’ll need to make small adjustments daily, especially in the first week, to fine-tune the chick heating distance and ensure optimal conditions.
Daily Monitoring and Adjustment Routine:
- Morning Check: Observe chick behavior. Are they spread out or huddled?
- Mid-day Check: Re-check the temperature with your thermometer and observe behavior again.
- Evening Check: Before you go to bed, ensure the chicks are settled and comfortable.
- Overnight Check: If possible, a quick check before you sleep can catch any issues early.
Scenario-Based Adjustments:
- If chicks are huddled under the lamp: Lower the lamp slightly (1-2 inches) or increase the wattage of the bulb if you have spares.
- If chicks are panting and spread out far from the lamp: Raise the lamp slightly (1-2 inches) or consider using a lower wattage bulb.
- If chicks are active and spread comfortably: You’ve likely found the sweet spot! Continue to monitor.
This iterative process of observation and adjustment is fundamental to effective chick care heat lamp management.
Alternative and Supplemental Heat Sources
While heat lamps are common, they aren’t the only option. Some keepers prefer alternative methods or use heat lamps in conjunction with other sources for redundancy.
Heat Mats and Plates:
- How they work: These provide radiant heat from below, mimicking a mother hen’s warmth.
- Pros: Generally considered safer than heat lamps as they don’t have exposed bulbs and are less of a fire risk. They provide a more natural warmth distribution.
- Cons: Can be more expensive to purchase initially. If the mat fails, you lose your sole heat source. Chicks can sometimes crowd the plate, leading to overheating if not managed.
- Placement: Placed under a portion of the brooder, allowing chicks to move off when too warm.
Ceramic Heat Emitters (CHEs):
- How they work: These screw into standard light sockets and emit infrared heat without any light.
- Pros: No light disruption for sleeping chicks, which can be beneficial for their natural cycles. They also tend to last longer than traditional bulbs.
- Cons: Can get very hot and still pose a burn or fire risk if not properly guarded and positioned. The heat can be intense.
- Placement: Similar to heat lamps, they need to be hung at an appropriate height and secured.
Red or Blue Brooder Bulbs:
- How they work: These are specialized incandescent bulbs that emit a colored light. Red is common, as it’s thought to have a calming effect.
- Pros: Can reduce pecking behavior among chicks.
- Cons: Still a heat source that needs proper placement. The color can sometimes mask signs of distress if you’re not paying close attention.
The Importance of Redundancy:
It’s always wise to have a backup heat source. Power outages can happen, or a bulb can burn out unexpectedly. Having a second heat lamp with a different wattage, or a heat mat ready, can save your flock. This ensures consistent temperature regulation for chicks even during unexpected events.
Troubleshooting Common Heat Lamp Issues
Even with the best intentions, you might encounter some hiccups. Here’s how to address them:
Chicks Constantly Moving to the Cooler Zone:
- Problem: The heat source is likely too hot or too close.
- Solution: Raise the lamp 1-2 inches or check your thermometer reading. If using a bulb that’s too powerful, switch to a lower wattage bulb.
Chicks Clustering Directly Under the Lamp and Chirping Loudly:
- Problem: The chicks are too cold.
- Solution: Lower the lamp 1-2 inches or consider a slightly higher wattage bulb. Ensure the ambient room temperature isn’t too low.
Bedding Smells Burnt or Is Discolored:
- Problem: The heat lamp is too close to the bedding, posing a fire risk.
- Solution: Immediately raise the lamp and ensure it is not touching or too near any combustible material. Check the fixture for any signs of damage. Always double-check your brooder lamp guidelines for safe distances.
Lamp Flickering or Not Staying On:
- Problem: Could be a faulty bulb, loose connection, or a problem with the fixture.
- Solution: Turn off the power, let the bulb cool, and check the bulb is screwed in tightly. If it persists, replace the bulb or fixture. This highlights the importance of regularly inspecting your equipment.
Frequently Asked Questions (FAQ)
Q1: Can I use a regular household light bulb as a heat source for chicks?
A1: It’s strongly discouraged. Household bulbs are not designed for continuous use as a heat source and can be unpredictable in their heat output, posing fire risks and potentially overheating or chilling chicks. Use bulbs specifically designed for brooder lamps or reptile terrariums.
Q2: How do I know if the heat lamp is working correctly?
A2: Observe your chicks! They are the best indicators. If they are spread out comfortably, active, and not panting or huddling excessively, your heat lamp is likely set at the correct distance and temperature. Use a thermometer for precise readings.
Q3: My chicks seem to be fighting or pecking each other. Could it be related to the heat lamp?
A3: Yes, temperature can influence chick behavior. Overcrowding and the wrong temperature (too hot or too cold) can lead to stress and pecking. Ensure proper brooder lamp placement provides a comfortable temperature gradient, and that the brooder is not overcrowded. Using red bulbs can sometimes help reduce pecking.
Q4: Can I leave a heat lamp on 24/7?
A4: Yes, heat lamps for chicks need to be on continuously until they are old enough to regulate their own body temperature, typically around 4-6 weeks of age. However, always ensure there are cooler areas for them to escape the heat.
Q5: What is the best bedding for a brooder with a heat lamp?
A5: Clean, dry pine shavings are a popular choice. Avoid cedar shavings, as their aromatic oils can be harmful to chicks. Ensure the bedding is at least 2-3 inches deep to provide insulation and allow for natural scratching behavior. Remember to keep the bedding dry, especially around waterers.
Q6: How do I ensure consistent temperature in a large brooder with multiple chicks?
A6: In larger brooders, you might need to use more than one heat lamp or a larger heat mat. Ensure the heat sources are spread out to create a consistent warm zone, and always provide cooler areas for retreat. Regular monitoring with a thermometer in multiple locations is crucial. This is part of comprehensive brooder lamp guidelines.
By carefully considering these guidelines and continuously observing your chicks, you can provide them with a safe, warm, and nurturing environment, setting them up for a healthy start in life. The optimal heat lamp distance for poultry is achieved through attentive observation and timely adjustments.