
The ideal distance to keep a heat lamp from chicks is typically 18 to 24 inches. This distance is crucial for maintaining the proper baby chick temperature and ensuring their well-being.
Bringing home new chicks is an exciting time for any poultry keeper. These tiny, fluffy creatures are adorable and a joy to watch. However, they are also incredibly fragile and have very specific needs, with temperature being the most critical. Chicks, unlike adult birds, cannot regulate their own body temperature. They rely entirely on an external heat source to stay warm and healthy. This is where the heat lamp comes in. But how far should this essential piece of equipment be from your delicate charges? Getting this chick heat lamp distance wrong can have serious consequences, ranging from chilling and illness to overheating and death. This guide will delve into the specifics of poultry heat lamp positioning, helping you create the perfect environment for your growing flock.
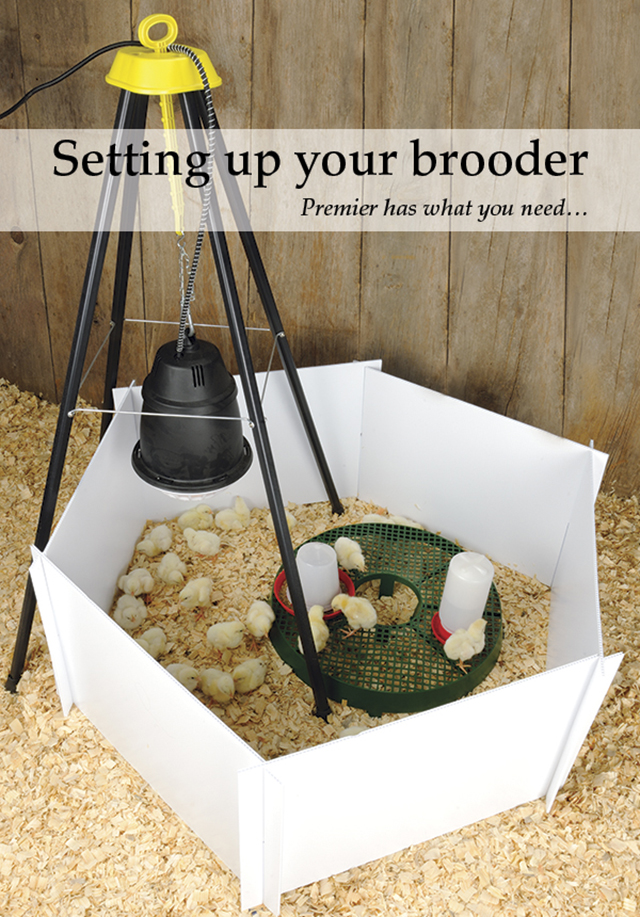
Image Source: www.premier1supplies.com
The Importance of Proper Heat Regulation for Chicks
Chicks are born with an underdeveloped ability to generate and retain body heat. Their downy covering offers minimal insulation compared to adult feathers. Therefore, they need a warm environment, especially during their first few weeks of life. The chick brooder temperature is paramount for their survival and growth. A brooder is essentially a safe, confined space designed to mimic the warmth of a mother hen.
What Happens When the Temperature is Wrong?
- Too Cold: If chicks are too cold, they will huddle together in a tight mass directly under the heat source. They may chirp incessantly, appear listless, and shiver. Chilled chicks are more susceptible to diseases like coccidiosis and can suffer from poor growth and even death. This is a critical indicator that your heat lamp height for chicks is too high, or the lamp itself is not providing enough warmth.
- Too Hot: Overheating is just as dangerous, if not more so. Chicks that are too hot will spread out from the heat source, pant, and may appear lethargic. They might try to get as far away from the heat as possible within the brooder. Overheated chicks can become dehydrated and suffer from heatstroke. This suggests your chick heat source distance is too close, or the lamp is too powerful.
Determining the Correct Heat Lamp Height for Chicks
The heat lamp height for chicks isn’t a fixed measurement for all situations. It’s a dynamic aspect that needs careful observation and adjustment. The goal is to create a temperature gradient within the brooder, allowing chicks to move to a warmer or cooler spot as needed.
The Role of Thermometers
A reliable thermometer is your best friend when regulating chick heat. Place a thermometer in the brooder, ideally at chick level. Many keepers use a digital probe thermometer or an infrared thermometer.
- Placement: Position the thermometer directly under the heat lamp, at the edge of the warmest zone, and also at the cooler edge of the brooder. This gives you a clear picture of the temperature range available to the chicks.
Initial Setup and Adjustment
When you first set up your brooder with the heat lamp, assume a starting height of about 18 to 24 inches from the floor of the brooder to the bottom of the bulb.
- Turn on the heat lamp.
- Observe your chicks. After about an hour, check their behavior.
- If they are huddled tightly and chirping excessively: The lamp is likely too high or not warm enough. Lower it gradually (2-3 inches at a time) or ensure you are using the correct wattage bulb.
- If they are spread out as far as possible and panting: The lamp is too low or too hot. Raise it gradually (2-3 inches at a time).
- If they are spread out comfortably, with some under the lamp and some further away, and appear content: You have likely found the optimal safe distance for heat lamp.
The “Chicks as Thermometers” Method
While thermometers are excellent tools, your chicks themselves are the ultimate indicators. Their behavior is the most direct feedback you’ll receive about the brooder’s temperature.
- Comfortable Chicks: They will be spread out loosely, with some choosing to be closer to the heat and others further away. They will be active, eating, drinking, and exploring their brooder.
- Chilled Chicks: They will be in a tight ball under the heat source. They may appear sleepy or lethargic.
- Overheated Chicks: They will be spread out as far from the heat as possible, with their wings slightly lifted, and may be panting.
Creating a Temperature Gradient
The most effective brooder setup provides a temperature gradient. This means there’s a warmer area directly under the heat lamp and a cooler area at the opposite end of the brooder. This allows chicks to self-regulate their body temperature by moving to the area that suits them best.
Why is a Gradient Important?
A gradient is crucial because it caters to individual chicks’ needs. Not all chicks will require the same amount of heat at any given moment.
- Temperature Zones:
- Warmest Zone (directly under the lamp): This is for the youngest and weakest chicks, or on cooler days.
- Medium Zone (near the edge of the lamp’s warmth): For active chicks that still need supplemental heat.
- Coolest Zone (farthest from the lamp): For slightly older chicks or on warmer days, allowing them to cool down if they get too warm.
Factors Influencing Heat Lamp Height
Several factors can influence how high or low your heat lamp needs to be. It’s not just about the wattage of the bulb; it’s about the overall environment.
1. Bulb Wattage
Heat lamps come in various wattages, most commonly 250-watt bulbs designed specifically for poultry.
- Higher Wattage: A higher wattage bulb will produce more heat, requiring a greater chick heat source distance to achieve the same temperature as a lower wattage bulb.
- Lower Wattage: Conversely, a lower wattage bulb will produce less heat, necessitating a closer proximity or a higher wattage bulb if the ambient temperature is very cold.
2. Ambient Room Temperature
The temperature of the room where the brooder is located plays a significant role.
- Cold Room: In a colder garage or shed, you might need to keep the lamp slightly lower or use a higher wattage bulb than in a heated house.
- Warm Room: If the room is already quite warm, you might need to raise the lamp higher or consider a lower wattage bulb to avoid overheating.
3. Brooder Size and Design
The size and materials of your brooder can also affect heat distribution.
- Small Brooder: In a small confined space, the heat will be more concentrated, so you’ll likely need to keep the lamp higher.
- Large Brooder: In a larger brooder, the heat may dissipate more quickly, potentially allowing for a slightly lower lamp height.
- Ventilation: Ensure your brooder has adequate ventilation, but avoid direct drafts on the chicks. Poor ventilation can trap heat and lead to overheating.
4. Age of the Chicks
The temperature requirements change as chicks grow. Their ability to regulate their own body temperature improves with age.
- Day 1-3: Chicks need the warmest environment, typically around 95°F (35°C) directly under the lamp. This often means the lamp is closest during this period.
- Week 1: Reduce the temperature by about 5°F (3°C) per week.
- Week 2: Around 90°F (32°C).
- Week 3: Around 85°F (29.5°C).
- Week 4: Around 80°F (27°C).
- Week 5 onwards: Continue gradually reducing the temperature until they no longer need supplemental heat, usually around 6-8 weeks of age.
This gradual reduction means you will be determining chick heat lamp height by slowly raising the lamp each week as they get older.
Practical Tips for Poultry Heat Lamp Positioning
Achieving the correct poultry heat lamp positioning requires attention to detail and ongoing monitoring.
Safety First: Preventing Fires
Heat lamps generate significant heat and can be a fire hazard if not used correctly.
- Secure Mounting: Always use a proper fixture designed for heat lamps. Ensure it is securely attached to the brooder or a stand and cannot fall into the bedding or onto the chicks.
- Bulb Guard: Many heat lamp fixtures come with a wire guard. This guard is essential to prevent the bulb from touching combustible materials like bedding or chick down, and to prevent chicks from coming into direct contact with the hot bulb.
- Away from Flammables: Position the heat lamp away from any flammable materials, including hay, straw, or plastic sheeting.
- Supervision: Never leave a heat lamp unattended for extended periods, especially during initial setup.
Types of Heat Sources
While heat lamps (typically red or clear incandescent bulbs) are common, other options exist.
- Heat Lamps: Most popular, but require careful height management and pose a fire risk.
- Radiant Panel Heaters: Safer, as they don’t get as hot on the surface, and provide a more even heat. They can often be mounted closer to the chicks.
- Brooder Plates: These mimic a mother hen’s underside, providing gentle warmth from below. They are considered very safe and promote natural chick behavior. The height is generally set so the chicks can easily walk under.
If using a brooder plate or radiant panel, the safe distance for heat lamp concept is different. For brooder plates, the height is set so chicks can easily walk under to access the warmth, typically 3-5 inches. The surface of the plate itself should be warm, not hot to the touch.
What About “How Close Can Heat Lamp Be?”
This question is often asked by beginners. The absolute closest a standard 250-watt heat lamp bulb should ever be is about 12 inches, but this is generally too close and only a temporary measure if chicks are severely chilled. The risk of burning or overheating is extremely high at such proximity. The recommended chick heat source distance is always within the 18-24 inch range for optimal comfort and safety.
Monitoring and Adjusting
Regulating chick heat is an ongoing process. Your chicks’ behavior will be your guide.
Daily Checks
Make it a habit to check on your chicks multiple times a day, especially during the first week.
- Behavior: Are they spread out evenly? Are they actively eating and drinking?
- Temperature: If you have a thermometer, check the readings.
- Lamp Functionality: Ensure the bulb is on and the lamp is securely in place.
Adjusting for Weather Changes
If there’s a sudden drop in outdoor temperature, you might need to lower the heat lamp slightly. Conversely, if a warm spell hits, you may need to raise it.
Common Mistakes to Avoid
- Assuming One Size Fits All: Not all chicks, brooders, or environments are the same. Always observe your chicks and adjust accordingly.
- Over-Reliance on Thermometers: While essential, thermometers shouldn’t replace careful observation of chick behavior.
- Ignoring Safety Precautions: Fire is a real risk. Always prioritize safety when using heat lamps.
- Sudden Temperature Changes: Chicks are sensitive to rapid shifts in temperature. Make adjustments gradually.
- Not Graduating Temperatures: Failing to reduce the heat as chicks age can lead to overheating and stress.
Frequently Asked Questions (FAQ)
Q1: How high should a heat lamp be for day-old chicks?
A1: For day-old chicks, the heat lamp should typically be set at 18 to 24 inches from the floor of the brooder to the bottom of the bulb. This provides a starting point to achieve a temperature of around 95°F (35°C) directly under the lamp.
Q2: What if my chicks are all huddled together?
A2: If your chicks are huddled tightly under the heat lamp, chirping excessively, they are too cold. This means the chick heat lamp distance is likely too great, or the bulb wattage is insufficient for the ambient temperature. Lower the heat lamp by 2-3 inches or ensure you are using the correct wattage bulb.
Q3: What if my chicks are spread out and panting?
A3: If your chicks are spread out to the edges of the brooder, trying to get away from the heat, and panting, they are too hot. This indicates the heat lamp height for chicks is too low, or the bulb is too powerful. Raise the heat lamp by 2-3 inches.
Q4: Can I use a regular light bulb as a heat source?
A4: It is not recommended to use a regular household incandescent bulb as the primary heat source for chicks. Use bulbs specifically designed for brooders, typically 250-watt infrared or red bulbs. These provide the necessary warmth without excessive light that can disrupt sleep patterns. However, some keepers use a lower wattage (e.g., 75-100 watt) clear bulb in a separate fixture for supplemental light and very mild warmth, carefully monitoring.
Q5: How long do chicks need a heat lamp?
A5: Chicks generally need supplemental heat for the first 6 to 8 weeks of their lives. This duration depends on the breed of chick and the ambient temperature of their environment. You gradually reduce the heat by raising the lamp or switching to lower wattage bulbs each week as they grow older and develop their own body heat regulation.
Q6: What is the best thermometer for a brooder?
A6: A digital probe thermometer is often considered the best for brooders. The probe can be placed at chick level, allowing for accurate readings of the temperature in their immediate environment. An infrared thermometer is also useful for quickly checking surface temperatures or readings in different spots within the brooder.
Q7: How do I know when to lower the heat?
A7: You should start lowering the heat (by raising the lamp or using a lower wattage bulb) about a week after you get the chicks. Reduce the temperature by approximately 5°F (3°C) each week. Continue this until they no longer show signs of needing supplemental heat, which is usually around 6-8 weeks old. Observe their behavior closely; if they are comfortable and spread out, you are on the right track.
Q8: What is a safe distance for a heat lamp if I’m using a brooder plate?
A8: Brooder plates are different from heat lamps. The height for a brooder plate is typically set so that the chicks can easily walk under it to get warm, usually around 3 to 5 inches. The plate should feel warm to the touch, not hot. The goal is to provide gentle warmth from below, mimicking a hen.
By paying close attention to the behavior of your chicks and adjusting the heat lamp height for chicks accordingly, you can ensure they receive the optimal temperature for healthy growth and development. Remember, observation and gradual adjustments are key to successful regulating chick heat.