
Chicks need a heat lamp for about 4 to 6 weeks, depending on their age, the ambient temperature, and the type of chicks you are raising.
Raising baby chicks is a rewarding experience, but it requires careful attention to their needs, especially when it comes to temperature. Newborn chicks are born without the ability to regulate their own body heat, making them entirely dependent on a reliable heat source. This is where the heat lamp comes in. Providing the correct chick brooding temperature is crucial for their survival and healthy development.
This comprehensive guide will delve into the specifics of how long to keep chicks warm, the ideal temperature gradients, and what signs to look for to know when your chicks are ready to transition away from artificial heat. We will explore the critical aspects of newborn chick care, focusing on the essential role of supplemental heat for chicks and determining the appropriate chick heat lamp duration.
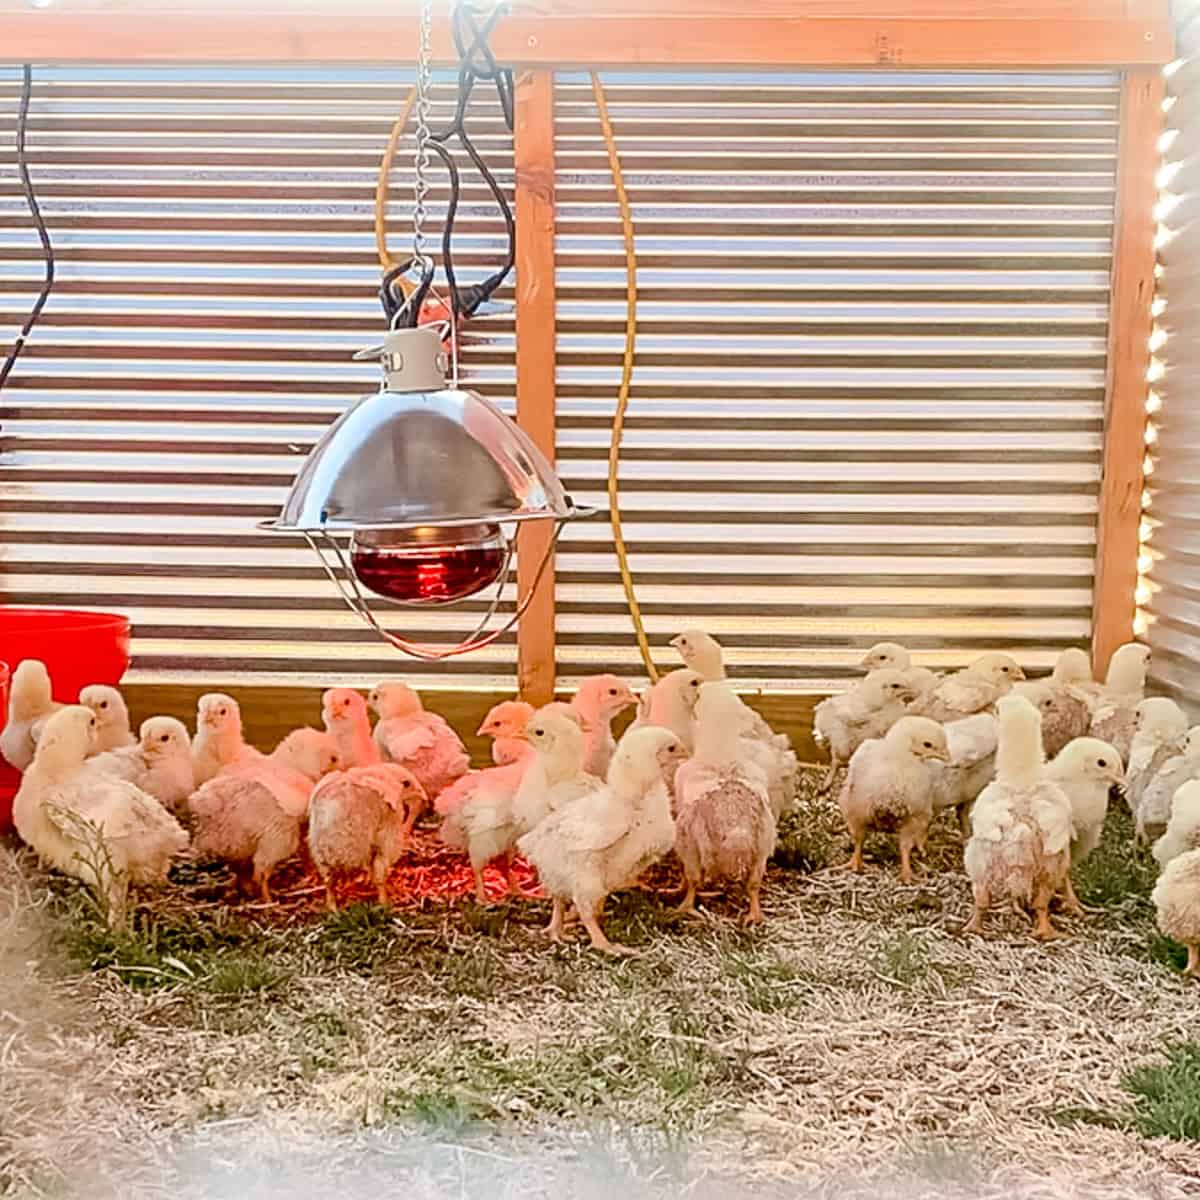
Image Source: ninnescahmade.com
The Crucial Role of Heat for Chicks
Newly hatched chicks are incredibly vulnerable. Their downy covering provides minimal insulation, and their internal systems are still developing. Without a consistent and appropriate heat source, they can quickly suffer from chilling, which can lead to a variety of health problems, including:
- Shivering: This is an obvious sign of being too cold.
- Lethargy and Weakness: Cold chicks will huddle together, appear sleepy, and may struggle to move or eat.
- Poor Growth: Inadequate warmth significantly hampers their ability to digest food and grow.
- Increased Susceptibility to Disease: A chilled chick’s immune system is compromised, making them an easy target for pathogens.
- Higher Mortality Rates: In severe cases, prolonged exposure to cold can be fatal.
This is why a chick heat source time is not optional; it’s a necessity for their initial weeks of life. The primary goal is to mimic the warmth of a mother hen.
How Many Weeks Chicks Need Heat?
Generally, chicks require artificial heat for 4 to 6 weeks. However, this is a guideline, and the exact duration can vary. Several factors influence how long chicks need heat:
- Age: The younger the chick, the more dependent it is on external heat.
- Feathering Development: As chicks grow, their down is gradually replaced by proper feathers, which provide natural insulation.
- Ambient Temperature: If the surrounding environment is already warm, the chicks may need less intense or shorter periods of supplemental heat.
- Breed: Some breeds are naturally hardier than others.
It’s essential to monitor your chicks closely rather than relying solely on a calendar.
Establishing the Ideal Brooding Temperature
The chick brooding temperature is not a static number; it needs to be adjusted as the chicks grow. The key is to provide a temperature gradient within the brooder, allowing chicks to move closer to or further away from the heat source to regulate their own comfort.
Week-by-Week Temperature Guidelines
Here’s a general breakdown of recommended temperatures for the first few weeks:
- Week 1: 95°F (35°C)
- Chicks should be actively moving, peeping normally, and spread out under the heat source, perhaps with a slight tendency to huddle but not tightly packed.
- Week 2: 90°F (32°C)
- Reduce the temperature by about 5 degrees Fahrenheit.
- Week 3: 85°F (29°C)
- Continue to lower the temperature by 5 degrees Fahrenheit each week.
- Week 4: 80°F (27°C)
- Chicks should be exhibiting more independent movement and less reliance on the heat.
- Week 5-6: 75°F (24°C) and below
- By this stage, if the ambient temperature is reasonable (above 60°F or 15°C), most chicks will no longer require the heat lamp.
Table 1: Recommended Chick Brooding Temperatures
| Week | Temperature (°F) | Temperature (°C) |
|---|---|---|
| 1 | 95 | 35 |
| 2 | 90 | 32 |
| 3 | 85 | 29 |
| 4 | 80 | 27 |
| 5 | 75 | 24 |
| 6 | 70-75 | 21-24 |
Note: These are starting points. Adjust based on chick behavior.
How to Measure Brooding Temperature
The most accurate way to measure the chick brooding temperature is to use a reliable thermometer. Place the thermometer at chick level, approximately 2 inches from the floor, directly under the heat source. Avoid relying on the temperature at the top of the brooder or in corners where the chicks are not actively congregating.
Observing Chick Behavior: Your Best Indicator
The most crucial aspect of determining when do chicks not need heat is by observing their behavior. Chicks are excellent communicators when it comes to their comfort levels.
Signs of Being Too Cold:
- Chirping Loudly and Constantly: This can indicate distress from being cold.
- Huddling Tightly Under the Heat Source: While some huddling is normal, a dense, unmoving mass of chicks is a red flag.
- Shivering: Visible trembling is a clear sign of being too cold.
- Lethargy and Reluctance to Move: Cold chicks will often seem subdued and unwilling to explore or eat.
- Piling Up: Chicks may pile on top of each other to try and gain warmth.
Signs of Being Too Hot:
- Panting or Holding Wings Away from Their Bodies: This is their way of trying to cool down.
- Moving to the Farthest Corners of the Brooder: Chicks will actively seek cooler areas if they are overheated.
- Becoming Lethargic and Uninterested in Food or Water: Overheating can also cause dehydration and a lack of energy.
- Spreading Out Widely: While some spreading is good, chicks appearing spread out and lethargic with panting can indicate it’s too warm.
Ideal Chick Behavior:
- Evenly Spread Out: Chicks should be spread out comfortably around the heat source, with some closer and some further away.
- Active and Curious: They should be exploring their brooder, eating, drinking, and interacting with each other.
- Gentle Peeping: Normal, soft peeping indicates contentment.
By consistently observing these behavioral cues, you can fine-tune the temperature and ensure your chicks are always at their optimal comfort level. This attentive approach is key to successful baby chick heat requirements.
The Heat Lamp Itself: Types and Safety
When providing artificial heat for chicks, the heat lamp is the most common method. However, selecting the right type and ensuring safe installation is paramount.
Types of Heat Sources:
- Infrared Heat Lamps: These are the most traditional and widely used. They emit heat but no light, which can be beneficial as it doesn’t disrupt the chicks’ natural sleep cycles. They come in various wattages (e.g., 125W, 250W).
- Brooder Heat Plates: These are panels that chicks can go under to get warm. They provide a more natural, hen-like warmth and are generally considered safer as they emit less intense radiant heat and are less likely to cause burns.
- Radiant Heaters: Some small, specially designed heaters are available for chick brooders, offering a more diffused heat.
Safety Precautions for Heat Lamps:
- Secure Mounting: Heat lamps must be securely attached to a stable fixture (like a clamp or stand) that cannot easily tip over. A falling heat lamp can cause a serious fire hazard and injure or kill the chicks.
- Proper Height: The initial height of the lamp is critical for establishing the correct chick brooding temperature. Start at about 18-24 inches above the chicks. Adjust as needed based on their behavior.
- Non-Flammable Surroundings: Ensure the heat lamp is not near any flammable materials like straw bedding, paper, or plastic.
- Backup Plan: Always have a backup heat source in mind in case your primary lamp fails.
- No Direct Contact: Chicks should never be able to touch the bulb or the heating element of the lamp.
What is the Best Chick Heat Source Time?
The best chick heat source time is dictated by the chicks’ needs, not a fixed schedule. You’ll use the heat lamp from the moment they arrive until they are consistently comfortable without it.
Can I Use a Regular Light Bulb?
No, a regular incandescent light bulb is not a suitable primary heat source for chicks. While it provides some heat, it also emits light, which can disrupt their natural day-night cycles. More importantly, they don’t provide the consistent, deep warmth that chicks require. Specialized brooder bulbs or infrared bulbs are designed for this purpose.
Gradual Transitioning Away from Heat
The process of weaning chicks off the heat lamp should be gradual. Abruptly removing the heat can cause the chicks to chill and suffer the negative consequences mentioned earlier.
How to Reduce Heat Gradually:
- Lower the Thermometer: As mentioned in the temperature guidelines, simply lower the heat source by a few inches each week, or adjust the lamp’s height to raise it further away.
- Observe Behavior: Pay close attention to their activity. If they are spread out and active, they are likely comfortable. If they start huddling excessively, the temperature might still be too low.
- Consider Ambient Temperature: If you are in a warmer month or have a well-insulated coop, the chicks may transition off heat sooner. Conversely, in colder weather, you might need to provide supplemental heat for longer.
- Check for Feathers: As chicks grow, you’ll notice their down being replaced by small pinfeathers, then larger contour feathers. Well-feathered chicks are much better at regulating their own body temperature.
When Do Chicks Not Need Heat?
Chicks are generally considered not to need supplemental heat when:
- They are fully feathered.
- They are actively foraging and interacting without huddling.
- The ambient temperature in their brooder or coop is consistently above 70°F (21°C).
- They are at least 4-6 weeks old and the weather is mild.
Alternatives and Considerations for Supplemental Heat
While heat lamps are common, other methods can provide supplemental heat for chicks. Each has pros and cons:
Brooder Plates:
- Pros: Safer, mimic natural mother hen warmth, provide a consistent temperature zone.
- Cons: Can be more expensive upfront, may not provide as much overall ambient warmth in a very large brooder.
Radiant Heat Panels:
- Pros: Even heat distribution, safe, can be left on 24/7 with thermostat control.
- Cons: Can be costly, requires specific placement.
Under-Floor Heating Mats:
- Pros: Gentle, even heat, safe.
- Cons: Only heats the floor, may not be sufficient for very young chicks, requires careful monitoring.
Regardless of the chick heat source time or type, the principle remains the same: provide a safe, reliable heat source that allows chicks to self-regulate their temperature through movement.
Common Mistakes to Avoid
- Overheating: This is just as dangerous as being too cold. Chicks that are too hot will pant, spread out, and become lethargic.
- Underheating: Chicks that are too cold will huddle excessively, shiver, and may appear listless.
- Sudden Removal of Heat: Always transition gradually.
- Unsafe Installation: A tipped-over heat lamp is a major fire hazard.
- Not Monitoring Behavior: Relying solely on a timer or age is a mistake; chick behavior is the ultimate guide.
- Poor Ventilation: Ensure the brooder is well-ventilated, but avoid drafts directly on the chicks.
Frequently Asked Questions (FAQ)
Q1: How many weeks do chicks need heat?
A: Chicks typically need supplemental heat for 4 to 6 weeks. This duration can vary based on ambient temperature, chick development, and breed.
Q2: What is the best temperature for newborn chicks?
A: Newborn chicks require a temperature of around 95°F (35°C) for their first week. This temperature should be gradually reduced by about 5°F each week.
Q3: How can I tell if my chicks are too cold or too hot?
A: Observe their behavior. Too cold: chicks huddle tightly, shiver, and chirp loudly. Too hot: chicks pant, spread their wings, and move to the furthest corners of the brooder.
Q4: When do chicks not need heat anymore?
A: Chicks are usually ready to be off heat when they are fully feathered, consistently active and spread out without huddling, and the ambient temperature is around 70-75°F (21-24°C). This is typically around 4-6 weeks old.
Q5: Can I use a heat lamp that also provides light?
A: While some heat lamps emit light, it’s generally better to use infrared heat lamps that do not emit light. This allows chicks to follow their natural sleep-wake cycles. If using a heat lamp with light, ensure the brooder is covered to create periods of darkness.
Q6: What is a good alternative to a heat lamp for chicks?
A: Brooder heat plates or radiant heat panels are excellent alternatives to heat lamps. They provide a more consistent and often safer heat source.
Q7: How long should the chick heat lamp duration be?
A: The chick heat lamp duration is not a fixed period. It starts from day one and continues until the chicks no longer need it, which is typically around 4-6 weeks, adjusting based on their behavior and ambient temperatures.
Q8: What are the essential aspects of newborn chick care related to heat?
A: Essential aspects include providing the correct chick brooding temperature, ensuring a safe and reliable chick heat source time, observing chick behavior for comfort, and gradually reducing heat as they develop feathers and grow.
By carefully following these guidelines and closely observing your fluffy charges, you can ensure they receive the necessary warmth for a healthy start in life. Happy chick raising!