
Can I fix a ripped lampshade? Yes, you can often fix a ripped lampshade with simple DIY steps. This guide will walk you through how to repair common lampshade damage, making your favorite lamps look like new again.
Lamps are more than just sources of light; they are often decorative pieces that contribute significantly to a room’s ambiance. However, like any household item, lampshades can suffer wear and tear. A rip, a tear, a loose seam, or even a bent frame can make a beloved lamp look shabby. Fortunately, lampshade repair is often a straightforward DIY project that can save you money and give your lamps a new lease on life. Whether it’s a delicate fabric shade or a more robust material, this guide will cover various methods for fixing a damaged lampshade and restoring a lampshade to its former glory. We’ll delve into techniques for patching, reattaching fabric, and even mending minor frame issues, making DIY lampshade repair accessible to everyone.
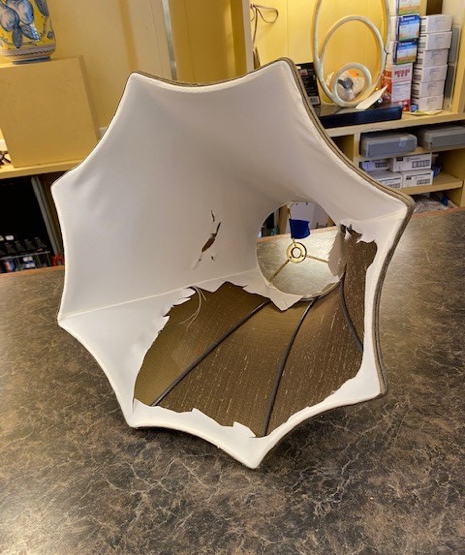
Image Source: concordlampandshade.com
Common Lampshade Problems and Solutions
Lampshades can encounter a variety of issues, from minor cosmetic flaws to structural damage. Identifying the problem is the first step to successful repair.
Tears and Rips in Fabric
Fabric lampshades are prone to tears, especially around the edges or if they’ve been handled roughly.
Small Tears and Holes
For small tears, a fine needle and thread can work wonders.
Materials:
- Matching thread
- Sewing needle
- Fabric scissors
- Iron and ironing board (optional)
- Fray check (optional)
Steps:
- Clean the Area: Gently wipe the damaged area with a slightly damp cloth to remove dust.
- Trim Frayed Edges: Use sharp fabric scissors to carefully trim away any loose threads from the tear.
- Apply Fray Check (Optional): If the fabric is prone to fraying, apply a small amount of Fray Check along the edges of the tear. Let it dry completely.
- Sew the Tear: Thread your needle with matching thread. Start by making a few small, neat stitches on the underside of the fabric, where the tear begins.
- Darning Technique: Gently bring the fabric edges together. Use a darning stitch or a simple whipstitch to carefully sew the tear closed. Keep your stitches small and close together for a cleaner finish.
- Reinforce: If the tear is in a high-stress area, you might consider reinforcing it from the inside with a small patch of matching fabric, secured with lampshade adhesive or fabric glue.
- Press (Optional): If the fabric is suitable, a gentle press with an iron can help flatten the repaired area.
Larger Rips and Seams
Larger rips or separated seams require a bit more attention.
Materials:
- Matching thread
- Sewing needle
- Fabric scissors
- Seam ripper (if needed)
- Fabric glue or lampshade adhesive
- Fabric scrap (for patching, optional)
- Iron and ironing board (optional)
Steps:
- Assess the Damage: Examine the rip to see if the original seam has come undone or if the fabric itself has torn.
- If Seam is Undone:
- Carefully use a seam ripper to undo any existing stitching around the damaged seam.
- Align the seam edges precisely.
- Use a sewing machine with a strong stitch or hand-sew the seam closed. For extra durability, you can sew a second line of stitches.
- If Fabric is Torn:
- Trim frayed edges.
- For a clean look, you might need to re-fold the torn edges to create a new edge to sew.
- If the tear is significant, consider using a small fabric patch on the inside of the lampshade. Cut a patch slightly larger than the tear, ensuring it’s made of a similar weight fabric.
- Apply a thin layer of lampshade glue or fabric glue to the edges of the patch and press it firmly onto the inside of the shade, covering the tear. Hold in place until the glue begins to set.
- Once the glue is dry, you can stitch around the edges of the patch for added security, or carefully sew the outer tear edges together as described for small tears.
- Final Press: Gently iron the repaired area if the fabric allows.
Loose or Detached Fabric
Sometimes, the fabric of a lampshade can start to peel away from its frame or backing.
Materials:
- Lampshade adhesive or fabric glue
- Clothespins or clips
- Damp cloth
Steps:
- Clean the Surfaces: Gently clean both the fabric edge and the surface it needs to reattach to. Use a damp cloth to remove any old glue residue or dust. Ensure both surfaces are completely dry before proceeding.
- Apply Adhesive: Apply a thin, even layer of lampshade adhesive or fabric glue to the edge of the fabric or the frame where it detached. Be careful not to use too much, as excess glue can seep through the fabric.
- Reattach and Secure: Carefully press the fabric back into place. Use clothespins or clips to hold the fabric securely while the glue dries.
- Wipe Excess: If any glue seeps out, wipe it away immediately with a damp cloth before it dries.
- Drying Time: Allow the glue to dry completely according to the manufacturer’s instructions. This is crucial for a strong bond.
Scuffs and Stains
Minor scuffs and stains can often be cleaned with a gentle approach.
Materials:
- Soft cloths (microfiber works well)
- Mild soap or upholstery cleaner
- Water
- Baking soda (for some stains)
Steps:
- Identify Fabric Type: Always check the lampshade’s material. Some fabrics are more delicate than others.
- Gentle Dusting: Start by gently dusting the entire shade with a dry, soft cloth or a vacuum cleaner with a brush attachment.
- Spot Cleaning: For scuffs, try gently rubbing with a dry cloth.
- Stain Removal:
- For most fabric shades, mix a small amount of mild soap with water.
- Dampen a clean cloth with the soapy water (do not saturate the cloth).
- Gently dab the stained area. Avoid rubbing vigorously, as this can spread the stain or damage the fabric.
- Rinse by dabbing with a cloth dampened with clean water.
- For persistent stains, a paste of baking soda and water can sometimes help. Apply the paste, let it sit for a short while, then gently brush it off.
- Drying: Allow the lampshade to air dry completely. Do not reattach it to the lamp until it is fully dry to prevent mildew or damage.
Replacing Lampshade Fabric
If your lampshade is beyond simple repair, or you simply want a fresh look, replacing lampshade fabric is a rewarding DIY project. This process involves carefully deconstructing the old shade and rebuilding it with new material.
Method 1: Re-covering a Frame with Existing Fabric (for minor tears/wear)
This is for shades where the fabric is still largely intact but has small tears or wear.
Materials:
- New fabric of your choice
- Spray adhesive or fabric glue
- Scissors
- Measuring tape
- Ruler
- Pins
- Iron and ironing board
- Damp cloth
- Optional: Trims or embellishments
Steps:
- Prepare the Old Shade: Clean the lampshade as described above.
- Measure and Cut New Fabric:
- Lay your old lampshade on a flat surface.
- Carefully measure the height of the lampshade.
- Measure the circumference at the top and bottom of the lampshade.
- Add about 1 inch to the circumference measurements for overlap.
- Cut your new fabric into a rectangle using these measurements. The height should be the lampshade height plus any allowance for top and bottom hems (usually about 1/2 inch to 1 inch at each end).
- Attach Fabric to Frame:
- Apply spray adhesive or fabric glue to one edge of the lampshade frame.
- Carefully align the edge of your new fabric with the glued edge and press it down firmly.
- Begin wrapping the fabric around the lampshade, applying adhesive as you go, ensuring the fabric is taut and smooth.
- Overlap the starting edge by about 1 inch and secure it with adhesive.
- Hem the Top and Bottom:
- At the top and bottom edges, fold the fabric over by about 1/2 inch to create a hem.
- Secure the hem with spray adhesive or fabric glue. For a cleaner finish, you can create a double hem.
- Use pins to hold the hems in place while the adhesive dries.
- Trim and Finish: Once dry, trim any excess fabric. You can add trims, fringe, or ribbon to the top and bottom edges for a decorative finish, securing them with fabric glue.
Method 2: Complete Fabric Replacement (for damaged frames or complete update)
This method is ideal if the old fabric is completely ruined or you want a more professional finish by working with the frame directly.
Materials:
- New fabric of your choice
- Lampshade adhesive or fabric glue
- Scissors
- Measuring tape
- Ruler
- Pins
- Iron and ironing board
- Damp cloth
- Seam ripper (optional)
- Fabric trimmer or craft knife
- Optional: New trims or embellishments
Steps:
- Remove Old Fabric: Carefully remove the old fabric from the frame. Use a seam ripper to cut stitches or gently peel away the fabric if it’s glued.
- Clean the Frame: Thoroughly clean the lampshade frame. Remove any old glue residue, dust, or debris.
- Measure the Frame Components:
- Measure the lengths of each metal support strut at the top and bottom of the frame.
- Measure the circumference of the top and bottom rings of the frame.
- Cut Fabric Panels:
- Cut fabric panels for each section of the lampshade. For a typical cone-shaped shade, you’ll have two main panels.
- For each panel, cut a piece of fabric that is the length of the strut plus about 1 inch for a seam allowance.
- The width of each panel should be half the circumference of the top ring plus half the circumference of the bottom ring, averaged, plus overlap. A more precise way is to create a pattern from the old fabric or the frame itself.
- Tip: For a cone shade, you can lay the old fabric flat, trace its shape, and use that as a pattern, adding seam allowances.
- Prepare Fabric Panels:
- If your fabric needs hemming, press the edges neatly.
- Attach Fabric to Frame:
- Apply lampshade adhesive or fabric glue to the metal struts and rings.
- Begin attaching the fabric panels. Start by securing one edge of a panel to a strut, ensuring it’s taut and aligned.
- Work your way around the frame, attaching the fabric to the struts and rings.
- Overlap the edges of the panels on a strut and secure them with glue and optionally a few stitches.
- Finish Edges:
- Carefully fold and glue the fabric to the top and bottom rings to create a clean edge.
- Trims can be added for a professional look.
- Drying: Allow the glue to dry completely.
Lampshade Frame Repair
Sometimes, the issue isn’t with the fabric but with the structural integrity of the lampshade frame. Bent wires or loose joints can detract from the shade’s appearance and function.
Bent Wires
Minor bends in the wire frame can often be gently straightened.
Materials:
- Pliers (needle-nose are best)
- Gloves (optional, to protect hands)
Steps:
- Assess the Bend: Identify the bent wire.
- Gentle Manipulation: Using needle-nose pliers, gently grip the bent section of the wire.
- Straighten Slowly: Slowly and carefully bend the wire back into its original position. Avoid forcing it, as this can weaken or break the wire.
- Check for Stress: If the wire looks stressed or kinked after straightening, you might consider covering the area with a small piece of tape or fabric to reinforce it.
Loose Joints and Connections
If the wire frame has joints that have come apart, they can sometimes be re-secured.
Materials:
- Pliers
- Wire cutters (if needed to trim excess wire)
- Small amount of strong adhesive (like epoxy, if appropriate for the metal) or electrical tape
Steps:
- Identify Loose Joints: Examine the frame for any points where wires are supposed to connect but have come loose.
- Realign and Secure:
- Try to realign the wires back into their original position.
- If the joint is a crimped connection, use pliers to carefully crimp it back together.
- If the joint is a welded spot that has broken, or if crimping isn’t possible, you might need to use a strong adhesive. Clean the metal surfaces thoroughly, apply a small amount of epoxy, and hold the joint in place until the adhesive sets.
- Alternatively, you can wrap the loose joint securely with electrical tape or strong fabric tape.
Lampshade Fitting
A lampshade needs to fit securely on the lamp base. The lampshade fitting refers to how the shade attaches to the bulb socket or harp.
Common Types of Lampshade Fittings:
- Spider Fitting: This is the most common type. It has a ring with a spider-like crossbar that sits on top of a harp. The bulb screws into the socket, pushing the shade onto the harp.
- Uno Fitting: This fitting has a ring that attaches directly to the socket, usually with a threaded collar that screws onto the bulb socket. There is no harp involved.
- Clip-On Fitting: These shades clip directly onto the light bulb itself. They are typically used for smaller, decorative bulbs.
Adjusting or Replacing Fittings
If your fitting is damaged or you’re using a shade with a different fitting type than your lamp base, adjustments might be needed.
Using a Harp with a Spider Fitting
- Ensuring Proper Fit: The spider fitting has a central hole. The size of this hole determines how it sits on the harp. If the hole is too small, you might need to gently enlarge it with pliers. If it’s too large and the shade is wobbly, you can use a lampshade fitting reducer (a plastic ring) that fits inside the spider’s hole to create a snugger fit on the harp.
Converting to Uno Fitting
- When is it needed? If your lamp base has a harp but you want to use a shade with an Uno fitting, or if your base doesn’t have a harp and uses a socket that accommodates an Uno fitting.
- How to convert: Some lamps have removable harps. If yours does, simply remove the harp. Then, the Uno fitting shade can screw directly onto the bulb socket.
Using a Clip-On Shade
- Compatibility: Clip-on shades are best for specific bulb shapes and sizes. Ensure the clip will securely attach to your bulb without damaging it. These are generally used for smaller accent lamps or very decorative lamps where a traditional fitting isn’t practical or aesthetically pleasing.
Specialty Repairs and Restoration
Beyond basic fabric and frame issues, some lampshades require more specialized attention.
Replacing a Cracked or Broken Panel (for hard-backed shades)
Hard-backed shades, often made of styrene or acrylic, can crack or break.
Materials:
- New styrene or acrylic sheet (available at craft or hardware stores)
- Lampshade adhesive or contact cement suitable for plastics
- Sharp craft knife or utility knife
- Ruler
- Measuring tape
- Cutting mat
- Clamps or heavy books
Steps:
- Remove Damaged Panel: Carefully detach the damaged panel from the frame. This might involve gently prying it away or cutting away old adhesive.
- Create a Template: Use the removed panel as a template, or carefully measure the dimensions of the opening in the frame.
- Cut New Panel: Using your measurements and a sharp craft knife on a cutting mat, carefully cut the new styrene or acrylic sheet to size.
- Apply Adhesive: Apply a thin, even layer of lampshade adhesive or appropriate contact cement to the edges of the new panel and the corresponding frame sections.
- Attach Panel: Carefully position the new panel onto the frame, ensuring it’s straight and flush.
- Secure and Dry: Use clamps or heavy books to hold the panel in place while the adhesive dries completely. Wipe away any excess adhesive immediately.
Dealing with Old or Brittle Glue
Over time, the adhesive used in lampshade construction can become brittle and fail.
Materials:
- Lampshade adhesive or suitable fabric glue
- Damp cloth
- Fingers or a blunt tool (like a plastic spatula)
Steps:
- Identify Brittle Areas: Gently feel along seams and edges to identify areas where the glue has failed or is flaking.
- Clean the Old Glue: If possible, gently scrape or rub away loose, brittle glue residue. Use a damp cloth to clean the surfaces.
- Reapply Adhesive: Apply a fresh layer of lampshade adhesive to the cleaned surfaces and press the fabric back into place, securing it as needed until dry.
Tips for Successful DIY Lampshade Repair
- Work in a well-lit area: This will help you see small details and stitches clearly.
- Use the right tools: Having appropriate tools like sharp scissors, good quality glue, and the right type of needle can make a big difference.
- Test adhesives on an inconspicuous area: Before applying any glue to a visible part of the lampshade, test it on an inside seam or a scrap of the same fabric to ensure it doesn’t discolor or damage the material.
- Patience is key: Rushing a repair can lead to mistakes. Take your time to achieve the best results.
- Consider the lampshade’s style and material: Delicate fabrics might require different techniques and adhesives than sturdier materials.
- Safety first: If using spray adhesives or potent glues, ensure you are in a well-ventilated area and follow the manufacturer’s safety instructions.
Frequently Asked Questions (FAQ)
Q1: What is the best glue for a lampshade?
A1: The best glue for a lampshade is typically a fabric glue or a specialized lampshade adhesive. Look for glues that are clear-drying, flexible, and suitable for the type of fabric your lampshade is made from. Brands like Aleene’s or fabric-specific adhesives are often recommended. For hard-backed shades, a contact cement or a glue designed for plastics might be needed.
Q2: Can I wash a fabric lampshade?
A2: It depends on the fabric. Most fabric lampshades cannot be washed in a washing machine. Spot cleaning with a damp cloth and mild soap is usually the safest method. Always check the manufacturer’s care instructions if available. Aggressive cleaning can damage the fabric, lining, or even the frame.
Q3: My lampshade frame is rusted. Can I fix it?
A3: Minor rust can often be removed by gently scrubbing with steel wool or a wire brush. After cleaning, you can apply a rust-inhibiting primer followed by a metal paint to prevent further rusting. If the rust is severe and has weakened the frame, it might be difficult to repair safely.
Q4: How do I make sure my repaired lampshade looks neat?
A4: Neatness comes from careful preparation and precise application of techniques. Trim frayed edges cleanly, use a sharp needle for stitching, apply glue thinly and evenly, and use pins or clips to hold pieces in place while drying. Working slowly and with good lighting also contributes to a professional-looking repair.
Q5: What if the original pattern of the fabric is hard to match?
A5: If an exact match for patterned fabric is impossible, consider these options:
* Patch discretely: Place the patch on the inside of the shade if possible.
* Use a coordinating fabric: If the patch is visible, choose a fabric that complements the original pattern in color and style.
* Add trim: Cover the repaired area with decorative trim or ribbon.
* Embrace the imperfection: Sometimes, a visible repair can add character.
By following these detailed steps and tips, you can effectively tackle most common lampshade issues, breathing new life into your lamps and enhancing the overall aesthetic of your living space. DIY lampshade repair is a rewarding skill that saves money and promotes sustainability.