
Can I fix a lamp shade myself? Yes, you absolutely can fix a lamp shade yourself at home, even if you’re a beginner! Many common lamp shade problems, from tears and loose frames to missing trim, can be repaired with a few simple tools and a little patience. This guide will walk you through how to repair a lamp shade so it looks like new.
Lampshades are more than just fabric covers; they’re crucial elements in a room’s ambiance. They diffuse light, create mood, and contribute significantly to your home’s decor. When a lampshade gets damaged, it can throw off the entire look and feel of a space. Fortunately, most damage isn’t permanent. You don’t need to be a seasoned crafter to tackle lampshade repair. With the right guidance, you can learn to mend lampshade issues effectively and save money on replacements.
Whether your lampshade has a minor tear, a wobbly frame, or you simply want to update its look, this comprehensive guide is for you. We’ll cover everything from basic repairs to more involved projects like re-covering a lampshade. Let’s get your lampshades looking their best again!
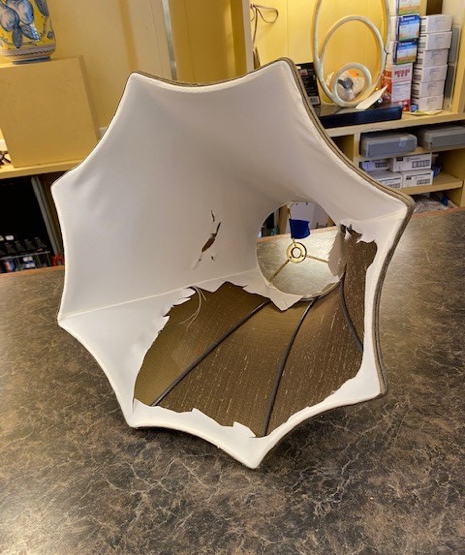
Image Source: concordlampandshade.com
Common Lampshade Problems and Solutions
Lampshades can suffer from a variety of wear and tear. Knowing what you’re dealing with is the first step to a successful repair.
Torn Fabric
A ripped or torn lampshade fabric is a very common issue. This can happen from accidental bumps, pets, or simply age.
Loose or Bent Frame
The wire frame that gives a lampshade its shape can become bent or loose over time, causing it to sag or lose its form.
Damaged Trim or Embellishments
Fringe can fray, beads can fall off, or other decorative elements might be damaged, detracting from the lampshade’s appearance.
Stains or Fading
While not a structural issue, stains or faded fabric can make a lampshade look old and unsightly.
Loose Adhesives
Sometimes, the fabric may start to peel away from the frame or backing, especially at the seams or edges.
Essential Tools and Materials for Lampshade Repair
Gathering the right supplies before you start will make the repair process much smoother. You might not need all of these for every repair, but it’s good to have a basic kit on hand.
Basic Repair Kit Essentials
- Fabric Glue or Adhesive: Look for a strong, clear-drying fabric glue. E6000 or Aleene’s Fabric Fusion are good choices for durable bonds.
- Double-Sided Fabric Tape: Excellent for quick fixes and reattaching edges without visible stitching.
- Sewing Needles and Thread: For mending tears and reinforcing seams. Match the thread color to your lampshade fabric.
- Scissors: Sharp fabric scissors are essential for clean cuts.
- Measuring Tape or Ruler: For accurate measurements if you need to cut new fabric or trim.
- Pliers (Needle-Nose): Useful for bending and adjusting the wire frame.
- Gloves: To keep your hands clean and protect the fabric.
- Iron and Ironing Board: For pressing fabric, especially if you plan to re-cover a shade.
- Pins: To hold fabric in place while gluing or sewing.
- Damp Cloth: For cleaning up excess glue.
Specialized Items for Specific Repairs
- Lampshade Repair Kit: Many craft stores offer comprehensive lampshade repair kits that include adhesives, tools, and sometimes even fabric scraps. These can be a great starting point.
- New Lampshade Fabric: If you’re re-covering a shade, you’ll need a new fabric of your choice. Cotton, linen, or silk blends are popular options.
- Fabric Starch: Can help stiffen thin fabrics before or after repair.
- Paintbrushes (Small): For applying glue evenly to larger areas.
- Decorative Trim (Fringe, Ribbon, etc.): If you’re replacing or adding decorative elements.
- Wire or Metal Strips: For reinforcing a weak lampshade frame.
Step-by-Step Guide to Common Lampshade Fixes
Let’s dive into how to tackle those common lampshade problems.
Repairing a Torn Lampshade Fabric
This is often the most frequent repair needed.
Method 1: Fabric Glue for Small Tears
- Preparation: Lay the lampshade on a flat surface. Gently smooth out the torn area.
- Apply Glue: Use a small paintbrush or the tip of a glue bottle to apply a thin, even layer of fabric glue to the edges of the tear. Be careful not to use too much, as it can soak through and create a visible mark.
- Press Together: Carefully bring the torn edges together, aligning them as neatly as possible.
- Hold in Place: Use binder clips or clothespins to hold the edges together while the glue dries. Alternatively, you can place a piece of wax paper over the tear, press gently, and weigh it down with a book.
- Drying Time: Allow the glue to dry completely according to the manufacturer’s instructions. This usually takes several hours.
- Finishing: Once dry, remove the clips. If there’s any stiffness or excess glue, you might be able to carefully trim it with sharp scissors.
Method 2: Sewing for Durability
For tears that are likely to be stressed or reopened, sewing offers a more durable repair.
- Preparation: As above, lay the shade flat and smooth the tear.
- Pin: Use fine pins to hold the torn edges together.
- Stitching: Thread a needle with a matching color thread. Use a small, neat stitch, like a whip stitch or a blind stitch, to join the edges. Work slowly and try to keep your stitches small and consistent.
- Reinforcement: For extra strength, you can sew a few stitches back and forth over the tear.
- Knot and Trim: Tie off the thread securely at the end of the seam and carefully trim any excess thread.
Method 3: Using Double-Sided Fabric Tape
This is a quick and effective method for non-visible repairs or areas not under much stress.
- Preparation: Ensure the fabric is clean and dry.
- Cut Tape: Cut a piece of double-sided fabric tape slightly longer than the tear.
- Apply Tape: Peel off one side of the backing paper and carefully apply the tape to the underside of one edge of the tear.
- Align and Press: Peel off the second backing paper. Align the other edge of the tear precisely over the taped edge and press firmly.
- Smooth: Gently smooth over the repaired area.
Reattach Lampshade Frame
A loose or detached wire frame can make a lampshade droop.
Simple Frame Adjustments
- Bent Wires: Use needle-nose pliers to gently bend any bent wires back into their original shape. Be careful not to apply too much force, which could snap the wire.
- Loose Connections: Some frames have wire connectors that can loosen. You might be able to gently crimp these with pliers to tighten them.
Reattaching Fabric to a Loose Frame
Sometimes, the fabric has pulled away from the wire frame.
- Clean the Frame: Remove any old glue or debris from the wire where the fabric detached.
- Apply Adhesive: Apply a thin bead of strong fabric glue or a hot glue gun (use a low-temp gun to avoid melting plastic components) along the wire.
- Press Fabric: Carefully press the edge of the lampshade fabric onto the glued wire.
- Secure: Use binder clips or clothespins to hold the fabric in place until the glue dries completely. You may need to reinforce this with a few stitches for a very secure hold.
Reinforce Lampshade Structure
If your lampshade feels flimsy or is starting to sag, reinforcing the frame or fabric can help.
Reinforcing the Frame
If the wire frame itself is weak or bent in multiple places, you might need to add support.
- Identify Weak Points: Look for areas where the wire seems to have lost its rigidity.
- Add Support: You can sometimes reinforce these areas by carefully wrapping thin wire or even strong craft wire around the existing frame at key points. Secure the new wire with a dab of glue.
- Stiffen Fabric: For fabric that is sagging between the frame wires, you can apply a light coat of fabric stiffener or spray starch and gently iron it (if the fabric can withstand heat).
Replacing Lampshade Fabric (Re-cover Lampshade)
This is a more involved project but is a great way to give an old lamp a completely new look.
Materials for Re-covering
- New Fabric: Measure your old shade to determine how much you need. Add a few extra inches for overlap and trimming.
- Old Lampshade: This will be your template.
- Fabric Glue or Spray Adhesive: For attaching the new fabric.
- Sharp Scissors:
- Measuring Tape:
- Pins:
- Optional: Trim or Embellishments:
Steps to Re-cover a Lampshade
- Disassemble (Carefully): If the old fabric is severely damaged or you want a clean slate, you can carefully remove the old fabric. Start by peeling it away from the frame. If it’s glued, gently work a craft knife or thin spatula under the fabric. If it’s stitched, unpick the stitches.
- Clean the Frame: Thoroughly clean the wire frame of any remaining glue or fabric remnants.
- Prepare the New Fabric: Lay your new fabric flat, wrong side up.
- Measure and Cut:
- For Cylindrical Shades: Measure the circumference of the top and bottom of the shade, and its height. Cut a rectangular piece of fabric with these dimensions, adding about 1-2 inches to the height for top and bottom hems, and 1-2 inches to the circumference for overlap.
- For Conical Shades: Lay the old shade on the new fabric. Trace around the shade, adding seam allowances. Alternatively, you can carefully unpick the seam of your old shade, lay it flat as a pattern piece, and trace around it onto the new fabric, adding seam allowances.
- Attach the Fabric:
- Option A: Glue: Apply fabric glue or spray adhesive to the wire frame where the fabric will attach. Start at a seam or a less visible spot. Carefully align the edge of the new fabric and press it firmly onto the glued frame. Slowly wrap the fabric around the frame, applying glue and smoothing as you go.
- Option B: Double-Sided Tape: Use strong double-sided fabric tape along the wire frame. This is often cleaner and quicker.
- Overlap and Secure: When you reach the starting point, overlap the fabric edge by about 1-2 inches. Apply glue or tape to the inside of the overlap and press firmly to secure.
- Hem the Edges: Fold the excess fabric at the top and bottom edges over the wires and glue or tape them securely. You can also create a neat hem by folding the fabric edge twice before gluing.
- Add Trim (Optional): Once the main fabric is secure, you can add decorative trim like fringe or ribbon along the top and bottom edges using fabric glue.
Attach Fringe to Lampshade
Adding or replacing fringe can instantly update a lampshade’s style.
Methods for Attaching Fringe
- Glue: The simplest method. Apply a generous line of fabric glue along the edge where the fringe will be attached. Carefully press the top band of the fringe into the glue, ensuring it’s straight and even. Let it dry completely.
- Sewing: For a more durable and professional finish, sew the fringe on. Use a wide zig-zag stitch or a specific fringe-foot if your machine has one. Sew along the top edge of the fringe, close to the lampshade fabric.
- Double-Sided Fabric Tape: For lighter fringes, strong double-sided fabric tape can work well. Apply the tape along the edge of the lampshade and then press the fringe into the tape.
Tips for Attaching Fringe
- Pre-measure: Cut the fringe to the correct length before you start gluing or sewing.
- Work in Sections: If you have a large amount of fringe, work in smaller sections to ensure the glue doesn’t dry before you can attach the fringe.
- Even Distribution: Try to distribute the fringe evenly around the entire shade for a balanced look.
Troubleshooting Common Issues During Repair
Even with careful work, you might encounter minor setbacks. Here’s how to fix them.
Glue Seepage
If too much glue seeps through the fabric:
- While Wet: Immediately try to wipe away the excess with a damp cloth. Be gentle to avoid spreading the glue further.
- Once Dry: Carefully try to scrape away any hardened excess glue with a craft knife. For small, slightly visible marks, you might be able to lightly buff them with a very fine-grit sandpaper, but test this in an inconspicuous area first.
Uneven Edges or Seams
- If Fabric is Loose: Gently peel back the edge and re-glue or re-tape, aligning it more carefully.
- If Fabric is Stiff: For slightly uneven fabric edges after gluing, you can sometimes carefully trim away the excess with very sharp scissors.
Drooping or Sagging After Repair
- Frame Issue: The frame might still be too weak. You may need to reinforce it further as described in the “Reinforce Lampshade Structure” section.
- Glue Not Dry: Ensure the glue is completely dry and has cured fully. Some adhesives take 24-72 hours for maximum strength.
Caring for Repaired Lampshades
Once you’ve successfully repaired your lampshade, proper care will help it last.
- Dust Regularly: Use a soft brush or a microfiber cloth to gently dust the lampshade. Avoid harsh chemicals or abrasive cleaners.
- Avoid Direct Sunlight: Prolonged exposure to direct sunlight can fade and weaken fabrics over time.
- Handle with Care: Be mindful of bumps and knocks that could damage the repaired areas.
- Check for Wear: Periodically inspect your lampshade for any signs of new damage or loosening.
When to Consider a Professional Repair or Replacement
While most lampshade repairs are DIY-friendly, there are times when professional help or a new shade is the best option.
Signs You Might Need Professional Help
- Extensive Frame Damage: If the entire wire frame is severely bent, rusted, or broken in multiple places, it might be too complex for a beginner repair.
- Delicate or Antique Fabrics: Very old, delicate, or valuable antique lampshades might require specialized cleaning and repair techniques to avoid further damage.
- Complex Designs: Shades with intricate beadwork, multiple layers of fabric, or complex shapes might be challenging for a beginner.
- Structural Integrity Compromised: If the shade’s entire structure feels unstable and cannot be easily reinforced.
When to Replace Your Lampshade
- Unrepairable Damage: If the fabric is too brittle, torn beyond repair, or the frame is irreparable.
- Outdated Style: Sometimes, a repair isn’t enough to modernize an old shade, and a fresh new one is a better investment.
- Safety Concerns: If the shade is damaged in a way that poses a fire hazard (e.g., melted or frayed fabric near the bulb).
Frequently Asked Questions About Lampshade Repair
Q: What is the best glue to use for lampshade fabric?
A: For most fabric-to-frame repairs, a strong, clear-drying fabric glue like E6000, Aleene’s Fabric Fusion, or a dedicated lampshade adhesive is recommended. For attaching trim, hot glue (low-temp) can also be effective.
Q: Can I wash a lampshade after repairing it?
A: Generally, it’s best to avoid washing lampshades, especially those with delicate fabrics, glued seams, or intricate details. Spot cleaning with a damp cloth is usually the safest option. If you’re unsure, test a small, inconspicuous area first.
Q: My lampshade fabric is discolored. Can I fix that?
A: Discoloration from sun fading is usually permanent. However, if the discoloration is from a stain, you might be able to carefully spot-clean it with a mild fabric cleaner or a mixture of water and a tiny amount of dish soap, but test first in a hidden area. If the fabric is too far gone, re-covering the lampshade is your best bet.
Q: How do I make sure the new fabric I choose will work?
A: Opt for fabrics that are not too heavy or too flimsy. Cotton, linen, silk blends, or polyester fabrics designed for upholstery or home decor are good choices. Ensure the fabric can withstand some heat from the light bulb, and avoid anything too flammable.
Q: What if I don’t have the original trim to match?
A: You can purchase new trim from craft stores or online retailers. Consider adding a complementary trim or a completely new style to update the lampshade’s look. Fringe, ribbon, or even decorative cording can all work well.
Q: How do I repair a hole in a paper or parchment lampshade?
A: For paper or parchment shades, use a piece of matching or complementary paper and fabric glue or a strong clear adhesive. Cut a patch slightly larger than the hole, apply glue to the edges of the hole on the inside of the shade, and carefully press the patch on. For very delicate paper, it might be best to use a very light spray adhesive.
By following these steps and tips, you can confidently tackle most common lampshade repairs at home, extending the life of your favorite lamps and enhancing your home’s aesthetic. Happy repairing!