
Image Source: contentgrid.homedepot-static.com
How To Install A Lamp Post: Step-by-Step for a Complete DIY Outdoor Lighting Setup
Can you install a lamp post yourself? Yes, you can absolutely install a lamp post yourself with the right tools and a bit of patience. This comprehensive guide will walk you through the entire process, from planning to the final flick of the switch, helping you create a beautiful and functional outdoor lighting setup. We’ll cover everything from choosing the right location to ensuring your lamp post installation is secure and aesthetically pleasing.
Planning Your Outdoor Lighting Setup
Before you even think about digging, careful planning is key to a successful DIY lamp post installation. This phase sets the foundation for your entire outdoor lighting setup.
Choosing the Perfect Location
Where should you place your lamp post? Consider the purpose of your lighting. Is it for security, to illuminate a pathway, enhance your garden’s beauty, or a combination of these?
- Safety and Security: Position lamp posts along driveways, walkways, and near entrances to deter intruders and prevent accidents.
- Ambiance and Aesthetics: Place garden lamp posts to highlight features like flower beds, trees, or seating areas.
- Pathway Illumination: Ensure consistent light coverage along your paths to guide visitors safely.
- Obstructions: Avoid areas with underground utility lines (call 811 or your local utility locator service before digging!) or overhead power lines. Also, consider the mature size of trees and shrubs to prevent future interference.
- Sunlight Exposure (for Solar Lamp Posts): If you’re opting for a solar-powered lamp post, ensure the chosen spot receives direct sunlight for at least 6-8 hours daily.
Selecting the Right Lamp Post
There are various types of lamp posts, each with its own pros and cons. Your choice will depend on your aesthetic preferences, budget, and the desired functionality.
Types of Lamp Posts:
| Lamp Post Type | Material | Pros | Cons | Best For |
|---|---|---|---|---|
| Traditional | Metal (Aluminum, Steel, Cast Iron) | Durable, classic look, available in many styles. | Can rust if not maintained (steel/iron), can be heavy. | Formal gardens, driveways, historic properties. |
| Modern | Metal, Composite | Sleek designs, weather-resistant, lightweight options. | May have a higher price point, less traditional appeal. | Contemporary homes, minimalist landscapes. |
| Solar | Plastic, Metal | No wiring needed, energy-efficient, easy installation. | Light output can vary, battery life depends on sunlight, less powerful. | Accent lighting, pathways, areas without easy access to electricity. |
| Decorative | Wood, Resin | Unique designs, can blend with garden themes. | Wood requires sealing/maintenance, resin can be less durable. | Garden accents, highlighting specific features. |
Essential Tools and Materials
Gathering all your tools and materials before you start will make the lamp post installation guide much smoother.
- Lamp Post Kit: Includes the post, fixture, and often mounting hardware.
- Shovel or Post Hole Digger: For digging the hole.
- Measuring Tape: For precise placement.
- Level: To ensure the post is plumb (straight up and down).
- String Line and Stakes: For aligning multiple posts.
- Gravel: For drainage at the bottom of the hole.
- Concrete Mix: For securing the post (check if your kit specifies a particular type).
- Water: To mix the concrete.
- Wheelbarrow or Tarp: For mixing concrete.
- Gloves and Safety Glasses: For protection.
- Wire Strippers and Crimpers (if wiring required): For electrical connections.
- Wire Nuts or Waterproof Connectors: For joining electrical wires.
- Post Level (optional but recommended): For accurate post leveling.
- Buckets: For water and carrying materials.
- Sandpaper: For cleaning wire ends.
Preparing the Site and Digging the Hole
This is a critical step for burying a lamp post securely and ensuring its longevity.
Marking the Post Location
Once you’ve chosen your spot, use a stake and string to mark the exact center where your post will go. If you’re installing multiple posts for a pathway, use your string line to ensure they are in a straight, consistent row.
Digging the Post Hole
The depth and width of your hole are crucial for stability. A general rule of thumb for how to erect a lamp post is to dig the hole to about one-third the total height of the post, plus an additional 6 inches for gravel. The diameter should be about three times the width of the post.
- Hole Depth: For a 6-foot lamp post, aim for a hole around 2.5 to 3 feet deep. Always check the manufacturer’s recommendations for your specific lamp post.
- Hole Width: A wider hole allows for more concrete, creating a stronger base.
Example Hole Dimensions:
| Lamp Post Height | Recommended Hole Depth (including gravel) | Recommended Hole Diameter |
|---|---|---|
| 5 feet | 24-30 inches | 12-18 inches |
| 6 feet | 30-36 inches | 15-20 inches |
| 7 feet | 36-42 inches | 18-24 inches |
Adding Gravel for Drainage
After digging, add about 6 inches of gravel to the bottom of the hole. This will help water drain away from the base of the post, preventing rot or corrosion, especially important for concrete lamp post base stability.
Assembling and Mounting the Lamp Post
This section focuses on the physical garden lamp post mounting and setting up a post light.
Assembling the Lamp Post Components
Most lamp posts come in sections. Follow the manufacturer’s instructions carefully to assemble the pole, the decorative elements, and the light fixture.
- Wiring: If your lamp post requires electrical wiring, this is the time to run the wire through the pole. Ensure you have a weatherproof junction box at the base and that the wiring is connected to your power source according to electrical codes. If you are unsure about electrical work, it is always best to consult a qualified electrician.
- Fixture Attachment: Securely attach the lamp fixture to the top of the post. Ensure all connections are tight and weatherproof.
Pouring the Concrete Lamp Post Base
A solid concrete lamp post base is essential for a stable installation.
- Mix the Concrete: In your wheelbarrow or on a tarp, mix the concrete mix with water according to the package instructions. You want a consistency similar to thick oatmeal – not too soupy, not too dry.
- Fill the Hole: Carefully pour the concrete into the hole around the lamp post. Work quickly, as concrete begins to set relatively fast.
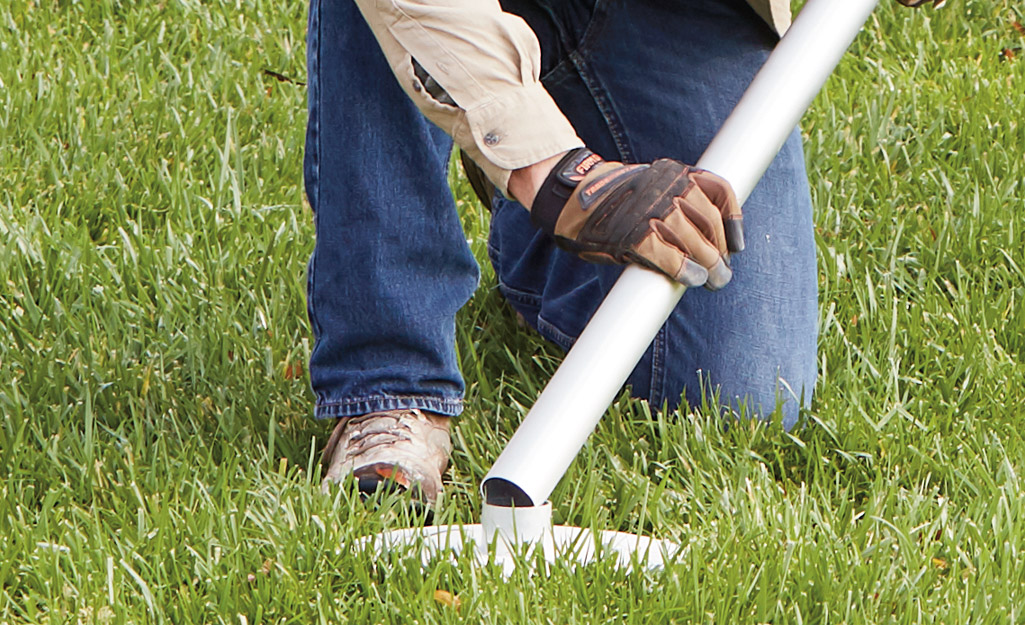
- Position the Post: Insert the lamp post into the wet concrete.
- Level the Post: Use your level (or post level) to ensure the post is perfectly vertical. Brace the post with temporary supports (e.g., wooden stakes) to keep it plumb while the concrete cures. Double-check that the post light fixture placement is facing the desired direction.
- Smooth the Top: Smooth the surface of the concrete around the base of the post. You can create a slight slope away from the post to help with water runoff.
Important Considerations for Concrete:
- Type of Concrete: Use a quick-setting concrete mix for faster curing, or a standard concrete mix if you have more time.
- Weather: Avoid pouring concrete in freezing temperatures or during heavy rain.
- Curing Time: Allow the concrete to cure for at least 24-48 hours before applying any significant load or stress to the post. Check the concrete bag for specific curing times.
Solar Lamp Post Assembly and Installation
For those choosing a solar lamp post assembly, the process is typically much simpler and avoids the need for concrete.
- Assemble the Post: Connect the different sections of the solar lamp post.
- Attach the Solar Panel and Fixture: Secure the solar panel and light fixture. Ensure the solar panel is positioned to receive maximum sunlight.
- Anchor the Base: Many solar lamp posts have a stake or anchor system that you drive directly into the ground. Choose a location with good sun exposure and push the anchor firmly into the soil until it’s stable. Some larger solar lamp posts may have a base plate that requires screwing into a pre-existing solid surface like a patio.
Wiring and Connecting the Light Fixture (for Electric Lamp Posts)
This is a crucial step for the outdoor lighting setup and requires careful attention to safety.
Connecting to the Power Source
There are a few ways to power your electric lamp post:
- Underground Burial Cable: The most common and aesthetically pleasing method. Dig a trench from your power source (e.g., an outdoor outlet, junction box) to the lamp post location. Use direct-burial rated low-voltage or line-voltage cable, depending on your fixture.
- Surface-Mounted Wiring: Less ideal for aesthetics, but simpler if trenching is not feasible. Use outdoor-rated extension cords or conduit to run the power. Ensure all connections are waterproof and protected from the elements and foot traffic.
Making Electrical Connections
Safety First! Always ensure the power is turned OFF at the breaker before making any electrical connections.
- Expose Wires: Carefully strip about 1 inch of insulation from the ends of the wires from both the power source and the lamp post.
- Connect Wires: Use wire nuts or waterproof connectors to join the corresponding wires:
- Black wire (hot) to black wire
- White wire (neutral) to white wire
- Green or bare copper wire (ground) to ground wire
- Secure Connections: Ensure all connections are tight and the wire nuts are securely in place.
- Test the Light: Once all connections are made and the concrete has cured sufficiently, turn the power back on at the breaker and test your lamp post.
Final Touches and Maintenance
Your DIY lamp post installation is almost complete! A few final steps will ensure your setup looks and functions perfectly.
Cleaning Up
Remove any excess concrete, tools, and materials from the area. Backfill any remaining gaps around the base with soil or decorative mulch.
Testing and Adjusting
Turn on your lamp post and check that it illuminates the desired area. Adjust the post light fixture placement if necessary (though this is best done before the concrete fully cures!).
Maintenance Tips
- Regular Cleaning: Wipe down the lamp post and fixture periodically to remove dirt and debris.
- Bulb Replacement: Replace bulbs as needed, using the type recommended by the manufacturer.
- Concrete Check: Inspect the concrete base annually for any cracks or signs of damage.
- Solar Panel Care: For solar lamps, keep the solar panel clean for optimal charging.
- Wiring Inspection: Periodically check electrical connections for corrosion or damage, especially if exposed to moisture.
Frequently Asked Questions (FAQ)
Q1: How deep should I dig for a lamp post?
A: Generally, dig the hole to about one-third the total height of the post, plus an additional 6 inches for gravel. Always check the manufacturer’s specific recommendations.
Q2: Can I install a lamp post without concrete?
A: For electric lamp posts that require stability and electrical connections, concrete is highly recommended. For some lightweight solar lamp posts, direct-to-ground anchoring may suffice, but it offers less stability.
Q3: How much concrete do I need for a lamp post?
A: The amount of concrete depends on the size of the hole. A typical 6-inch diameter, 3-foot deep hole will require approximately one 50-pound bag of concrete mix. It’s always better to have a little extra than not enough.
Q4: What type of wire should I use for outdoor lighting?
A: Use low-voltage landscape wire for low-voltage systems or UF-B (underground feeder) cable for line-voltage systems. Ensure the wire is rated for direct burial.
Q5: How do I make sure my lamp post is straight?
A: Use a level against the post as you pour the concrete and brace it with temporary supports until the concrete cures. A post level is also an excellent tool for this.
Q6: How long does concrete take to cure?
A: Concrete typically takes 24-48 hours to cure sufficiently to bear weight. However, it continues to gain strength for weeks. Always check the specific instructions on your concrete mix bag.
By following this detailed lamp post installation guide, you can successfully set up your new outdoor lighting setup, enhancing both the beauty and functionality of your home’s exterior. Enjoy your beautifully illuminated space!