
Can I install a post lamp myself? Yes, with the right tools and careful planning, you can safely install a post lamp yourself. This guide will walk you through the entire process, from choosing the right location to the final wiring. We’ll cover everything you need to know for a successful lamp post installation and a beautiful outdoor lighting setup. Whether you’re looking to illuminate a pathway light mounting, add charm with a garden lamp fixture, or even burying a lamp post securely, this article has you covered. We’ll also explore options for a sturdy concrete lamp post base and how to handle electrical wiring for lamp post projects. For those seeking a greener approach, we’ll touch on solar lamp post installation too. Think of this as your ultimate guide, much like how one would approach setting a fence post with precision.
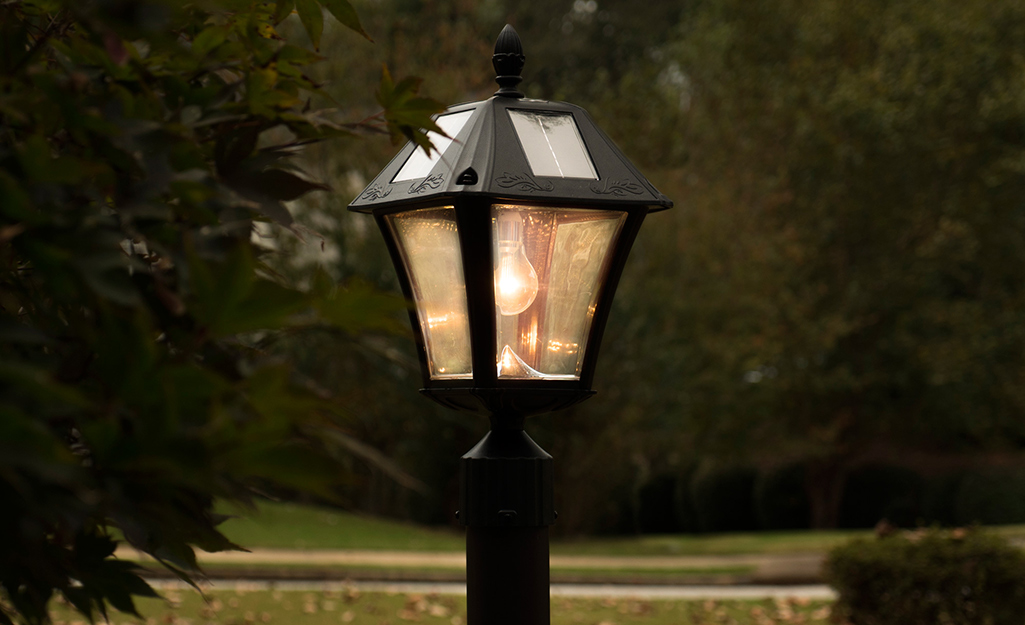
Image Source: contentgrid.homedepot-static.com
Planning Your Post Lamp Placement
Before you even think about digging, careful planning is key. Where you put your post lamp will affect its usefulness and appearance.
Choosing the Right Spot
Consider what you want your lamp to do.
- Illumination Needs: Do you need light to see your walkway, highlight a garden feature, or simply add ambiance to your patio?
- Aesthetics: The post lamp should complement your home’s style and the surrounding landscape.
- Proximity to Power: If you’re not using solar, you’ll need access to an electrical outlet or a junction box.
- Underground Utilities: This is crucial for safety. Always call 811 (in the US) or your local utility locating service before you dig. They mark underground lines for free. This prevents dangerous and costly accidents.
- Obstructions: Avoid placing the post where it might interfere with gates, pathways, or natural growth like tree roots.
Types of Post Lamps
There are several styles to choose from, each with its own installation considerations.
- Traditional Post Lamps: These often require direct burial or a concrete base. They are typically wired into your home’s electrical system.
- Pathway Lights: Smaller and designed to line walkways or garden beds. Many are solar-powered or low-voltage, making installation simpler.
- Decorative Post Lamps: These can be more elaborate and might have specific mounting requirements.
Gathering Your Tools and Materials
Having everything ready before you start makes the job much smoother.
Essential Tools
- Shovel and Post Hole Digger: For digging the hole.
- Level: To ensure the post is perfectly straight.
- Measuring Tape: For accurate placement and depth.
- Wire Strippers and Cutters: For electrical connections.
- Screwdriver Set: For attaching the fixture.
- Wrench or Socket Set: For tightening bolts.
- Safety Glasses and Gloves: For protection.
- Trowel or Small Shovel: For filling and tamping soil.
- Wheelbarrow: To mix concrete if needed.
- Gravel: For drainage in the hole.
Necessary Materials
- Post Lamp Fixture: The actual lamp and its components.
- Lamp Post: The pole itself. Ensure it’s suitable for outdoor use and the type of installation (e.g., ground-mounted, concrete-base).
- Electrical Wire: If you’re hardwiring, use outdoor-rated, waterproof wire suitable for underground burial.
- Wire Connectors: Waterproof connectors are essential for outdoor electrical work.
- Concrete Mix: If you’re using a concrete lamp post base.
- Anchor Bolts: If your lamp base uses them for mounting.
- Gravel or Crushed Stone: For drainage at the bottom of the hole.
- Sand: Can be used as a base layer in the hole.
- Plastic Conduit: To protect underground wiring.
Preparing the Installation Site
This is where the physical work begins. Precision here prevents future problems.
Digging the Hole
The depth and width of your hole are critical for stability, especially for burying a lamp post.
- Depth: The general rule of thumb for setting a fence post applies here: at least one-third of the post’s total length should be underground. For a 6-foot post, that means 2 feet in the ground. Check local building codes for specific requirements, especially in areas prone to frost heave or high winds.
- Width: The hole should be about three times the diameter of the post. This allows ample space for concrete or backfill and ensures good stability.
- Drainage: Dig the hole slightly wider at the bottom than at the top. This helps the concrete or soil pack more firmly. Add about 4-6 inches of gravel at the bottom of the hole for drainage.
Setting the Post – Direct Burial Method
If your lamp post is designed for direct burial, follow these steps:
- Place Gravel: Add 4-6 inches of gravel to the bottom of the hole.
- Position the Post: Carefully lower the post into the hole, centering it.
- Check for Plumb: Use your level to ensure the post is perfectly vertical from all sides. You might need temporary bracing to hold it in place.
- Backfill: Begin filling the hole with the excavated soil, or a mixture of soil and gravel. If using soil, tamp it down firmly every few inches to remove air pockets and prevent settling.
- Concrete Collar (Optional but Recommended): For extra stability, especially in areas with soft soil or strong winds, consider adding a concrete collar around the top few inches of the post. Mix concrete according to the package directions and pour it around the post, tapering it slightly away from the post at the surface.
- Final Check: Ensure the post is still plumb as you add soil and compact it.
Setting the Post – Using a Concrete Lamp Post Base
Many lamp posts come with a mounting flange that attaches to a pre-cast concrete base or a base you create yourself.
- Prepare the Base: If using a pre-cast base, ensure it’s level and stable. If you’re pouring your own concrete lamp post base, you’ll need to:
- Dig a wider and deeper hole than for direct burial. The size depends on the post and expected conditions.
- Place a layer of gravel at the bottom for drainage.
- Set anchor bolts into the wet concrete in the correct positions for your lamp post’s mounting flange. Make sure these bolts are plumb and at the correct spacing.
- Allow the concrete to cure fully, usually for at least 24-48 hours, before attaching the post.
- Attach the Post: Once the concrete is cured, place the lamp post’s mounting flange onto the anchor bolts. Secure it with nuts and washers.
- Level the Post: Use your level to ensure the post is perfectly vertical. Shim if necessary. Tighten the nuts securely.
Electrical Wiring for Lamp Post Installation
This is the most critical step for safety and functionality. If you’re uncomfortable with electrical work, it’s best to hire a qualified electrician.
Power Source Options
- Hardwired: This connects directly to your home’s electrical system, usually via a buried cable from a junction box or breaker. This offers the most reliable power but requires careful planning and execution.
- Solar Powered: These lamps have a solar panel that charges a battery during the day, powering the light at night. They are easier to install as they require no wiring.
- Low Voltage: These systems use a transformer that plugs into a standard outlet, stepping down the voltage for safety. They are also relatively simple to install.
Hardwired Installation Steps
This assumes you have access to a power source (e.g., a nearby outdoor-rated junction box).
- Safety First: Turn off the power to the circuit you’ll be using at the breaker box. Double-check with a voltage tester to ensure the power is off.
- Run the Wire:
- Dig a trench from your power source to the lamp post location. The trench should be deep enough to protect the cable (typically 18-24 inches, check local codes).
- Run outdoor-rated, underground electrical cable (e.g., UF-B cable) through plastic conduit for added protection.
- If the cable needs to cross a pathway or driveway, use thicker conduit and bury it deeper.
- Connect at the Power Source:
- Inside the junction box, connect the incoming power wires to the cable running to the lamp post. Use appropriate wire connectors (e.g., wire nuts rated for outdoor use or specialized waterproof connectors).
- Ensure the ground wire is properly connected.
- Connect at the Lamp Post:
- Most lamp post installation kits include a way to bring the wire up through the base of the post. This might be a conduit opening or a specific cable entry point.
- Strip a small amount of insulation from the ends of the wires (black to black/hot, white to white/neutral, bare copper or green to ground).
- Connect the wires using waterproof wire connectors. Ensure the connections are secure and insulated.
- Mount the garden lamp fixture or the lamp assembly to the post according to the manufacturer’s instructions. This often involves screwing it onto a threaded pipe at the top of the post.
- Test the Connection: Once everything is connected and secured, turn the power back on at the breaker box and test the lamp.
Solar Lamp Post Installation
This is the simplest and most eco-friendly option.
- Assemble the Lamp: Follow the manufacturer’s instructions to assemble the solar lamp. This usually involves connecting the solar panel to the light unit and attaching it to the post.
- Position the Post: Dig a hole (or use a pre-existing base) as described earlier.
- Insert the Post: Place the assembled solar lamp post into the hole and secure it.
- Ensure Sunlight: Position the solar panel so it receives maximum direct sunlight throughout the day. Avoid placing it in the shade of trees or buildings.
- Charge and Test: Allow the solar panel to charge the internal battery for at least a full day before testing the light.
Low-Voltage Installation
- Transformer Placement: Find a suitable outdoor-rated GFCI-protected outlet. Place the low-voltage transformer nearby.
- Run Low-Voltage Wire: Bury the low-voltage wire from the transformer to the lamp post location. This wire is typically buried directly without conduit, but always check the manufacturer’s recommendations.
- Connect to Lamp: Attach the low-voltage wire to the lamp fixture. This usually involves simple screw terminals.
- Mount the Fixture: Secure the pathway light mounting fixture or the post lamp to the post.
- Test: Plug in the transformer and test the light.
Attaching a Lamp to a Post
Once the post is securely installed, it’s time to attach the actual lamp.
Fixture Mounting
- Threaded Top: Many posts have a threaded pipe at the top. The lamp fixture will have a corresponding threaded base that screws onto this pipe. Ensure it’s tightened securely but don’t overtighten and damage the threads.
- Flange Mounts: Some fixtures attach to a mounting plate or flange on the top of the post using screws.
- Brackets: Certain designs may use specialized brackets that are screwed or bolted to the post.
Securing the Wiring to the Fixture
- Feed Wires: Gently feed the electrical wires through the designated openings in the post and into the lamp fixture base.
- Make Connections: Inside the fixture’s housing, you’ll typically find screw terminals or wire connectors for the incoming power wires. Connect black to hot, white to neutral, and ground to ground.
- Waterproofing: Ensure all connections are made with waterproof connectors and that the housing is sealed correctly to prevent moisture from entering.
Installing the Bulb and Lens
- Bulb Type: Use the type and wattage of bulb recommended by the fixture manufacturer. LED bulbs are energy-efficient and long-lasting.
- Lens/Cover: Carefully attach the glass lens or cover. Many are secured with screws or clips. Make sure the gasket (if present) is seated correctly to maintain a weather-tight seal.
Post-Installation Checks and Maintenance
After installation, a few final checks will ensure your new outdoor lighting setup is safe and functional.
Safety Checks
- Stability: Gently push on the post to ensure it’s firm and doesn’t wobble.
- Electrical Safety: For hardwired systems, ensure all connections are secure and insulated. If you have any doubts, have a qualified electrician inspect your work. Check that the GFCI outlet (if used) is functioning correctly.
- No Exposed Wires: Make absolutely sure there are no exposed electrical wires anywhere.
Routine Maintenance
- Cleaning: Regularly clean the lamp fixture and lens to maintain brightness and prevent corrosion.
- Bulb Replacement: Replace bulbs as needed.
- Solar Panel Care: For solar lights, keep the solar panel clean and free of debris or snow.
- Wiring Inspection: Periodically inspect outdoor wiring for any signs of damage from weather or pests.
Frequently Asked Questions (FAQ)
Q1: How deep do I need to bury a lamp post?
A1: Generally, bury at least one-third of the post’s total length. For a 6-foot post, this means 2 feet. Always check local building codes for specific depth requirements, especially in areas with frost or high winds.
Q2: Can I connect a post lamp to a standard outdoor outlet?
A2: Yes, if the outlet is GFCI-protected and rated for outdoor use. For hardwired lamps, it’s often connected to a junction box or directly to your home’s electrical system by a qualified electrician. Low-voltage systems use a transformer plugged into an outlet.
Q3: What type of wire should I use for underground burial?
A3: Use outdoor-rated, underground-rated cable like UF-B (Underground Feeder) cable. It’s designed to be buried directly or run through conduit for extra protection. Always use waterproof wire connectors for all outdoor electrical connections.
Q4: Do I need a concrete base for every lamp post installation?
A4: Not necessarily. Some posts are designed for direct burial. However, a concrete base, or at least a concrete collar, provides much greater stability, especially in windy conditions or softer soil. It’s essential if your post has a mounting flange.
Q5: How often should I check my outdoor lighting wiring?
A5: It’s a good practice to inspect your outdoor wiring annually, or after severe weather events, for any signs of damage or wear. Ensure all connections remain secure and protected from moisture.
By following these detailed steps, you can successfully and safely install a post lamp, enhancing your property’s beauty and security. Remember, when in doubt about electrical work, always consult a professional.