
Can you paint a lamp? Yes, absolutely! Painting a lamp is a fantastic way to breathe new life into old decor without breaking the bank. If you’re looking to refresh your home’s style or simply want to update a tired-looking lamp, this guide will walk you through a budget-friendly DIY lamp makeover. We’ll cover everything from preparing your lamp base to choosing the right paint and applying it for a flawless finish. Get ready to transform your lighting with some simple lamp refinishing techniques.
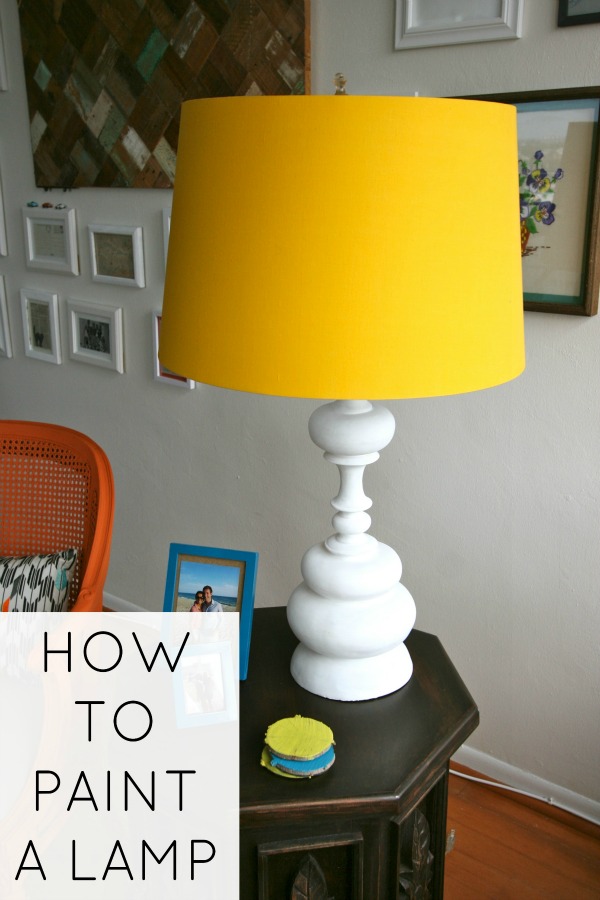
Image Source: www.creatingreallyawesomefunthings.com
Why Paint Your Lamp?
Old lamps often have outdated colors or finishes that don’t match your current decor. Instead of buying a new one, which can be costly, a coat of paint can work wonders. This is a key aspect of furniture painting, where strategic color changes can dramatically alter the feel of a piece. Updating lamps is one of the easiest and most satisfying DIY projects.
Preparing Your Lamp for Painting
Proper preparation is crucial for a professional-looking finish. This step ensures your paint adheres well and lasts longer.
Disassembly and Cleaning
- Unplug the lamp: Safety first! Always ensure the lamp is unplugged before you begin any work.
- Remove the lampshade and bulb: Carefully take off the lampshade and unscrew the lightbulb.
- Wipe down the lamp base: Use a damp cloth with mild soap to clean off dust, dirt, and any grime. For tougher spots, a degreaser might be necessary.
- Dry thoroughly: Make sure the lamp base is completely dry before proceeding.
- Protect electrical components: If you’re not comfortable removing the electrical cord and socket, use painter’s tape to meticulously mask off any areas you don’t want to paint. Pay close attention to the socket where the bulb screws in and the switch.
Light Sanding
Sanding provides a surface for the new paint to grip.
- Choose your grit: For most lamp bases (metal, ceramic, wood), a fine-grit sandpaper (180-220 grit) is ideal. You want to scuff the surface, not remove material.
- Sand gently: Lightly sand the entire surface you plan to paint. This removes any glossy finish that might prevent paint adhesion.
- Wipe away dust: After sanding, use a tack cloth or a slightly damp cloth to remove all dust particles. This is a vital step for a smooth finish.
Choosing the Right Paint for Your Lamp
The type of paint you choose will depend on the lamp base material and the desired finish.
Paint Types for Lamp Bases
Here’s a look at popular paint options for lamp bases:
| Paint Type | Best For | Pros | Cons |
|---|---|---|---|
| Spray Paint | Metal, plastic, ceramic, wood | Quick application, even coverage, wide range of finishes (matte, satin, gloss, metallic) | Fumes require ventilation, can drip if not applied correctly, can be hard to control on intricate shapes. |
| Chalk Paint | Wood, metal, ceramic, painted surfaces | No priming needed, matte finish, easy to distress, adheres to many surfaces | Requires a topcoat (wax or poly), can be more expensive upfront. |
| Acrylic Paint | Wood, ceramic, some plastics (with primer) | Water-based, easy cleanup, versatile, can be used with brushes or sponges | May require a primer for non-porous surfaces, less durable than spray paint without a sealant. |
| Enamel Paint | Metal, wood, some plastics | Durable, scratch-resistant, often comes in spray or brush-on forms | Can have strong fumes, slower drying time than some acrylics. |
Selecting Your Paint Finish
- Matte: Offers a soft, velvety look. Great for a modern or vintage feel.
- Satin: Has a slight sheen, more durable than matte, and easy to clean.
- Glossy: Provides a high shine, reflecting light and making a statement.
- Metallic: Adds a touch of glamour and can mimic the look of metal.
Painting Techniques for Lamp Bases
Different techniques yield different results. Experimenting is part of the fun of a DIY lamp makeover.
Spray Painting Lamps: A Quick and Easy Method
Spray paint is a go-to for many DIYers tackling lamp base painting projects due to its speed and even coverage.
Steps for Spray Painting:
- Choose a well-ventilated area: Outdoors or in a garage with open doors is best.
- Protect surrounding areas: Lay down drop cloths or old newspapers to protect the ground and any nearby objects.
- Shake the can well: Shake the spray paint can for at least one to two minutes to ensure the pigment and propellant are mixed.
- Test spray: Before spraying your lamp, test the spray on a piece of scrap material or cardboard to check the flow and color.
- Apply thin, even coats: Hold the can about 8-12 inches away from the lamp base. Use a steady, sweeping motion, overlapping each stroke slightly. Avoid holding the can in one spot for too long, as this can cause drips.
- Allow drying time between coats: Refer to the paint can for recommended drying times. Typically, it’s 10-15 minutes for light coats.
- Apply multiple coats: Two to three thin coats are usually better than one thick coat for a smooth, opaque finish.
- Let it cure: Once you’ve applied your final coat, let the paint cure completely. This can take 24 hours or more, depending on the paint and humidity. Curing is different from drying; it’s when the paint reaches its maximum hardness and durability.
Chalk Paint Lamps: For a Vintage or Distressed Look
Chalk paint is incredibly forgiving and perfect for achieving a vintage or shabby chic aesthetic.
Steps for Chalk Painting:
- Clean and dry: Ensure your lamp base is clean and dry. Light sanding is still recommended for best adhesion, even though chalk paint is known for its no-prep nature.
- Apply the first coat: Using a chalk paint brush, apply the paint in broad strokes. Don’t worry about perfect coverage initially; the texture is part of the charm.
- Let it dry: Chalk paint dries relatively quickly.
- Apply subsequent coats: Apply as many coats as needed to achieve your desired coverage. You can also layer different colors for a more complex look.
- Distressing (Optional): Once the paint is dry, you can lightly sand areas (like edges or raised details) to reveal the layer underneath or the original lamp material. This creates a beautiful distressed effect.
- Seal your work: Chalk paint requires a protective topcoat.
- Furniture Wax: Apply with a wax brush or cloth in thin layers. Buff to a soft sheen.
- Polyurethane or Sealer: For a more durable, water-resistant finish, especially for lamps that might be placed in humid areas, use a water-based polyurethane or a spray sealant. Apply in thin coats.
Acrylic Paint Lamps: Versatile and Easy to Use
Acrylic paints offer great flexibility, allowing for detailed work or simple color blocking.
Steps for Acrylic Painting:
- Prime (if necessary): For very slick or non-porous surfaces like glass or high-gloss plastic, apply a spray primer specifically designed for that material. Let it dry completely.
- Paint your base layers: Use a good quality brush. Apply the paint in smooth, even strokes.
- Build up color: Apply multiple thin coats for solid coverage. Allow each coat to dry before applying the next.
- Detailing: If you’re adding patterns or details, let your base color dry completely.
- Seal your project: Once the acrylic paint is thoroughly dry, seal it with a clear acrylic sealer or a water-based polyurethane. This protects the paint and adds durability.
Painting Lamp Shades: A Different Ballgame
Painting a lamp shade is possible, but it requires different materials and techniques than painting the lamp base. The goal here is to add color or pattern without making the shade too heavy or opaque, which would block light.
What Kind of Paint Can I Use on Lamp Shades?
- Fabric Spray Paint: This is the best option for fabric lamp shades. It’s designed to be flexible and not stiffen the material.
- Acrylic Paint (Thinned): For some materials or for very light coverage, you can thin acrylic paint with water or a fabric medium. Test this on a scrap piece first.
- Specialty Lamp Shade Paints: Some craft stores carry paints specifically formulated for lamp shades.
Painting Techniques for Lamp Shades
- Preparation: Remove the shade from the lamp. If it’s fabric, ensure it’s clean and free of dust. For paper or plastic shades, wipe them down gently.
- Masking: If you only want to paint part of the shade or if it has a trim, use painter’s tape to mask off those areas.
- Spray Painting Fabric Shades:
- Work in a well-ventilated area, protecting your surroundings.
- Hold the can about 10-12 inches away.
- Use light, sweeping motions. Avoid over-spraying, which can make the fabric stiff or create an uneven finish.
- Apply multiple thin coats rather than one heavy one. Allow ample drying time between coats.
- Important: Fabric spray paint needs to cure properly to retain its flexibility. Follow the product instructions.
- Brush Painting Thinned Acrylics:
- Mix acrylic paint with water or a fabric medium to a milky consistency.
- Test on an inconspicuous area.
- Use a soft brush and apply very thin layers. You might need several coats to build up color.
- Avoid overloading the brush, as this can cause drips and stiffen the material.
- Drying and Reassembly: Let the lampshade dry completely, ideally for 24-48 hours, before reattaching it to the lamp.
Finishing Touches and Sealing
No lamp restoration is complete without a proper finish.
Sealing Your Painted Lamp
- Purpose of Sealing: A sealant protects your painted surface from chipping, scratching, and fading. It also makes it easier to clean.
- Choosing a Sealant:
- Spray Sealants: Offer a convenient and even finish. Options include clear acrylic sealers, polyurethane sprays, or matte sealers.
- Brush-on Sealants: Water-based polyurethanes are excellent choices. They dry clear and offer good durability.
- Application:
- Ensure your painted lamp base is completely dry and cured before applying the sealant.
- Apply thin, even coats, following the product’s instructions.
- Allow each coat to dry thoroughly before applying the next. Two to three coats are usually sufficient.
Adding Embellishments
Once your lamp is painted and sealed, you can add extra flair:
- Faux Finishes: Use metallic waxes or glazes over your dried paint for an aged or metallic effect.
- Stenciling: Add patterns or designs using stencils and a contrasting paint color.
- Hardware: Replace old finials or add decorative elements to the cord.
- New Lampshade: Pair your freshly painted lamp with a new lampshade to complete the updated look. This is another simple way of updating lamps.
Troubleshooting Common Painting Problems
Even with careful preparation, you might encounter issues. Here’s how to fix them:
Drips and Runs
- Cause: Applying paint too thickly, holding the spray can too close, or not using a steady motion.
- Fix: Once the paint is dry, lightly sand down the drip until it’s level with the rest of the surface. Then, reapply thin coats. For severe drips, you might need to wipe off the wet paint with a rag and start the section again.
Uneven Coverage
- Cause: Not shaking the spray paint enough, inconsistent application pressure, or applying paint in a cold, humid environment.
- Fix: Allow the patchy areas to dry completely. Lightly sand them smooth. Apply additional thin coats, ensuring even coverage.
Paint Not Adhering
- Cause: Insufficient sanding or cleaning, painting over a greasy surface, or using the wrong type of paint for the material.
- Fix: If the paint is peeling or chipping easily, you may need to remove it, properly prepare the surface (clean and sand), and repaint.
Lamp Restoration: More Than Just Painting
Lamp restoration can involve more than just a fresh coat of paint. If your lamp has issues with its wiring, the socket, or the pull chain, consider addressing those as well.
Safety First with Electrical Components
- Inspect wiring: Check for any frayed or damaged wires. If you find any, it’s best to have the lamp rewired by a professional.
- Replace the socket: If the socket is cracked or the pull chain mechanism is broken, replacement is usually straightforward. You can find replacement lamp sockets at hardware stores. Ensure you turn off the power at the breaker before working on any electrical components.
Repairing the Lamp Base
- Cracked ceramic or resin: Use a strong adhesive like E6000 or epoxy to repair cracks. Clamp the pieces together while the adhesive dries. You can then paint over the repaired area.
- Loose parts: Tighten any screws or bolts holding the lamp together. If parts are wobbly, use wood glue or epoxy to secure them.
Frequently Asked Questions (FAQ)
Q1: Do I need to prime before painting a lamp?
A1: It depends on the material and the type of paint. For slick surfaces like glossy plastic or metal, a spray primer designed for those materials is highly recommended for good adhesion. If you’re using chalk paint or a good quality bonding primer, you might be able to skip priming on surfaces like wood or ceramic. Always check the paint manufacturer’s recommendations.
Q2: Can I paint a lamp with a clear glass base?
A2: Yes, you can paint a clear glass lamp base. It’s best to use a spray paint specifically designed for glass or a spray primer that adheres well to glass. Lightly sanding the glass with a fine-grit sandpaper can also help improve paint adhesion.
Q3: How do I paint a metal lamp base without getting drips?
A3: The key to avoiding drips when spray painting a metal lamp base is to apply multiple thin coats. Hold the can about 8-12 inches away and use a steady, sweeping motion. Avoid pausing the spray in one spot. If a small drip occurs, let it dry and then gently sand it down before applying another thin coat.
Q4: What kind of paint is best for a wooden lamp base?
A4: For a wooden lamp base, you have several good options:
* Spray paint: Provides quick, even coverage.
* Chalk paint: Offers a matte, no-prep finish and is great for distressing.
* Acrylic paint: Versatile and easy to clean up.
* Latex or oil-based enamel paint: Durable and can be brushed or sprayed.
Regardless of the paint type, light sanding and cleaning are essential first steps for any lamp base painting.
Q5: Can I paint over a lampshade that is already colored?
A5: Yes, you can paint over an existing lampshade, but the results will vary. Lighter colors might show through darker paint. For best results, especially if you want a vibrant color, consider using a primer designed for fabric or the specific shade material first. Fabric spray paint is usually the best choice for fabric lampshades.
Q6: How do I achieve a smooth, professional finish when painting lamps?
A6: A smooth finish comes down to preparation and technique.
1. Clean and sand thoroughly.
2. Use thin, even coats.
3. Allow adequate drying time between coats.
4. If spray painting, maintain a consistent distance and motion.
5. Consider a primer if needed.
6. Apply a clear sealant once the paint is fully cured.
By following these steps and choosing the right materials, your DIY lamp makeover will look professionally done. This approach to updating lamps can significantly improve your home’s aesthetic.
By following these guidelines, you can successfully transform old, uninspired lamps into stylish decorative pieces that enhance your living space. Happy painting!