
What is the correct heat lamp height for chicks? The correct heat lamp height for chicks is typically 12 to 18 inches above the chicks. This distance can vary based on the specific heat lamp wattage, the ambient temperature of the brooding area, and the behavior of the chicks themselves. However, achieving the right chick brooding temperature is paramount for their survival and healthy development. A baby chick heat source needs careful placement to ensure warmth without overheating or causing stress. This guide will delve into the crucial aspects of brooder heat lamp placement for chick survival heat lamp success.
When raising baby chicks, one of the most critical factors for their survival is providing a consistent and appropriate heat source. This is where the chicks heat lamp height and proper brooder heat lamp placement become vital. A misplaced or incorrectly positioned heat lamp can lead to a range of problems, from chilling and weakened immune systems to heat stress and burns. This article will provide a comprehensive guide on how to position your heat lamp correctly, ensuring your little ones stay safe and warm.
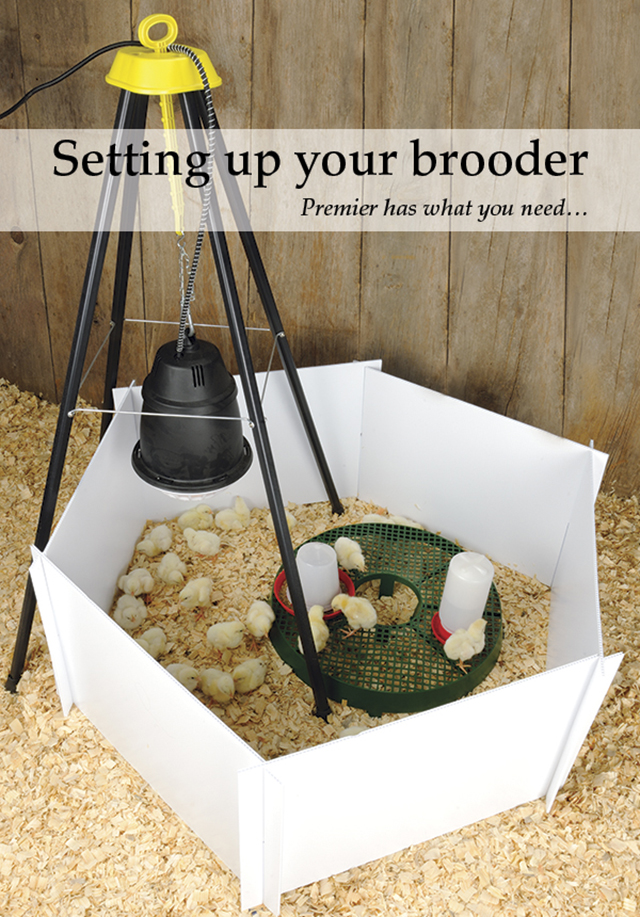
Image Source: www.premier1supplies.com
The Importance of Proper Heat Lamp Placement
Chicks, especially those just a few days old, cannot regulate their own body temperature effectively. They rely entirely on an external heat source to stay warm. This is why a chick survival heat lamp is non-negotiable. The goal is to mimic the warmth of a mother hen, providing a comfortable environment where they can thrive. Incorrect placement can lead to:
- Chilling: If the lamp is too high, the chicks won’t get enough warmth, leading to huddling, shivering, and increased susceptibility to illness.
- Overheating: If the lamp is too low, chicks can suffer from heat stress, dehydration, and even burns. This can be fatal.
- Uneven Heat Distribution: A poorly positioned lamp might create hot spots and cold spots within the brooder, forcing chicks to constantly move to find a comfortable temperature.
Fathoming Chick Comfort Levels
Observing your chicks is the best way to gauge if your heat lamp setup for newborn chicks is correct. Their behavior provides valuable clues:
- Chicks are spread out evenly and chirping contentedly: This indicates they are at a comfortable temperature.
- Chicks are huddled directly under the lamp: The lamp is likely too high, and they are seeking more heat.
- Chicks are huddled together tightly and far from the lamp, or appear lethargic: The lamp is too high, and they are cold.
- Chicks are panting, spreading their wings, and moving away from the heat source: The lamp is too low, and they are too hot.
This direct observation is key to fine-tuning the heat lamp distance for chicks.
Factors Influencing Heat Lamp Positioning
Several factors will influence the ideal heat lamp height for chicks. You can’t simply set it and forget it. Regular checks are essential.
Wattage of the Heat Lamp
Heat lamps come in various wattages, commonly 250 watts. A higher wattage lamp will emit more heat, requiring a greater heat lamp distance for chicks to avoid overheating. Always check the manufacturer’s recommendations for the specific bulb you are using. Using a heat lamp for poultry chicks with a wattage higher than recommended for a brooder size can quickly lead to dangerous temperatures.
Ambient Room Temperature
The temperature of the room where the brooder is located plays a significant role. If the room is already quite warm, you might need to position the lamp higher or even use a lower wattage bulb. Conversely, in a cooler environment, you may need to lower the lamp slightly. The brooder heat lamp placement must account for the overall environment.
Type of Brooder
The size and material of your brooder will also affect heat distribution. A larger brooder allows for more space between the chicks and the heat source, and also provides a larger area for chicks to move away from the heat if they become too warm. A smaller brooder requires more precise heat lamp height for chicks to ensure adequate warm zones and cool zones.
Ventilation
Proper ventilation in the brooder area is crucial. It helps to prevent the buildup of ammonia fumes from droppings and allows for air circulation, which can moderate temperature extremes. Good ventilation supports a healthier environment for the chicks and makes the chick brooding temperature more stable.
Optimal Heat Lamp Placement Guidelines
Here are the practical steps and considerations for setting up your heat lamp:
Initial Setup: The Golden Rule
As a starting point, aim for the chicks heat lamp height to be approximately 12 to 18 inches above the litter. This is a general guideline, and you will need to adjust based on the chicks’ behavior. Think of this as the baseline for your brooder heat lamp placement.
Securing the Heat Lamp
Safety is paramount. Heat lamps can be a fire hazard if not properly secured.
- Use a specialized heat lamp clamp: These are designed to grip the edge of the brooder securely and allow for height adjustments.
- Ensure the clamp is sturdy: It should be able to hold the weight of the lamp without slipping.
- Position the lamp so it hangs directly over the center of the brooder: This ensures even heat distribution.
- Never suspend the lamp by its cord: This is a major fire risk and can lead to the lamp falling into the brooder.
- Make sure the bulb is shielded: Many brooder lamps come with a protective cage. If yours doesn’t, consider adding one to prevent chicks from touching the hot bulb.
Adjusting the Height
This is where observation comes into play.
- First 24-48 hours: Chicks generally need a warmer environment, closer to 90-95°F (32-35°C) at their level. You might start with the lamp at the lower end of the recommended range (12 inches) and monitor the chicks.
- Subsequent Weeks: As chicks grow and develop their own downy insulation, their heat requirements decrease. For every week of age, you can typically raise the heat lamp by about 2 inches.
- Week 1: 90-95°F (32-35°C)
- Week 2: 85-90°F (29-32°C)
- Week 3: 80-85°F (27-29°C)
- Week 4: 75-80°F (24-27°C)
You can use a thermometer placed at chick level to check the temperature. However, the most reliable indicator remains the chicks’ behavior. This iterative process is key to perfecting your heat lamp distance for chicks.
Understanding the “Heat Zone”
A good heat lamp setup for newborn chicks creates a “heat zone” within the brooder. Chicks should be able to move in and out of this warm area as they need to.
- Center: Warmest area directly under the lamp.
- Mid-area: Comfortably warm.
- Outer edges: Cooler, allowing chicks to retreat if they get too warm.
This gradient ensures each chick can self-regulate its temperature. The best heat lamp position chicks can easily navigate provides these options.
Using Thermometers for Accurate Temperature Readings
While observing chick behavior is crucial, a thermometer can provide objective data to confirm your adjustments.
Types of Thermometers to Consider
- Infrared Thermometer (Laser Thermometer): This is an excellent tool because you can point it at the litter surface or the chicks themselves without disturbing them. It gives an immediate surface temperature reading.
- Dial or Digital Thermometer: You can place these inside the brooder at chick level. Ensure they are not positioned directly under the heat lamp or in a drafty area.
Where to Place Thermometers
- Under the lamp (at chick level): This tells you the temperature of the hottest spot.
- Away from the lamp (at chick level): This tells you the temperature of the cooler zone.
The goal is to have a temperature gradient, not a uniformly hot or cold brooder. This ensures the chick brooding temperature is optimally managed.
Common Mistakes to Avoid with Heat Lamps
Even with good intentions, several common pitfalls can occur when setting up a heat lamp for poultry chicks.
Mistake 1: Relying Solely on One Height
As mentioned, chicks’ needs change daily. A fixed height without adjustment is a recipe for disaster. Your brooder heat lamp placement needs to be dynamic.
Mistake 2: Not Securing the Lamp Properly
A falling heat lamp is incredibly dangerous. Always prioritize secure mounting. The heat lamp setup for newborn chicks must be as safe as possible.
Mistake 3: Overlooking Fire Hazards
Bulbs can break, wires can fray, and flammable materials like bedding can ignite. Always use a protective cage and keep the area around the brooder clear.
Mistake 4: Ignoring Chick Behavior
Your chicks are the best indicators. If they look uncomfortable, something is wrong with your heat lamp distance for chicks.
Mistake 5: Using the Wrong Type of Bulb
Incandescent bulbs are standard for heat lamps. Red bulbs are sometimes used to create a calmer environment, but they still emit heat. Avoid bulbs designed for other purposes (e.g., colored decorative bulbs) that may not provide the correct spectrum or intensity of heat.
Mistake 6: Insufficient Brooder Space
If chicks are too crowded, they will have difficulty moving away from the heat source, leading to overheating even if the chicks heat lamp height seems appropriate. Ensure your brooder is large enough for the number of chicks you have.
Alternative and Supplemental Heat Sources
While heat lamps are the most common baby chick heat source, there are alternatives or supplements to consider, especially if you have concerns about fire safety.
- Radiant Brooder Plates: These are flat plates that sit just above the litter. Chicks can go underneath to get warm, mimicking a mother hen’s body. They are generally considered safer than heat lamps as they don’t pose a fire risk and provide a more natural heat. The height of these plates also needs to be adjusted as chicks grow.
- Heated Mats/Pads: Some specialized mats are designed for poultry. Like brooder plates, they offer a gentler, more consistent heat.
- Brooder Thermostats: These can be used with heat lamps or other sources to maintain a consistent temperature, reducing the need for constant manual adjustment. They are a great addition to any heat lamp setup for newborn chicks.
When using any supplemental heat, ensure it complements, rather than competes with, your primary heat source for maintaining the optimal chick brooding temperature.
Transitioning Chicks Away from Artificial Heat
As chicks grow, they will need less supplemental heat. This transition should be gradual.
- Start reducing heat: Once chicks are around 3-4 weeks old and have developed more feathers, you can begin to gradually lower the heat lamp further (increasing the heat lamp distance for chicks) or turn it off for longer periods during the day.
- Monitor their behavior closely: Ensure they are not looking cold or huddling.
- Final transition: By 4-6 weeks old, most chicks will no longer require artificial heat, provided the ambient temperature is suitable for their age and breed.
This gradual weaning is a critical part of ensuring chick survival heat lamp needs are met throughout their vulnerable early stages.
Key Takeaways for Safe and Warm Chicks
To summarize the essentials for your heat lamp for poultry chicks:
- Height is adjustable: The initial chicks heat lamp height is a starting point; observe and adjust.
- Safety first: Secure the lamp properly and guard against fire hazards.
- Temperature gradient: Create a warm zone and cooler zones.
- Observe chicks: Their behavior is your best guide to the correct chick brooding temperature.
- Use thermometers: For objective temperature verification.
- Gradual transition: Slowly reduce heat as chicks mature.
By paying close attention to your brooder heat lamp placement and the needs of your young flock, you can ensure a safe, warm, and healthy start for your baby chicks. The best heat lamp position chicks can thrive in is one that is consistent, safe, and responsive to their developing needs.
Frequently Asked Questions (FAQ)
Q1: How many watts should a heat lamp for chicks be?
A1: A 250-watt heat lamp is the most common and generally suitable for most brooder setups. Ensure you adjust the height based on the specific bulb’s output.
Q2: Can I use a regular light bulb instead of a heat lamp?
A2: No, a regular incandescent light bulb will not provide enough heat for young chicks. They need a dedicated heat bulb designed for this purpose.
Q3: My chicks are sneezing, could the heat lamp be too low?
A3: Sneezing can be a sign of respiratory irritation, which can be caused by excessive heat, dry air, or ammonia fumes. If the heat lamp is too low and causing overheating, it can contribute to this. Ensure proper ventilation and check the heat lamp distance for chicks.
Q4: Is it okay if my chicks huddle directly under the heat lamp all the time?
A4: No, this indicates they are too cold. The chicks heat lamp height needs to be lowered. They should have the option to move to cooler areas.
Q5: How do I know if my brooder is too hot or too cold?
A5: Observe your chicks. If they are spread out evenly and content, the temperature is likely correct. If they are huddled together tightly, they are too cold. If they are panting and trying to get away from the heat, they are too hot.
Q6: What should I do if the heat lamp bulb burns out?
A6: Have a spare bulb readily available. If it burns out during a cold period, immediately replace it. If it happens when chicks are older and the ambient temperature is warmer, you may need to adjust your strategy to provide alternative warmth temporarily.
Q7: Can I use two heat lamps in one brooder?
A7: For most standard brooders, one heat lamp is sufficient. Using two can create excessive heat or uneven distribution. If you have a very large brooder or a significantly cold environment, consult with experienced poultry keepers about safe dual-lamp setups.
Q8: What is the best bedding to use under a heat lamp?
A8: Pine shavings or chick starter litter are good choices. Avoid dusty materials that can irritate chick respiratory systems. Ensure the litter is dry, as wet litter can lead to chilling. The heat lamp setup for newborn chicks should include appropriate bedding.