
Can I replace a 3-way lamp socket? Yes, you absolutely can replace a 3-way lamp socket yourself with a few basic tools and by following these simple steps. This guide will walk you through the entire process of a 3-way lamp socket fix, from identifying the problem to enjoying your newly functional lamp. We’ll cover everything you need to know about 3-way socket wiring and how to rewire a 3-way lamp safely.
Lamps with three-way bulbs are fantastic for setting the mood or providing varying levels of light. However, like any electrical component, the socket can wear out or become damaged. Knowing how to address a faulty 3-way lamp socket replacement is a valuable DIY skill. This article is your comprehensive lamp repair guide, specifically focusing on the common issue of a worn-out 3-way lamp socket. We’ll dive deep into lamp socket troubleshooting, explain the necessary lamp socket replacement parts, and offer clear instructions for how to change a lamp socket.
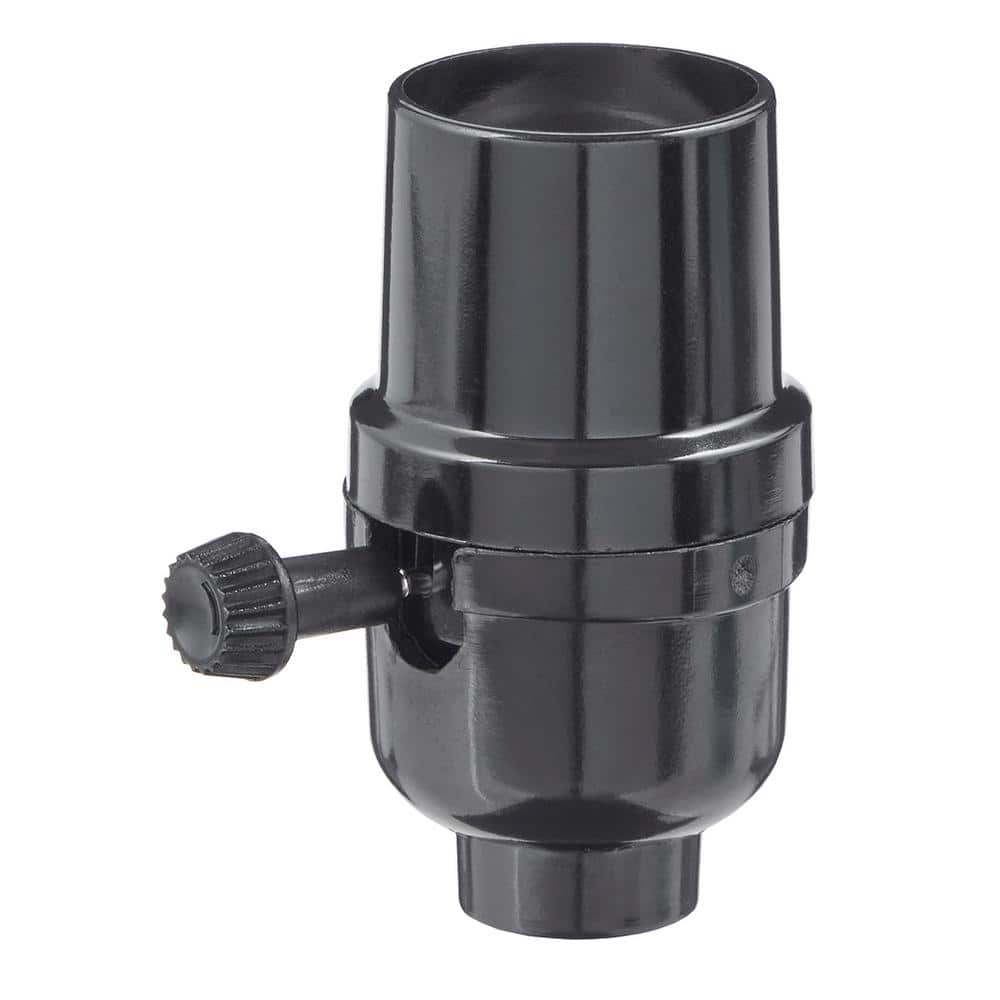
Image Source: images.thdstatic.com
Why Your 3-Way Lamp Socket Might Need Replacing
Several common issues can signal that your 3-way lamp socket is on its way out. Recognizing these signs is the first step in performing a successful 3-way lamp socket fix.
Common Signs of a Failing Socket
- Intermittent Light: The most common symptom is the bulb flickering or turning on and off unexpectedly. This often indicates a loose connection or corrosion within the socket.
- No Light at All: If your lamp suddenly stops working, even with a new bulb, the socket is a prime suspect.
- Bulb Won’t Stay Secure: If the bulb feels loose or wobbly in the socket, the internal spring clips might be damaged or bent.
- Bulb Burns Out Quickly: While this can sometimes be a bulb issue, a faulty socket can also cause improper contact, leading to premature bulb failure.
- Discoloration or Melted Appearance: Any signs of heat damage, charring, or melting around the socket are serious indicators that it needs immediate replacement for safety reasons.
- Loose or Damaged Wiring: Visual inspection might reveal frayed wires, loose connections, or damaged insulation connected to the socket terminals.
Gathering Your Tools and Parts for the Job
Before you begin, it’s crucial to have everything you need ready. This will make the process smoother and safer.
Essential Tools for the Task
- Screwdriver Set: You’ll likely need a Phillips head and potentially a flathead screwdriver to open the lamp and secure wires.
- Wire Strippers/Cutters: For safely removing insulation from wires and trimming them if necessary.
- Needle-Nose Pliers: Helpful for gripping and bending wires, especially when connecting them to terminals.
- Voltage Tester (Non-Contact): This is an absolutely essential safety tool. It allows you to confirm the lamp is completely de-energized before you touch any wires.
- New 3-Way Lamp Socket: Ensure you purchase the correct type for your lamp.
- Lamp Thread Tape or Electrical Tape: To secure wires and insulate connections.
- Small Pliers or Socket Wrench (Optional): Some sockets have a hex nut that needs to be tightened onto the lamp pipe.
Finding the Right Lamp Socket Replacement Parts
When it comes to 3-way lamp socket replacement parts, the key is to get an exact match for what you’re replacing.
Types of 3-Way Sockets
There are a few common designs for 3-way sockets:
- Screw-in Type: These are the most prevalent. They have terminals where wires are screwed in.
- Push-in or Quick-Connect Type: Some newer sockets have terminals where you push the stripped wire into a slot, and it’s held by a spring mechanism.
Key Features to Match
- Thread Size: The socket screws onto a threaded pipe within the lamp. Measure the diameter of this pipe or the threaded portion of your old socket to ensure a match.
- Wattage and Voltage Rating: Most standard lamps use sockets rated for 120V and a maximum wattage (e.g., 150W). Check your old socket for these ratings.
- Mounting Style: How does the socket attach to the lamp? Does it screw onto a pipe, or is it held by a threaded cap?
- Switch Mechanism: Ensure the new socket has the same type of three-position switch (Off, Low, Medium, High).
Tip: Take a clear picture of your old socket, noting the wire connections, before you buy a replacement. You can also take the old socket with you to the hardware store to help match it.
Safety First: De-Energizing Your Lamp
This is the most critical step. Working with electricity can be dangerous if precautions aren’t taken.
Steps to Safely Work on Your Lamp
- Unplug the Lamp: Always ensure the lamp is unplugged from the wall outlet. This is the fundamental safety measure.
- Test with a Voltage Tester: Even though it’s unplugged, it’s good practice to use a non-contact voltage tester on the existing wires going into the socket. Touch the tester to the wires – it should indicate no voltage.
Taking Apart Your Lamp to Access the Socket
Now that the lamp is safely de-energized, you can begin the disassembly process.
Steps for Accessing the Socket
- Remove the Lamp Shade and Bulb: Carefully take off the lampshade and unscrew the light bulb.
- Examine the Socket Housing: Most lamp sockets are held in place by a threaded ring or cap, often called a “socket ring” or “thread collar,” that screws onto the socket body. This ring screws onto the socket threads to secure the socket to the lamp harp or stem.
- Unscrew the Socket Ring: Gently unscrew this ring counter-clockwise. You might need pliers if it’s tight, but be careful not to damage the surrounding parts.
- Lower the Socket: Once the ring is removed, the socket assembly will likely loosen. You should be able to carefully pull it down or lower it slightly to expose the wiring connections.
Deciphering the 3-Way Socket Wiring
A 3-way lamp socket has a specific wiring configuration to achieve its three light levels. Fathoming this setup is key to a successful replacement.
How 3-Way Lamp Socket Wiring Works
A 3-way lamp uses a special 3-way switch built into the socket. This switch controls the flow of electricity to different parts of the bulb.
- Standard Incandescent Bulbs: These bulbs have three contact points: one at the very bottom (the base contact), one around the screw-in base (the shell contact), and a middle contact.
- 3-Way Function:
- Off: No electricity flows.
- Low: Electricity goes to the bottom contact of the bulb and one of the socket’s terminals.
- Medium: Electricity goes to the shell contact of the bulb and another socket terminal.
- High: Electricity flows to both the bottom and shell contacts simultaneously, illuminating both filaments in the bulb.
Identifying the Wires
Inside the lamp, you’ll find two main wires coming from the lamp’s cord. These wires will connect to the terminals on the socket.
- Hot Wire (Usually Black): This wire carries the electrical current.
- Neutral Wire (Usually White): This wire completes the circuit.
In a 3-way socket, you will typically see three connection points:
- Common Terminal: This is where the hot wire from the power cord connects.
- Low Terminal: This connects to one of the bulb’s filaments (via the bottom contact).
- Medium Terminal: This connects to the other filament (via the shell contact).
Important Note: Wire colors can vary, especially in older lamps. Always rely on a voltage tester and the physical layout of the connections if in doubt.
Understanding the 3-Way Socket Diagram
A visual aid can be incredibly helpful. While specific diagrams vary slightly by manufacturer, the principle remains the same.
Here’s a simplified representation of a typical 3-way socket wiring:
| Terminal Location | Wire Color (Typical) | Function (3-Way Bulb) |
|---|---|---|
| Common Terminal | Black (from cord) | Hot wire input |
| Low Terminal | Silver or Brass | Connects to bottom bulb contact (low filament) |
| Medium Terminal | Brass or Darker | Connects to shell bulb contact (medium filament) |
| Shell Contact | Connected to Medium | Outer screw base of bulb |
| Bottom Contact | Connected to Low | Center tip of bulb |
You will often find the common wire connects to the screw that is physically furthest from the switch mechanism, while the low and medium wires connect to the terminals that correspond to the bulb’s bottom and shell contacts.
Removing the Old 3-Way Lamp Socket
With the lamp disassembled and the wiring layout clear, you can now remove the old socket.
Steps to Safely Remove the Socket
- Disconnect Wires: Loosen the screws holding the wires to the old socket terminals. Carefully remove the wires from their terminals. If the wires are very short, you might need to strip a tiny bit more insulation to give yourself some slack.
- Remove the Old Socket: Once the wires are disconnected, the socket itself should be free from the lamp’s stem or harp. You might need to unscrew it from a central threaded pipe.
Installing Your New 3-Way Lamp Socket
This is where you bring your lamp back to life!
Step-by-Step Installation Process
- Prepare the New Socket: Ensure the new socket is clean and ready for wiring.
- Attach the New Socket: Secure the new socket onto the lamp’s stem or pipe. If there’s a threaded pipe, screw the socket onto it until it’s snug.
- Connect the Wires:
- Identify the Common Terminal: Look for the terminal that is usually brass or darker in color and often has a slightly different screw than the others. Connect the hot wire (usually black from the cord) to this terminal.
- Connect the Low and Medium Wires: The remaining two wires from the lamp’s cord will connect to the other two terminals. These usually correspond to the bottom contact and the shell contact of the bulb. In most cases, the wire that was connected to the terminal closest to the bulb’s shell will connect to the new socket’s corresponding terminal. Likewise for the wire connecting to the bulb’s bottom contact.
- Secure the Wires: Wrap the stripped end of each wire around the screw terminal in a clockwise direction. Tighten the screws firmly, ensuring no stray wire strands are sticking out. Use needle-nose pliers to ensure the wire wraps around the screw properly.
- Secure the Socket: Screw the socket ring or thread collar back onto the new socket to hold it firmly in place against the lamp’s harp or stem.
- Tidy Up: Tuck any excess wire neatly back into the lamp’s housing.
Testing Your Newly Replaced Socket
The moment of truth!
How to Safely Test Your Lamp
- Reassemble Components: Place the lampshade back on and screw in a new 3-way bulb.
- Plug In and Test: Plug the lamp into the wall outlet.
- Cycle Through Settings: Turn the lamp on and cycle through the three brightness settings using the switch. Ensure each setting works correctly.
Troubleshooting Common Issues After Replacement
Even with careful work, you might encounter a small hiccup. Here’s how to tackle it.
Common Problems and Solutions
- Lamp Still Doesn’t Work:
- Double-check: Ensure the lamp is plugged in.
- Bulb: Try a different 3-way bulb.
- Connections: Unplug the lamp, and carefully re-check all wire connections to the socket terminals. Ensure they are tight and in the correct positions.
- Cord: Inspect the lamp’s power cord for any damage. If the cord itself is faulty, it might need replacement.
- Only One or Two Settings Work:
- Wire Connections: This is almost always a wiring issue. Unplug the lamp and verify that the wires are correctly attached to the common, low, and medium terminals according to the 3-way socket diagram. A misplaced wire is the most common cause.
- Socket Feels Loose:
- Socket Ring: Ensure the socket ring or thread collar is tightened securely.
- Buzzing Sound:
- Loose Connections: This can indicate a loose wire connection within the socket or at the switch. Unplug and check all connections.
- Bulb Issue: Less commonly, a faulty bulb can cause buzzing.
Advanced Lamp Repair: When to Seek Professional Help
While replacing a 3-way lamp socket is a manageable DIY task, there are situations where professional help is advisable.
When to Call an Electrician or Lamp Repair Specialist
- Damaged Lamp Cord: If the power cord is frayed, cut, or shows signs of melting, it’s best to have it professionally replaced.
- Internal Lamp Wiring Issues: If you discover complex wiring within the lamp base that seems damaged or confusing, do not attempt to rewire it yourself.
- Unfamiliar With Electrical Work: If you are uncomfortable or unsure about any step, especially regarding electrical connections, it’s always safer to consult a professional.
- Antique or Valuable Lamps: For lamps that are particularly old, valuable, or have intricate designs, it might be worth seeking out a specialized lamp repair service to ensure no damage occurs during the repair.
Frequently Asked Questions About 3-Way Lamp Sockets
Here are answers to some common questions people have when tackling a 3-way lamp socket replacement.
FAQs
Q1: How do I know if my lamp socket is bad?
A1: Signs include flickering light, no light at all, the bulb feeling loose, or visible signs of heat damage around the socket.
Q2: What kind of bulb do I need for a 3-way lamp?
A2: You need a specific 3-way incandescent or LED bulb. These bulbs have three distinct brightness levels (usually indicated by 50-100-150 watts, or equivalent for LEDs).
Q3: Can I use a regular light bulb in a 3-way socket?
A3: Yes, but it will only operate at its single, standard brightness. You won’t get the three-way functionality.
Q4: What does the middle terminal on a 3-way socket do?
A4: The middle terminal, often referred to as the “medium” terminal, along with the common terminal, controls the second filament in a 3-way bulb.
Q5: Do I need to solder the wires when replacing a lamp socket?
A5: In most cases, no. Standard lamp sockets use screw terminals, so you just need to strip the wire and secure it with the screw. Soldering is generally not required for typical lamp socket replacement.
Q6: My new socket has different terminal colors than the old one. What should I do?
A6: Refer to the diagram provided with the new socket or the generalized 3-way socket diagram. Match the function (common, low, medium) rather than just the wire color. The common terminal is always where the hot wire from the cord connects.
Q7: How tight should I screw in the socket ring?
A7: Screw it in until it’s snug and the socket feels secure, but don’t overtighten, as this could crack the socket housing or damage the lamp stem.
Q8: Can I replace a 3-way socket with a regular one?
A8: Yes, you can, but your lamp will no longer have the three-way functionality. If you only want a single brightness, this is an option. However, if you want to maintain the 3-way feature, you must use a 3-way replacement socket.
By following this detailed guide, you can confidently tackle the task of how to replace a 3-way lamp socket. With a little care and the right materials, your lamp will be back to providing its full range of illumination in no time. Remember to prioritize safety throughout the process, especially when dealing with electrical components.