
Image Source: i.ytimg.com
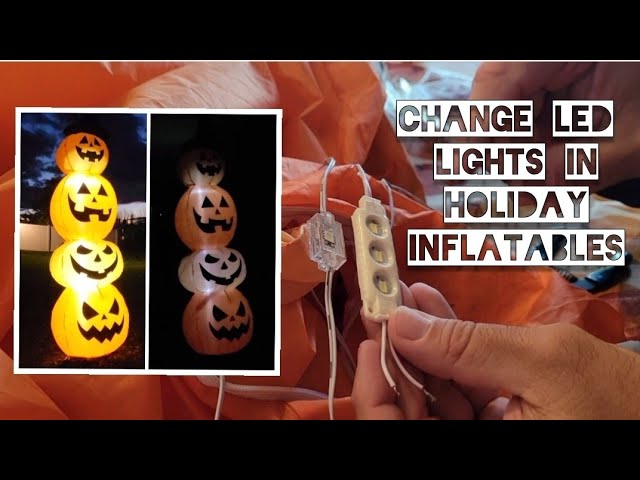
How To Replace LED Light In Inflatable: Step-By-Step
Can I replace an LED light in an inflatable? Yes, you absolutely can replace an LED light in an inflatable, and it’s often a straightforward process that can save you money and extend the life of your favorite decorations. What is the best way to troubleshoot inflatable lights? The best way to troubleshoot inflatable lights is to start with the power source, check connections, and then systematically test individual bulbs or LED strips if the problem persists.
Illuminated inflatables bring joy and festive cheer to any occasion, from Halloween and Christmas to birthday parties and summer gatherings. But what happens when one of those bright, cheerful lights flickers out? Don’t despair! This guide will walk you through the process of replacing an LED light in your inflatable, ensuring your decorations stay dazzling. We’ll cover everything from identifying the problem to making the actual LED replacement, helping you with your inflatable repair needs and DIY LED fix.
Identifying the Problem
Before you can fix it, you need to know what’s wrong. A single dim or non-functioning light can be frustrating, but it’s usually an easy fix.
Common Issues with Inflatable Lights
- One light out: This is the most common scenario. Often, a single LED has failed or a connection has come loose.
- Section of lights out: If a whole string or a group of LEDs isn’t working, it might indicate a break in the wire connecting that section or a problem with the power supply to that part of the circuit.
- Flickering lights: This could be a loose connection, a failing LED, or an issue with the power adapter.
- No lights at all: This usually points to a problem with the power source, the main plug, the fuse (if applicable), or the entire LED strip/system.
Tools and Materials You’ll Need
Gathering these items before you start will make the process smoother:
- Replacement LED(s): Make sure to get the correct type and color.
- Wire strippers/cutters: For preparing wires.
- Soldering iron and solder (optional but recommended for a durable fix): For more permanent connections.
- Electrical tape or heat shrink tubing: For insulating connections.
- Small Phillips head screwdriver: Often needed to open battery compartments or access light modules.
- Pliers: For gripping wires or removing components.
- Multimeter (optional): To test for voltage and continuity if you’re comfortable using one.
- Gloves (optional): To keep your hands clean and avoid leaving fingerprints on new LEDs.
- Safety glasses: To protect your eyes, especially if soldering or cutting wires.
Preparing Your Inflatable for Repair
Safety and proper preparation are key to a successful DIY LED fix.
Safety First!
- Unplug the inflatable: Always disconnect the power source before attempting any repairs. This is crucial to prevent electric shock.
- Allow time to deflate: If you need to access the internal components, it’s best to let the inflatable deflate completely or partially. This makes it easier to reach the lights and wiring.
- Work in a well-lit area: Good lighting will help you see what you’re doing and avoid mistakes.
Accessing the Light Module
The way you access the LED light will depend on the design of your inflatable.
- External Light Modules: Some inflatables have light modules or bulb holders that are visible on the exterior. These might have a simple clip-on cover or a small screw to remove.
- Internal Access Panels: Many inflatables have a hidden access panel, often near the base or the blower, secured with Velcro or zippers. This panel allows you to reach the internal wiring and blower system.
- Accessing Through Fabric: In some cases, you might need to carefully access the light by gently reaching through the fabric itself, especially if the light is integrated into a specific part of the decoration. Be very careful not to tear the material.
Replacing a Single LED Bulb (Bulb Swap)
This is the most common type of LED replacement. It involves swapping out a faulty LED with a new one.
Step-by-Step: Changing Bulb
- Locate the Faulty LED: Identify which LED is not working. If it’s a single LED in a string, you might need to trace the wires to find the problematic one.
- Access the LED: Depending on the design, you might find the LED is part of a small module or directly wired into the string.
- If it’s a plug-in module: Carefully unplug the old LED module from its socket. Inspect the socket for any corrosion or damage.
- If it’s wired: You’ll likely need to carefully cut the wires connecting the old LED. Make a note of which wire connects to which side of the LED (positive and negative). LEDs are polarized, meaning they only work when connected the right way around.
- Remove the Old LED:
- For plug-in modules: Gently pull the old module out.
- For wired LEDs: If the LED is soldered, you’ll need to desolder it. If it’s just crimped or twisted, you might be able to carefully unwrap or pull it free.
- Prepare the New LED: New LEDs often have small leads (wires) on either side. If they are very long, you might need to trim them slightly with wire cutters.
- Connect the New LED: This is where your method of connection comes in.
- Soldering (Recommended for Durability):
- Strip a small amount of insulation from the ends of the wires leading to the LED socket.
- Strip a small amount of insulation from the leads of the new LED.
- Twist the corresponding wires together (positive to positive, negative to negative).
- Heat your soldering iron and apply a small amount of solder to the twisted wires. Aim for a smooth, shiny connection.
- Once cooled, cover the connection with electrical tape or a piece of heat shrink tubing. Slide the heat shrink tubing over the joint before soldering, then slide it back over the soldered connection and apply heat (using a lighter or heat gun) to shrink it.
- Wire Connectors/Crimping: If the original connection used wire nuts or crimp connectors, you can use similar ones for the replacement. Ensure you get the correct size. Strip the wires, insert them into the connector, and crimp or twist securely.
- Twisting and Taping (Less Durable): While not ideal for long-term repairs, you can twist the wires together securely and wrap them tightly with electrical tape. Make sure the tape is applied smoothly and covers the connection completely.
- Soldering (Recommended for Durability):
- Test the New LED: Before reassembling everything, plug the inflatable back in (briefly!) to test if the new LED lights up. If it doesn’t, double-check your connections for polarity (are positive and negative wires matched correctly?) and ensure the solder joint is good.
- Secure and Reassemble: Once you’ve confirmed the new LED works, carefully tuck the wires away so they don’t get pinched. Close any access panels or covers.
Replacing an Entire LED String or Module
If multiple lights are out or the problem is more extensive, you might need to replace a whole section.
Troubleshooting Inflatable Lights: Beyond Single Bulbs
- Checking the Power Supply: Ensure the power adapter is working correctly. You can test it with a multimeter if you have one, or try it with another device if it’s a universal adapter.
- Inspecting the Main Wiring: Follow the wires from the power plug into the inflatable. Look for any signs of damage, fraying, or breaks. Loose connections at the main harness can also cause issues.
- Fuses: Some inflatables have an in-line fuse in the power cord. Check if this fuse has blown and replace it if necessary with one of the same amperage.
Step-by-Step: Replacing a String
- Identify the Affected Section: Determine which part of the inflatable’s lighting system is failing.
- Locate the Connection Point: Find where the faulty LED string connects to the main power harness or the next section of lights. This might involve opening a larger access panel.
- Disconnect the Old String: Carefully disconnect the old LED string. This might involve unplugging a connector, cutting wires, or removing screws. Take clear photos before disconnecting to remember how it was wired.
- Connect the New String:
- Ensure the new LED string is compatible with your inflatable (voltage, connector type).
- Connect the new string following the same pattern as the old one. Again, pay close attention to polarity. Solder connections are best here for reliability.
- Secure and Route Wiring: Make sure the new wiring is routed safely, away from the blower fan or any moving parts. Use zip ties or tape to secure it neatly.
- Test: Plug in the inflatable to test the new section.
- Reassemble: Close up all access panels securely.
Common Challenges and Solutions
Even with the best intentions, you might run into a few snags. Here’s how to deal with them.
Table: Common Inflatable Light Problems and Fixes
| Problem | Possible Cause | Solution |
|---|---|---|
| One LED not lighting | Burned-out LED, loose connection, incorrect polarity | Replace the LED (see detailed steps above). Check and secure wire connections. Ensure correct polarity (+ to +, – to -). |
| Section of LEDs out | Broken wire in the section, loose connector | Inspect wiring for breaks. Check connectors for looseness or corrosion. If a section is faulty, you may need to replace the entire string (see above). |
| All LEDs out | Power supply issue, blown fuse, main wiring fault | Check the power outlet. Test the power adapter. Inspect the power cord for damage. Check for and replace any blown fuses. If none of these, the internal wiring harness may be damaged and require professional repair or replacement of the entire lighting system. |
| Flickering lights | Loose connection, failing LED, voltage fluctuations | Tighten all connections. Test individual LEDs for consistent output. Ensure the power supply is stable and adequate for the load. Sometimes, replacing a few LEDs in the flickering section can resolve the issue. |
| Water ingress near lights | Compromised seal, crack in housing | If water has entered a light module, unplug immediately and allow it to dry completely. Inspect the module for cracks. You might need to seal minor cracks with waterproof sealant or replace the module entirely. Ensure all seals and connections are tight to prevent future water damage, which can lead to short circuits and component failure. This is a crucial aspect of inflatable repair. |
When to Call a Professional
While many LED replacements are DIY-friendly, there are times when it’s best to seek expert help.
- Complex Internal Wiring: If the wiring is extremely intricate or integrated into a sealed unit, attempting a repair yourself might cause more damage.
- Multiple Component Failures: If you suspect more than just a single LED is faulty, and you’re not comfortable diagnosing a complex electrical issue, a professional can help.
- Uncertainty: If you’re unsure about any step of the process or uncomfortable working with electrical components, it’s always safer to consult a professional who specializes in repairing inflatables or electronics.
Maintaining Your Illuminated Inflatable
Regular care can prevent future problems and keep your decorations looking their best. This is key for seasonal decoration maintenance.
Tips for Longevity
- Proper Storage: When not in use, store your inflatable in a cool, dry place. Ensure the lights and wiring are not tangled or kinked.
- Regular Inspection: Before each use, give your inflatable a quick visual inspection. Look for any signs of wear and tear on the fabric, as well as on the blower and light components.
- Protect from Elements: While designed for outdoor use, extreme weather can still cause damage. If heavy rain or high winds are expected, it’s best to deflate and store your inflatable.
- Gentle Cleaning: If you need to clean your inflatable, use mild soap and water. Avoid harsh chemicals or abrasive materials that could damage the fabric or the lighting components. Ensure it’s completely dry before storing.
By following these steps, you can confidently tackle LED replacement in your inflatables, keeping your festive lights shining bright for seasons to come. A little bit of care and a willingness to do a DIY LED fix can go a long way in maintaining your cherished decorations.
Frequently Asked Questions (FAQ)
Q1: Can I use a different color LED than the original?
A1: Yes, you can generally use a different color LED, as long as it’s the same voltage and type (e.g., same size and base if it’s a replaceable bulb). However, if it’s part of a specific color sequence, using a different color might disrupt that pattern.
Q2: My inflatable has LED strips. How do I replace a section of the strip?
A2: LED strips are usually connected with small connectors or by soldering. You’ll need to identify where the faulty section begins and ends. Cut the strip at the designated cut points (often marked with a scissor icon) and use a compatible connector or solder to attach a new section of the same type of LED strip.
Q3: How do I know if my inflatable has a fuse?
A3: Check the power cord where it plugs into the wall. Some power adapters have a small sliding door that reveals a fuse. If you don’t see one there, the fuse might be located internally within the inflatable’s wiring harness. Consult your inflatable’s manual if available.
Q4: My inflatable smells like burning plastic when the lights are on. What should I do?
A4: Unplug the inflatable immediately! This is a serious safety hazard. It indicates a potential short circuit, overheating component, or faulty wiring. Do not attempt to use the inflatable until it has been inspected by a qualified professional. This could be a severe issue requiring immediate inflatable repair.
Q5: Is it safe to repair inflatable lights myself?
A5: For basic LED replacement and minor wire fixes, it is generally safe if you follow all safety precautions, especially unplugging the device. However, if you are not comfortable with electrical work or the problem seems extensive, it’s always safer to seek professional help to avoid further damage or potential hazards.
Q6: How do I prevent my inflatable lights from getting damaged during use?
A6: Avoid placing the inflatable where it can rub against rough surfaces. Ensure the lights are not pinched by the fabric when the inflatable is fully inflated. Keep children and pets from playing too roughly around the lights and wiring. Proper installation and placement are key to maintaining your illuminated inflatable.