
Image Source: i.ytimg.com
How To Replace Switch On Lamp: Easy Guide
Can I replace a switch on a lamp myself? Yes, you can replace a switch on a lamp yourself with the right tools and a little patience. This guide will walk you through the process of performing a light switch replacement and even touch upon lamp cord repair and dimmer switch installation for those looking to upgrade their lighting.
Lamps are a wonderful way to add ambiance and light to any room. But what happens when the switch stops working? A faulty light switch can leave your favorite lamp useless. Fortunately, replacing a lamp switch is a straightforward DIY project that most people can tackle. This comprehensive guide will equip you with the knowledge and steps needed to confidently replace your lamp’s switch, ensuring your lamp shines bright once more. We’ll also explore related topics like lamp wiring diagram, how to wire a lamp, replace lamp socket, and the importance of domestic wiring safety.
Why Replace Your Lamp Switch?
Several reasons might prompt you to replace a lamp switch:
- Malfunction: The most common reason is a switch that no longer works. This could be due to wear and tear, internal damage, or simply reaching the end of its lifespan.
- Damage: The switch might be physically broken, cracked, or loose, posing a safety hazard.
- Upgrade: You might want to upgrade to a different type of switch, such as a dimmer switch for more control over light intensity or a touch-sensitive switch for modern convenience.
- Safety: If the switch feels hot to the touch, sparks, or smells unusual, it’s a critical safety issue and needs immediate replacement.
Safety First: Essential Precautions for Lamp Repair
Before you begin any electrical work, prioritizing safety is paramount. Working with electricity can be dangerous if not done correctly. Adhering to domestic wiring safety guidelines is crucial.
- Always unplug the lamp: This is the most critical step. Ensure the lamp is completely disconnected from the power outlet before you start. Double-check that the plug is out of the socket.
- Use insulated tools: Employ screwdrivers and wire strippers with insulated handles to prevent accidental electric shock.
- Work in a dry environment: Ensure your hands and the work area are dry. Avoid working near water sources.
- If you’re unsure, don’t proceed: Electrical work can be complex. If at any point you feel uncomfortable or uncertain, it’s best to consult a qualified electrician.
Tools and Materials You’ll Need
Gathering the right tools before you start will make the process smoother and safer.
- New Lamp Switch: Ensure it’s compatible with your lamp’s wattage and type. Common types include inline rocker switches, rotary switches, and push-button switches.
- Screwdriver Set: You’ll likely need a Phillips head and a flathead screwdriver, preferably with insulated handles.
- Wire Strippers/Cutters: Essential for removing insulation from wires.
- Pliers: Needle-nose pliers can be helpful for manipulating wires and terminals.
- Wire Nuts (optional, depending on switch type): For securely connecting wires.
- New Lamp Cord (if repairing cord): If the cord itself is damaged, you’ll need a replacement.
- Multimeter (optional, for testing): To check for continuity and voltage.
- Electrical Tape: For insulating any exposed wire connections.
- Flashlight or Headlamp: To illuminate your workspace.
Locating and Accessing the Switch
Most table lamps and floor lamps have the switch located either on the lamp cord itself (inline switch) or near the bulb socket.
- Inline Switches: These are usually found a few inches to a foot away from the lamp base or plug. They often have a small seam or screws that allow access to the internal mechanism.
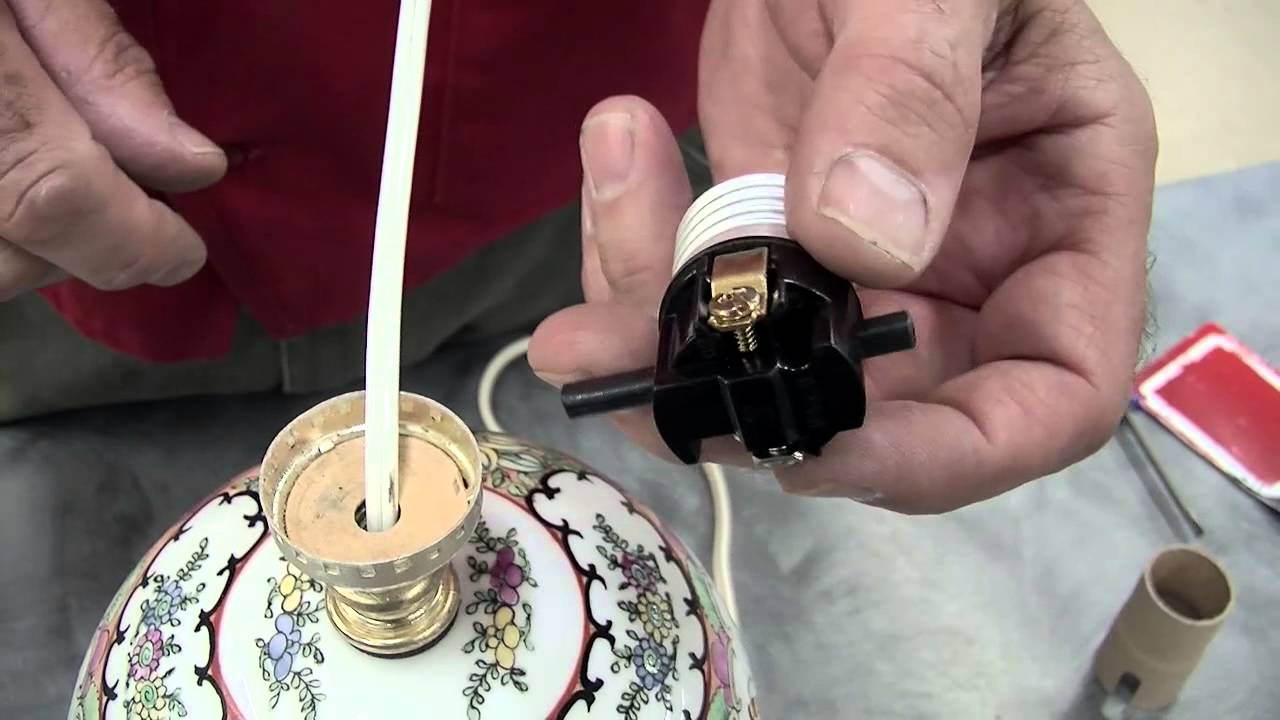
- Socket Switches: On some lamps, the switch is integrated into the base of the light socket. In this case, you might need to unscrew the socket assembly from the lamp’s stem.
Step-by-Step Guide to Replacing an Inline Lamp Switch
This is the most common type of switch found on lamps. Follow these steps carefully.
Step 1: Unplug the Lamp
As stressed before, this is the most critical safety step. Make sure the lamp is completely disconnected from the power source.
Step 2: Locate the Faulty Switch
Find the switch on the lamp cord that you suspect is broken or malfunctioning.
Step 3: Open the Switch Housing
Most inline switches are designed to be opened. Look for small screws that hold the housing together.
* Use the appropriate screwdriver to gently loosen and remove these screws.
* Carefully separate the two halves of the switch housing. Be mindful of any small internal components.
Step 4: Inspect the Internal Wiring
Once the housing is open, you’ll see how the lamp cord wires are connected to the switch terminals.
* Typically, the lamp cord has two wires: one is the “hot” wire (often black or red) and the other is the “neutral” wire (often white or blue).
* These wires will be connected to screw terminals or push-in connectors within the switch.
Deciphering a Lamp Wiring Diagram:
While it might seem intimidating, a basic lamp wiring diagram is quite simple. It shows how the power flows from the wall outlet, through the cord, to the switch, and then to the socket where the bulb is.
- The power cord usually splits inside the switch housing.
- One wire (hot) goes to one terminal of the switch.
- Another wire from the switch then connects to the socket.
- The neutral wire usually bypasses the switch entirely and goes directly from the cord to the socket.
Step 5: Disconnect the Old Switch
- Screw Terminals: If the wires are connected to screw terminals, loosen the screws and carefully remove the wires.
- Push-In Connectors: Some switches have small holes where you insert the stripped ends of the wires. You might need to press a small release tab with a tiny screwdriver to free the wire.
Step 6: Prepare the New Switch
Your new switch will likely look very similar to the old one.
- If the new switch came with a separate cover, set it aside for now.
- Examine the terminals on the new switch. They will either be screw terminals or push-in connectors.
Step 7: Connect the New Switch
This is where you essentially reverse the disconnection process. Referencing the old wiring or a lamp wiring diagram is helpful here.
- Identify Wire Positions: Note which wire was connected to which terminal on the old switch. This is crucial for ensuring the lamp operates correctly. If there’s no clear marking, the hot wire (usually black) connects to the switched terminal, and the neutral wire (usually white) bypasses the switch.
- Strip Wires (if necessary): Ensure the ends of the lamp cord wires are stripped cleanly, exposing about half an inch of copper. If they are too long or too short, use your wire strippers to adjust them.
- Connect to New Switch:
- Screw Terminals: Loop the stripped end of the wire clockwise around the screw terminal and tighten the screw securely. Ensure no stray strands of wire are loose.
- Push-In Connectors: Gently push the stripped wire end into the appropriate connector hole until it feels secure.
- Important Note on Wire Splitting: For an inline switch, the lamp cord is actually cut in half. The switch is designed to reconnect these two halves. One side of the cord connects to the input terminals, and the other side connects to the output terminals.
Step 8: Secure the Wires
Ensure all connections are tight and that no bare wire is exposed beyond the terminals. You can wrap any exposed connections with electrical tape for extra security and insulation.
Step 9: Close the Switch Housing
- Carefully place the two halves of the switch housing back together.
- Ensure no wires are pinched or trapped.
- Reinsert and tighten the screws to secure the housing.
Step 10: Test the Lamp
- Plug the lamp back into the power outlet.
- Turn the switch on and off to confirm it’s working correctly.
Replacing a Socket-Mounted Switch
If your lamp has a switch integrated into the socket, the process is slightly different. This often involves replacing the entire socket assembly.
Step 1: Safety First! Unplug the Lamp
Again, this is non-negotiable.
Step 2: Access the Socket
- On many lamps, the socket assembly is held in place by a threaded collar or a retaining nut.
- You may need to unscrew a decorative shade holder or finial first.
- Carefully unscrew the socket assembly from the lamp’s stem.
Step 3: Expose the Socket Wiring
- The socket usually has a cover or a base that can be unscrewed or pried open.
- Inside, you’ll find wires coming from the lamp cord connected to terminals on the socket.
Step 4: Note the Wiring (Crucial!)
Before disconnecting anything, take a clear picture or draw a simple lamp wiring diagram of how the wires are connected to the socket terminals.
* One wire from the cord will connect to a terminal that controls the light (usually marked with a screw color, like brass for the hot side).
* The other wire (neutral) will connect to the other terminal (often silver).
Step 5: Disconnect the Old Socket
- Carefully loosen the screws holding the wires to the old socket terminals.
- Remove the wires.
Step 6: Prepare the New Socket
Ensure you have a compatible replacement socket. It should match the type of bulb your lamp uses (e.g., E26 base) and the wattage rating.
Step 7: Wire the New Socket
- Referencing your diagram or photo, connect the wires from the lamp cord to the corresponding terminals on the new socket.
- Strip the wire ends if necessary, and secure them tightly to the screw terminals.
Step 8: Reassemble the Socket
- Carefully close the socket housing.
- Ensure no wires are pinched.
- Screw the new socket assembly back onto the lamp stem.
- Replace any shade holders or finials you removed.
Step 9: Test the Lamp
Plug it in and test the new switch.
Lamp Cord Repair: When the Cord Itself is Damaged
Sometimes, the issue isn’t just the switch but also the lamp cord repair. If the cord is frayed, cut, or damaged, you’ll need to replace it entirely or splice in a new section.
Replacing the Entire Cord
This is often the safest and most robust solution for a damaged cord.
- Unplug the Lamp.
- Trace the Cord: Follow the cord from the plug all the way to where it enters the lamp base or stem.
- Disconnect the Old Cord: This usually involves opening the lamp base to access where the cord connects internally. You might need to disconnect it from a terminal block or directly from the socket/switch assembly. Note the wiring meticulously.
- Attach the New Cord: Thread the new cord through the lamp base and connect its wires to the same points as the old cord, following your noted wiring. Ensure a secure connection.
- Secure the Cord: Make sure the cord is properly anchored where it enters the lamp to prevent strain on the internal connections.
- Reassemble and Test.
Splicing a Damaged Cord Section (Use with Caution)
This is a temporary fix or for minor damage. It’s often better to replace the whole cord if the damage is significant.
- Unplug the Lamp.
- Identify the Damage: Locate the specific section of the cord that is damaged.
- Cut Out Damaged Section: Carefully cut out the damaged portion of the cord.
- Prepare for Splice: Strip about an inch of insulation from the two cut ends of the cord.
- Connect the Wires: You’ll have two wires from each side of the cut.
- Connect the two “hot” wires (usually black) together using a wire nut or by soldering and then covering with heat-shrink tubing.
- Connect the two “neutral” wires (usually white) together similarly.
- Insulate Thoroughly: Use electrical tape or heat-shrink tubing to ensure no bare wire is exposed.
- Test Carefully: Plug in the lamp and test. Ensure the splice is not getting warm. If it does, this is a sign of a poor connection or overloading, and the entire cord should be replaced.
Upgrading to a Dimmer Switch Installation
Want more control over your lamp’s brightness? A dimmer switch installation is a fantastic upgrade.
- Types of Dimmers:
- Inline Rotary Dimmer: Replaces a standard inline switch. You turn a knob to adjust brightness.
- Inline Rocker Dimmer: Replaces an inline switch with a rocker style that often has a small dial or touch control.
- Socket Dimmer: Screws into the socket, and the bulb screws into it.
- Considerations for Dimmer Switches:
- Wattage Compatibility: Ensure the dimmer switch is rated for the wattage of the bulb you’re using.
- Bulb Type: Not all bulbs are dimmable. Use LED or incandescent bulbs specifically marked as “dimmable.”
- Heat: Dimmers can generate heat, especially older incandescent types. Ensure adequate ventilation.
- Installation: The process is very similar to replacing a standard inline switch, but you’ll be connecting the wires to the specific terminals on the dimmer unit. Always follow the manufacturer’s instructions for your chosen dimmer. Some may have more complex wiring configurations.
Troubleshooting Common Lamp Switch Issues
| Problem | Possible Cause | Solution |
|---|---|---|
| Lamp won’t turn on | Faulty switch, loose wire connection | Replace the switch, check all wire connections for tightness. |
| Lamp flickers or dims intermittently | Loose connection, worn-out switch, faulty bulb | Tighten all connections, replace the switch, try a new bulb. |
| Switch feels hot | Overloaded circuit, damaged switch, poor connection | Ensure wattage is within limits, replace the switch, check connections. If persists, consult an electrician. |
| Switch is loose or wobbly | Internal screw loose, housing cracked | Tighten internal screws, replace the switch housing or the entire switch if cracked. |
| Lamp turns on when switch is off | Internal short circuit in the switch | Replace the switch immediately. |
When to Call a Professional Electrician
While many lamp repairs are DIY-friendly, there are times when you should seek professional help.
- Uncertainty: If you’re ever unsure about any step or the wiring itself.
- Damaged Lamp Cord: If the cord is severely damaged or frayed, especially near where it enters the lamp base.
- Internal Lamp Wiring Issues: If the problem seems to be beyond the switch or socket, involving the lamp’s internal wiring or base.
- Persistent Problems: If you replace the switch and the lamp still doesn’t work correctly.
- Signs of Fire Hazard: Any smell of burning, excessive heat, or sparking that you can’t immediately resolve.
Frequently Asked Questions (FAQ)
Q1: What kind of switch do I need to replace my lamp’s switch?
A1: You need a replacement switch that matches the type of switch currently in your lamp (e.g., inline rocker, inline rotary, socket switch) and is rated for the wattage of your lamp.
Q2: Can I use a dimmer switch on any lamp?
A2: No, you can only use a dimmer switch with bulbs that are specifically designed to be dimmable (usually incandescent or specific LED bulbs). The dimmer switch also needs to be rated for the wattage of the bulb.
Q3: How do I know which wire is the hot wire and which is the neutral wire?
A3: Typically, the hot wire is black or red, and the neutral wire is white or blue. However, this can vary. It’s crucial to observe how the old switch was wired or consult a lamp wiring diagram if you’re unsure.
Q4: What if my lamp has a three-prong plug?
A4: Lamps with three-prong plugs are usually designed for more powerful appliances or have specific grounding requirements. If your lamp has a three-prong plug, it’s best to ensure your replacement switch and any cord repairs are also grounded and follow domestic wiring safety standards for three-wire systems. For simpler lamps with two-prong plugs, the wiring is generally less complex.
Q5: How do I replace an electrical socket on a lamp if the socket itself is broken?
A5: This process is similar to replacing a socket-mounted switch. You’ll need to unplug the lamp, carefully detach the old socket from the lamp structure, note the wiring connections, disconnect the wires, connect them to the new socket, and reassemble. Always ensure the new socket is compatible.
Replacing a switch on a lamp is a rewarding DIY task that can save you money and bring your beloved lamps back to life. By following these steps and prioritizing safety, you can confidently tackle this common household repair. Remember to always work cautiously and, when in doubt, consult a professional.