
Can you cut LED light strips? Yes, you can cut most LED light strips, typically at designated cut marks. This allows for customization to fit your specific lighting needs.
LED light strips offer a versatile and energy-efficient way to illuminate your home or business. Whether you’re looking to add accent lighting under cabinets, create a dramatic effect behind your TV, or enhance the ambiance of a room, these flexible strips are a fantastic DIY solution. This guide will walk you through everything you need to know to get your LED strip lighting project up and running.
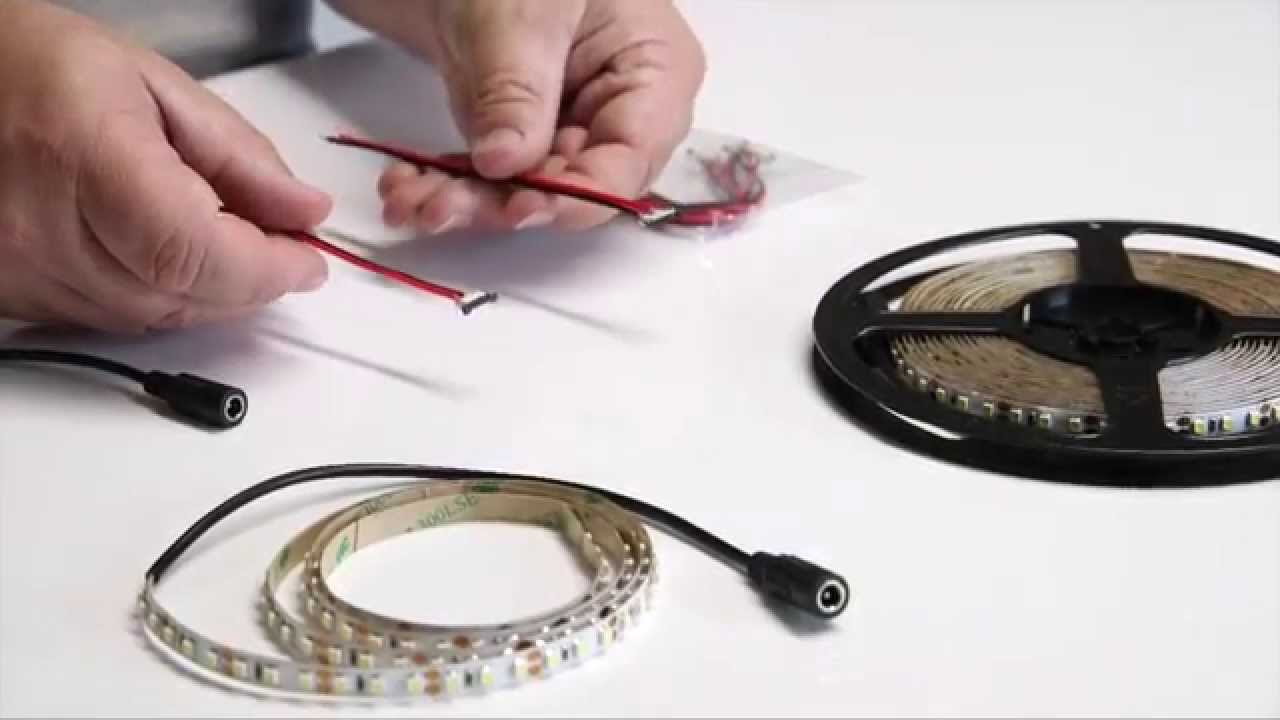
Image Source: i.ytimg.com
Exploring the Benefits of LED Strip Lighting
Before diving into the how-to, let’s quickly touch on why LED strips are such a popular choice. The LED strip benefits are numerous and compelling for both practical and aesthetic reasons.
- Energy Efficiency: LEDs consume significantly less power than traditional incandescent bulbs, leading to lower electricity bills.
- Long Lifespan: These lights are built to last, often shining brightly for tens of thousands of hours, meaning fewer replacements.
- Versatility: Their flexible nature and ability to be cut to size make them adaptable to virtually any space and design.
- Customization: With various colors, brightness levels, and control options, you can create the perfect mood and atmosphere.
- Low Heat Output: Unlike older lighting technologies, LEDs generate very little heat, making them safe to use in enclosed spaces or near sensitive materials.
- Easy Installation: For many applications, DIY LED strip lighting is straightforward, requiring minimal tools and expertise.
Getting Started: What You’ll Need
To successfully implement your LED strip lighting, you’ll need a few key components. Think of this as your essential toolkit.
Essential Components:
- LED Light Strip: The heart of your project. These come in various colors (single color, RGB, RGBW) and densities (number of LEDs per meter).
- LED Strip Power Supply: This is crucial. It converts your home’s AC power to the DC power that LEDs require. The voltage (usually 12V or 24V) must match your LED strip.
- LED Strip Controller (for color-changing or dimmable strips): If you have RGB, RGBW, or dimmable white strips, you’ll need a controller to manage colors and brightness. These can range from simple remotes to smart home-compatible Wi-Fi controllers.
- Connectors: For joining sections of LED strip or connecting to the power supply/controller. You’ll find clip-on connectors, solderless connectors, and soldering equipment.
- Mounting Accessories: Options include adhesive backing (often pre-applied to the strips), mounting clips, or specialized channels for a cleaner look.
Optional but Recommended:
- LED Strip Channels/Diffusers: These aluminum channels protect the LEDs, help dissipate heat, and provide a more even, diffused light, reducing harsh spots.
- Wire Strippers and Cutters: For preparing wires if you’re soldering or using certain types of connectors.
- Soldering Iron and Solder: For more secure and permanent connections, especially for longer runs or custom configurations.
- Measuring Tape: To accurately plan your LED strip placement.
- Cleaning Supplies: Isopropyl alcohol and a clean cloth to prepare the surface for adhesion.
Planning Your Project: Key Considerations
Before you even think about plugging anything in, a little planning goes a long way. This is where you map out your vision and ensure you have everything you need.
1. Design and Layout:
- Define Your Purpose: What do you want the lights to achieve? Accent, task, mood, or decorative lighting?
- Measure Your Space: Accurately measure the lengths of the areas you want to illuminate. This is critical for purchasing the correct amount of LED strip.
- Consider LED Strip Placement: Where will the strips be installed? Under cabinets, behind furniture, along ceiling coves, or outlining a feature? Think about how the light will fall and if you want it to be directly visible or diffused.
- Power Source Location: Where is the nearest power outlet? Plan how you’ll route the power supply and any wires discreetly.
2. Choosing the Right LED Strip:
- Color:
- Single Color: For a consistent look (e.g., warm white for kitchens, cool white for workspaces).
- RGB (Red, Green, Blue): Allows you to mix colors to create a wide spectrum of hues.
- RGBW (RGB + White): Adds a dedicated warm or cool white channel, providing purer whites and more subtle color mixing than RGB alone.
- LED Density (LEDs per Meter): Higher density means brighter, more continuous light. Common densities are 30, 60, or 120 LEDs per meter.
- Voltage: Most commonly 12V or 24V. Ensure this matches your power supply. 24V strips can run longer distances without significant voltage drop.
- Brightness (Lumens per Meter): Choose based on your desired illumination level.
- IP Rating: If installing in a damp or outdoor environment, look for IP-rated strips (e.g., IP65, IP67) for water and dust resistance.
3. Calculating Power Requirements:
This is a crucial step often overlooked, leading to dim lights or damaged power supplies.
- Find the Wattage per Meter: This information is usually provided by the manufacturer on the product packaging or specifications.
- Calculate Total Wattage: Multiply the wattage per meter by the total length of LED strip you’ll be using.
- Example: If your strip is 10W/meter and you’re using 5 meters, your total wattage is 10W/meter * 5 meters = 50W.
- Add a Buffer: Always choose a power supply with a wattage rating at least 20% higher than your calculated total. This prevents the power supply from overheating and ensures a longer lifespan.
- Example: For 50W, choose a power supply rated for at least 50W * 1.20 = 60W. A 75W or 100W supply would be ideal.
4. Selecting the Controller and Power Supply:
- Controller Compatibility: Ensure your controller can handle the type of LED strip (RGB, RGBW) and its total power draw.
- Power Supply Voltage: Must match your LED strip (12V or 24V).
- Power Supply Wattage: As calculated above, ensure it has enough wattage with a buffer.
The Installation Process: Step-by-Step
Now for the hands-on part! Here’s how to bring your LED strip lighting to life.
Step 1: Prepare the Surface
Cleanliness is key for the adhesive backing to stick well.
- Use a clean cloth and isopropyl alcohol to wipe down the surface where you plan to mount the LED strip.
- Allow the surface to dry completely.
Step 2: Cut the LED Strip (If Necessary)
Most LED strips have designated cut marks, often indicated by a scissor icon or copper pads.
- Measure the length you need and identify the nearest cut mark.
- Use sharp scissors or wire cutters to make a clean cut straight across the copper pads. Do not cut anywhere else.
Step 3: Connecting LED Strips and Components
There are several ways to make connections.
Method A: Using Solderless Connectors
This is the easiest method for DIYers, requiring no soldering skills.
- Prepare the Strip End: Gently peel back the silicone coating (if present) at the cut end of the LED strip to expose the copper connection points.
- Open the Connector: Ensure the connector is open and ready. For RGB/RGBW strips, make sure the polarity (+/-) is correct for each color channel and the power input.
- Insert the Strip: Carefully slide the cut end of the LED strip into the connector, ensuring the copper pads align with the connector’s pins.
- Close the Connector: Snap the connector shut firmly to secure the connection.
- Repeat: Connect multiple strips end-to-end or connect the first strip to the power supply/controller lead.
Method B: Soldering Connections
This provides the most robust and reliable connection, especially for high-humidity areas or longer runs.
- Prepare the Strip Ends: Cut the strip at a designated mark. Gently tin the exposed copper pads with a small amount of solder.
- Prepare Wires: Strip a small amount of insulation from the ends of your connecting wires (or wires attached to the power/controller lead).
- Tin the Wires: Apply a small amount of solder to the stripped ends of the wires.
- Solder: Heat the copper pads on the LED strip and the tinned wire simultaneously with the soldering iron. Apply a small amount of solder to the heated connection point.
- Secure: Allow the solder to cool and solidify. Use heat-shrink tubing or electrical tape to insulate the connection and prevent short circuits.
- Repeat: Connect multiple strips or components as needed, paying close attention to polarity (+/-).
Step 4: LED Strip Wiring to Controller and Power Supply
This is where everything comes together.
- Single Color Strips: Connect the LED strip to the power supply directly (if it has an integrated connector) or via a simple DC connector.
- RGB/RGBW Strips:
- Connect the LED strip to the LED strip controller‘s output terminals. Ensure the pins on the strip (often marked R, G, B, W, V+) align correctly with the controller’s corresponding outputs.
- Connect the LED strip power supply to the controller’s input terminals. Again, match the polarity (+/-) correctly.
- Ensure Polarity: Double-check all connections for correct polarity. Reversing polarity can damage the LEDs or controller.
Step 5: LED Strip Mounting
Now it’s time to affix the strips to their intended locations.
- Adhesive Backing: Peel off the protective backing from the adhesive tape on the rear of the LED strip. Carefully press the strip firmly onto the prepared surface, starting from one end and working your way along. Avoid touching the adhesive with your fingers.
- Mounting Clips: For extra security, especially on textured surfaces or in areas with vibration, use the provided mounting clips. Position the clips along the strip and screw them into place.
- LED Strip Channels: Slide the LED strip into the aluminum channel. Then, mount the channel to your desired location using screws or the channel’s adhesive backing.
Step 6: Powering Up and Testing
The moment of truth!
- Plug the LED strip power supply into the wall outlet.
- If you have a controller with a remote, use it to turn on the lights and test different colors and effects.
- If you have a Wi-Fi or app-controlled system, follow the manufacturer’s instructions to pair your device.
Troubleshooting Common Issues
Even with careful planning, you might encounter a snag. Here are some common LED strip troubleshooting tips.
| Problem | Possible Cause | Solution |
|---|---|---|
| No Light at All | Power supply not plugged in or faulty. | Check that the power supply is plugged into a working outlet and that the connection to the strip/controller is secure. Try a different outlet. Test the power supply with a multimeter if possible. |
| Loose connections. | Ensure all wire connections (solderless, soldered, or DC connectors) are firm and properly seated. | |
| Incorrect polarity. | Verify that positive (+) and negative (-) connections are correctly aligned throughout the circuit. | |
| Faulty LED strip or controller. | Try connecting a known working LED strip section to the power supply/controller, or vice versa, to isolate the faulty component. | |
| Part of the Strip Doesn’t Light Up | A break in the circuit on the strip. | If using solderless connectors, the connection at that point might be poor. If soldered, the solder joint might have failed. You might need to cut out the bad section and reconnect. |
| Exceeded maximum run length for the strip (voltage drop). | Shorter runs are better, especially for 12V strips. Use 24V strips for longer runs. If voltage drop is the issue, you may need to power the strip from both ends. | |
| Dim Lights or Flickering | Insufficient power supply wattage. | Ensure your power supply has enough wattage for the total length of the strip with a 20% buffer. |
| Voltage drop over long runs. | Use thicker gauge wires for longer runs or power the strip from both ends. Consider using a 24V strip. | |
| Poor connections causing resistance. | Ensure all connections are clean and tight. Solder connections are generally more reliable than cheap solderless connectors. | |
| Colors are Incorrect or Mismatched (RGB) | Incorrect wiring to the controller. | Double-check that the R, G, B, and V+ connections on the strip are wired to the correct terminals on the controller. The order matters. |
| Faulty controller or segment of the LED strip. | Test the controller with a different LED strip section, or test the strip section with a known working controller. | |
| LEDs Blink or Flash Intermittently | Unstable power supply or loose connections. | Check the power supply connection to the wall and to the controller. Ensure all wire connections are secure. A power supply that is on the verge of failing can cause this. |
| Adhesive Not Sticking Well | Surface not properly cleaned or prepared. | Re-clean the surface with isopropyl alcohol and allow it to dry thoroughly. |
| Surface is too rough, porous, or greasy. | Use mounting clips or LED channels for better adhesion on such surfaces. |
Advanced Techniques and Considerations
Once you’ve mastered the basics, you might want to explore more advanced applications of DIY LED strip lighting.
Extending Run Lengths and Powering from Multiple Points
For very long runs or high-density strips, you might experience “voltage drop.” This means the voltage decreases along the length of the strip, causing the LEDs at the far end to be dimmer than those closer to the power source.
- Use Higher Voltage Strips: 24V strips inherently have less voltage drop than 12V strips over the same distance.
- Use Thicker Gauge Wire: For longer power leads, use thicker gauge wire to minimize resistance.
- Power from Both Ends: The most effective solution is to run a separate wire from the power supply (or controller) to the far end of the LED strip and connect it there. This ensures consistent voltage across the entire strip. You’ll need to cut the strip and use connectors or soldering to attach these additional power leads.
Integrating with Smart Home Systems
Many modern LED strip controllers are Wi-Fi or Bluetooth enabled, allowing integration with smart home platforms like:
- Amazon Alexa
- Google Assistant
- Apple HomeKit (look for HomeKit-certified controllers)
- Samsung SmartThings
This enables voice control, scheduling, and automation of your LED lighting.
Using LED Channels and Diffusers
These accessories are highly recommended for a professional finish.
- Protection: Channels shield the LED strip from dust, moisture, and physical damage.
- Heat Dissipation: Aluminum channels help draw heat away from the LEDs, extending their lifespan.
- Light Quality: Diffuser covers soften the light, eliminating individual LED “hot spots” and creating a smooth, even glow. They are invaluable for applications where the strip is visible, such as under cabinet lighting or cove lighting.
Frequently Asked Questions (FAQ)
Q1: Can I connect more than one LED strip together?
A1: Yes, you can connect multiple LED strips end-to-end using connectors or soldering. However, be mindful of the total length and power requirements to avoid voltage drop and ensure your power supply and controller can handle the load.
Q2: How do I know what power supply to buy?
A2: Calculate the total wattage of your LED strips (wattage per meter x total meters) and then add a 20% buffer. The voltage of the power supply must match the voltage of your LED strip (12V or 24V).
Q3: My LED strip is dimming at the end. What’s wrong?
A3: This is likely due to voltage drop. For longer runs, use 24V strips, thicker wires, or power the strip from both ends.
Q4: Can I use LED strips outdoors?
A4: Yes, but you must use strips with an appropriate IP rating (e.g., IP65 or higher) for water and dust resistance, and ensure all connections are also waterproof.
Q5: How do I change the color of my RGB LED strip?
A5: You need an RGB LED strip controller. These can come with a remote control or be controlled via a smartphone app or voice assistant if they are smart controllers.
Q6: What is the difference between RGB and RGBW LED strips?
A6: RGB strips create colors by mixing red, green, and blue light. RGBW strips have an additional dedicated white LED, which allows for purer white light and more nuanced color mixing than RGB alone.
LED light strips are a fantastic way to enhance any space. By following this guide, you can confidently plan, install, and enjoy your DIY LED strip lighting project, adding both style and functionality to your environment. Happy lighting!