
Can you use a UV lamp for nails at home? Yes, you absolutely can! With the right tools and a little practice, achieving professional-looking gel manicures at home is well within your reach. This guide will walk you through everything you need to know about using a UV lamp for nails, making the process simple and enjoyable for beginners.
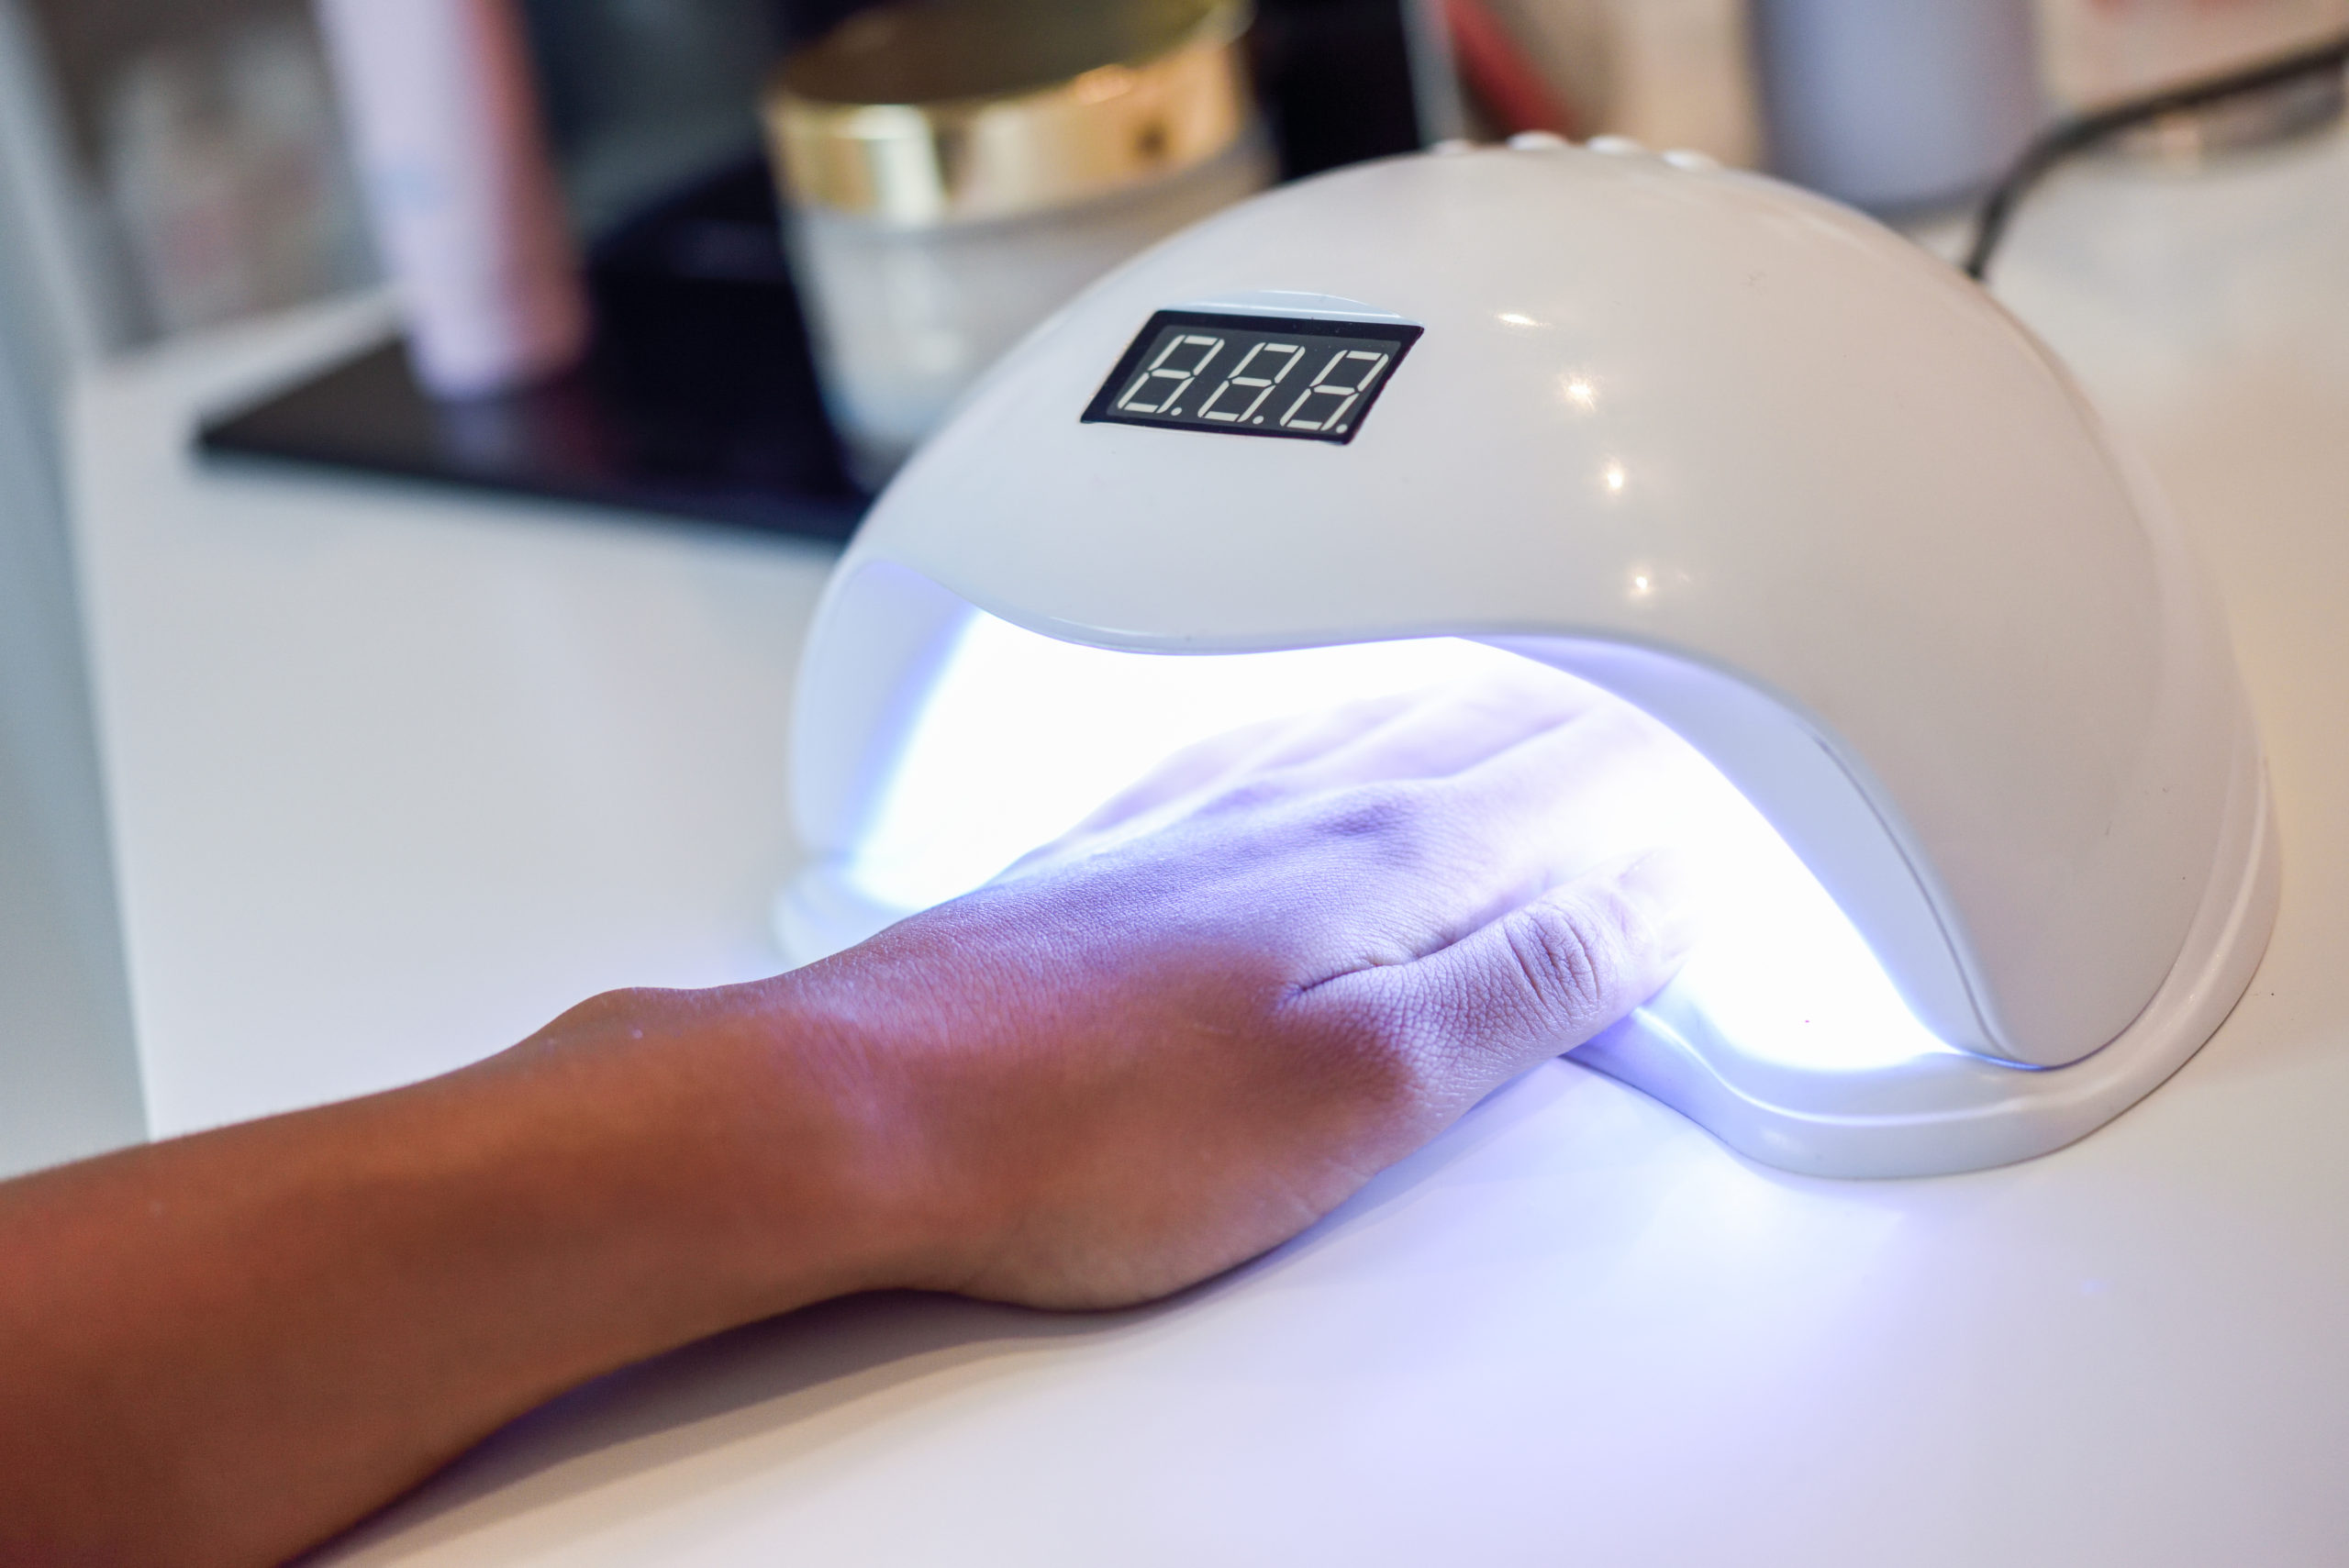
Image Source: tipsyturvynails.com
What You Need for Home Gel Nails
Embarking on the journey of home gel nails requires a few essential items beyond just the UV lamp itself. Think of it as building your personal at-home nail salon.
The Core Components of Your Gel Manicure Kit:
- UV/LED Nail Lamp: This is the heart of your operation. We’ll delve deeper into choosing the best UV lamp later, but for now, know that this device is crucial for curing (hardening) your gel polish.
- Gel Polish: This isn’t your average nail polish. Gel polish is a special formula that hardens under UV or LED light. It’s known for its durability and glossy finish.
- Nail Prep Tools:
- Nail File: To shape your nails.
- Nail Buffer: To smooth the nail surface for better adhesion.
- Cuticle Pusher/Orange Stick: To gently push back your cuticles.
- Lint-Free Wipes: Essential for cleaning the nail surface without leaving fibers.
- Nail Cleanser/Alcohol: To remove any oils or residue from the nail before applying polish.
- Base Coat: This forms the foundation, protecting your natural nail and helping the gel polish adhere better.
- Top Coat: This seals the color, provides a high-gloss finish, and protects against chipping.
- Cuticle Oil: To nourish your cuticles after the manicure.
- Nail Polish Remover (Acetone-Based): For when it’s time to change your color.
Choosing Your UV/LED Nail Lamp
Not all nail lamps are created equal. The market offers both UV lamps and LED lamps, and understanding the differences will help you pick the right one for your needs.
UV Lamp vs. LED Lamp Nails: What’s the Difference?
- UV Lamps: These use ultraviolet bulbs to cure gel polish. They are generally more affordable but take longer to cure, typically 2-3 minutes per coat. The bulbs also need to be replaced periodically.
- LED Lamps: These use Light Emitting Diodes. They cure gel polish much faster, often in 30-60 seconds per coat. LED lamps are more energy-efficient and have a longer lifespan as they don’t have bulbs that burn out. Most modern UV nail dryer devices are actually hybrids, offering both UV and LED bulbs for maximum compatibility.
Key Features to Look For:
- Wattage: Higher wattage generally means faster curing times. Look for lamps with at least 36 watts for efficient curing.
- Sensors: Automatic sensors turn the lamp on when you place your hand inside, making the process easier.
- Timers: Built-in timers with preset curing times (e.g., 30, 60, 90, 120 seconds) are very convenient.
- Size and Shape: Ensure the lamp is large enough to fit your hand comfortably, and consider if you’ll be curing both hands at once or need space for toes.
- Portability and Power: Consider if you need a battery-operated lamp for on-the-go or a mains-powered one for home use.
The Step-by-Step Gel Manicure Process
Now that you have your tools, let’s dive into the gel manicure process. Follow these steps carefully for a salon-quality finish.
Step 1: Nail Preparation
Proper preparation is key to a long-lasting gel manicure.
- Shape Your Nails: Use a nail file to shape your nails to your desired length and style.
- Push Back Cuticles: Gently push back your cuticles using a cuticle pusher or orange stick. Avoid cutting them unless you are experienced, as this can lead to damage.
- Buff the Nail Surface: Lightly buff the surface of your natural nail with a nail buffer. This creates a smooth canvas and helps the base coat adhere better. Be gentle; you’re not trying to remove the nail, just create a slightly rough surface.
- Cleanse the Nails: Wipe each nail thoroughly with a lint-free wipe and nail cleanser or rubbing alcohol. This removes any dust, oils, or natural moisture from the nail plate, which can prevent the gel from adhering properly.
Step 2: Applying the Base Coat
The base coat is your gel manicure’s best friend, ensuring adhesion and protecting your natural nail.
- Apply a Thin Layer: Apply a very thin, even layer of gel base coat to each nail. Ensure you cap the free edge (the tip of the nail) by running the brush along it. This helps prevent chipping.
- Cure Under the Lamp: Place your hand under the UV/LED lamp and cure for the time specified by the base coat manufacturer (usually 30-60 seconds for LED, 2 minutes for UV).
Step 3: Applying the Gel Color
This is where your nails start to transform!
- Apply Thin Coats: Apply a thin, even layer of your chosen gel polish color. Again, cap the free edge. Avoid getting polish on your cuticles or skin.
- Cure: Place your hand under the lamp and cure for the recommended time (typically 30-60 seconds for LED, 2 minutes for UV).
- Apply Second Coat (if needed): For opaque coverage, apply a second thin coat of gel polish. Cap the free edge and cure again under the lamp. Depending on the polish, you might need a third coat for full opacity, but remember to keep each coat thin.
Step 4: Applying the Top Coat
The top coat is the final seal, providing shine and durability.
- Apply a Thin, Even Layer: Apply a thin, even layer of gel top coat, making sure to cap the free edge. This is crucial for preventing lifting and chipping. Ensure no polish is touching your skin or cuticles.
- Cure: Place your hand under the lamp and cure for the recommended time (usually 60 seconds for LED, 2 minutes for UV). Some top coats are “no-wipe,” meaning they don’t leave a sticky residue. Others require a cleansing step.
- Cleanse (if applicable): If your top coat has a sticky “inhibition layer,” wipe each nail with a lint-free wipe soaked in nail cleanser or rubbing alcohol to reveal the glossy finish.
Step 5: Final Touches
- Apply Cuticle Oil: Once your manicure is complete and the lamp has done its job, apply a drop of cuticle oil to each nail and massage it in. This rehydrates the skin around your nails, keeping them healthy and preventing dryness.
Nail Lamp Benefits: Why Go Gel?
The nail lamp benefits extend beyond just achieving a beautiful shine. Gel manicures offer a practical and aesthetically pleasing solution for those seeking longer-lasting, chip-resistant nails.
Advantages of Using a Gel Polish and Lamp System:
- Durability: Gel polish is incredibly tough. It resists chipping and smudging far better than traditional nail polish, often lasting 2-3 weeks without losing its luster.
- Quick Drying: The curing process under a lamp means your nails are completely dry and hard immediately after the manicure. No more waiting hours for polish to set, only to smudge it within minutes!
- High Shine: Gel manicures provide a consistently glossy, mirror-like finish that traditional polish can struggle to maintain.
- Strength: The gel layer can add a protective shield to natural nails, making them less prone to breaking.
- Consistency: Achieving a smooth, even application is easier with gel polish, especially with the guidance of a lamp for proper curing.
How to Cure Gel: The Science of Hardening
How to cure gel effectively relies on the interaction between the gel polish formula and the light emitted by your lamp.
The Curing Process Explained:
Gel polish contains photoinitiators. When these molecules are exposed to UV or LED light of specific wavelengths, they trigger a chemical reaction that hardens (cures) the polish.
- Even Application is Key: Ensure each layer of polish is applied thinly and evenly. Thick patches can lead to incomplete curing, resulting in a gummy or lifted finish.
- Full Exposure: Make sure all parts of the nail, including the edges and the area near the cuticle, are exposed to the light. Avoid getting polish on your skin, as it will cure onto your skin and can cause irritation or the gel to lift from the nail.
- Time Matters: Adhere to the curing times recommended by the polish and lamp manufacturers. Under-curing can lead to a weak, easily removed manicure, while over-curing can make it brittle and difficult to remove.
Nail Lamp Safety: Important Considerations
While UV lamps are safe for occasional use, a few nail lamp safety guidelines will ensure you use them responsibly.
Protecting Yourself and Your Nails:
- Limit Exposure: The U.S. Food and Drug Administration (FDA) notes that the UV exposure from nail lamps is generally low, but it’s still a form of UV radiation. While the risk of skin cancer is extremely low, it’s wise to minimize exposure.
- Use Sunscreen: Applying a broad-spectrum SPF 30 or higher sunscreen to your hands 20 minutes before using the lamp can offer protection.
- Wear UV-Protective Gloves: Special gloves designed to block UV rays are available and offer excellent protection.
- Avoid Overlapping Curing Times: Stick to the recommended curing times. Prolonged exposure isn’t necessary and doesn’t improve the cure.
- Inspect Your Lamp: Ensure your lamp’s bulbs (if it has them) are not damaged or expired. Replace UV bulbs as recommended by the manufacturer, usually every 6-12 months, even if they still light up, as their UV output can diminish. LED lamps don’t have bulbs to replace.
- Keep Away from Water: Like any electrical device, keep your nail lamp away from water.
Troubleshooting Common Gel Manicure Issues
Even with careful application, you might encounter a few hiccups. Here’s how to address them.
Addressing Gel Polish Problems:
- Gel Not Curing Properly (Gummy or Smudgy):
- Possible Causes: Polish applied too thickly; insufficient curing time; old or weak UV bulbs; incompatible polish and lamp.
- Solutions: Apply thinner coats; ensure you’re using the correct curing time for both base/top coat and color; replace UV bulbs if old; try a different brand of gel polish to see if it cures better.
- Gel Lifting or Peeling:
- Possible Causes: Insufficient nail prep (oils left on the nail); base coat not applied to the free edge; gel touching the cuticle or skin; base coat not cured properly.
- Solutions: Thoroughly cleanse and dehydrate nails; cap the free edge with all coats; ensure no gel touches the skin; cure the base coat for the full recommended time.
- Bubbles in Gel Polish:
- Possible Causes: Shaking the polish bottle too vigorously; applying polish too quickly.
- Solutions: Gently roll the bottle between your hands to mix; apply polish in slow, even strokes.
- Glossy Finish is Dull:
- Possible Causes: Top coat not applied evenly; forgetting to cure the top coat; not wiping off the inhibition layer (if applicable).
- Solutions: Ensure an even top coat application, capping the free edge; cure the top coat for the full recommended time; wipe off the sticky layer with cleanser if your top coat requires it.
Frequently Asked Questions About UV Lamps for Nails
Q: Can I use any nail polish with a UV lamp?
A: No, only gel polish is designed to cure under UV or LED light. Regular nail polish will not harden in a UV lamp; it dries through evaporation.
Q: How long does a gel manicure typically last?
A: A well-applied gel manicure can last anywhere from 2 to 3 weeks, depending on your nail care habits and the quality of the products used.
Q: Do UV lamps damage your nails?
A: When used correctly and with proper removal techniques, UV lamps themselves do not damage your nails. Damage can occur if you try to peel or pick off gel polish, or if the nail preparation process is too harsh.
Q: How often should I replace UV bulbs in my nail lamp?
A: UV bulbs typically need replacement every 6 to 12 months, depending on usage and manufacturer recommendations. LED lamps do not have bulbs that need replacing.
Q: Is it safe to use my own nail lamp at home?
A: Yes, it is safe to use your own nail lamp at home when following the safety guidelines provided, such as limiting exposure and potentially using sunscreen or protective gloves.
Q: What is the difference between a UV lamp and an LED lamp for nails?
A: UV lamps use ultraviolet bulbs that cure gel polish over a longer period (around 2 minutes). LED lamps use Light Emitting Diodes and cure gel polish much faster (around 30-60 seconds). LED lamps are generally more energy-efficient and have a longer lifespan. Many modern lamps are hybrids of both technologies.
Q: What is the best UV lamp for home use?
A: The best UV lamp for home use depends on your budget and needs. Look for a lamp with at least 36 watts, automatic sensors, and multiple timer settings. Brands like MelodySusie, Gelish, and OPI offer popular and reliable options for home use.
Q: How do I remove gel polish?
A: To remove gel polish, you’ll typically soak cotton balls in acetone-based nail polish remover, place them on your nails, wrap them in foil, and let them sit for 10-15 minutes. Then, gently push off the softened gel with a cuticle pusher.
Embarking on the world of home gel nails using a UV lamp is a rewarding experience. By following these steps and recommendations, you’ll be well on your way to enjoying beautiful, long-lasting manicures right from the comfort of your home. Happy polishing!